Page 14
Conveyor Operation Summary
Operation
◼
Place the Conveyor on top of the light box.
◼
Avoid bright ambient light and sunlight.
◼
Adjust the belt tension
– see Belt Tension Adjustment.
◼
Slide guide rods into position.
◼
Run WinDIAS software, and optimise camera, lens and threshold.
◼
Click on the
Calibrate
tool and calibrate with ruler.
◼
Toggle
Conveyor
on in the
Area
Control Window.
SLACKEN THE BELTS AT FINISH
Belt Speed Selection
◼
Choose the fastest speed that does not blur the image.
◼
Set the camera shutter to around 1-10 ms.
◼
The image should take about two seconds to cross the screen.
◼
Drop the idlers pulley in its slot to release the drive band tension.
◼
Remove the knurled nut from the motor shaft.
◼
Fit the desired pulley and lock it in place.
◼
Re-tension the drive band to eliminate slip. Do not over-tighten.
◼
Keep all liquids away from the drive band and pulleys.
Belt Removal
De-tension the belts.
Remove the line-guides.
Unlock and release the roller shafts.
Lift out each belt and its pair of rollers.
On re-assembly, locate the bottom roller inside the rubber drive band.
Belt Renewal and Cleaning
◼
Cut the new material to length - top belt: 80 cm, bottom belt:104 cm.
◼
Make a butt-joint using clear adhesive tape on both sides.
◼
Clean the belts with anti-static spray or a damp soft cloth.
◼
Avoid abrasive cleaners and solvents.
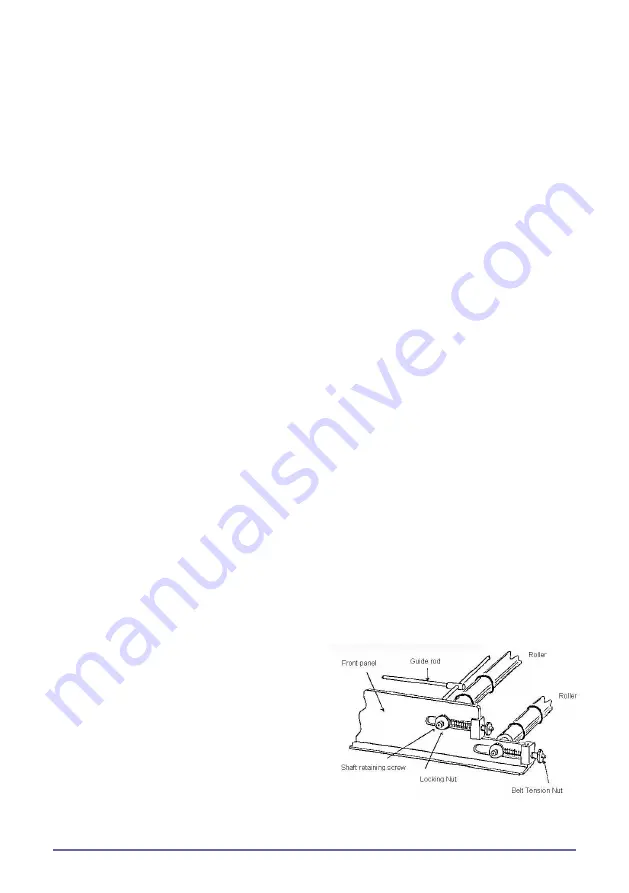
Belt Tension Adjustment
The upper and lower conveyor belts are
tensioned with four belt-tensioning nuts.
Initially the belt tension should be minimal.
Ensure that the tension is even and that the
belts are centred.
Inspect the belts for ripples - this indicates
uneven or excessive tension.
SLACKEN THE BELTS AT FINISH


