background image

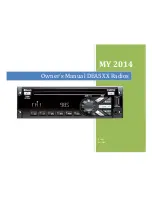
Owner´s Manual DEA5XX Radios 


14 | 

P a g e


Note  1:  This  function  will  only  be  shown  if  the 
cell phone supports this feature. 
Note  2:  The  contacts  shown  on  the  radio 
display will  depend on the  information received 
by the radio from the phone device used. 
Note  3:  Function  may  differ  depending  on  the 
phone. 
Note 4: Some cell phones may require enabling 
this feature through their own applications. 
Please  consult  your  cell  phone  user  guide 
regarding how to enable it. 
Note  5:  Some  phones  will  make  the  radio 
display  BT  AUDIO  PAUSE  while  audio  is 
available. This is normal on phones that do not 
have  full  compatibility  with  this  radio  Bluetooth 
remote control commands. 
Note 6: Some devices will disconnect Bluetooth 
when a transfer is performed. 

Radio System Settings 

The  radio  contains  two  menus  for  settings 
adjustment: 

  Audio Control Menu. 
  User Menu  

These  menus  are  defined  in  the  following 
sections. 

Audio Control Menu 

The  Audio  Control  Menu  is  shown  when  the 
Volume  knob  is  pressed  for  less  than  2 
seconds. 

In  this  menu  the  user  can  adjust  the  bass, 
middle,  treble,  fade,  balance  and  auto  EQ. 
Furthermore,  modify  the  Clock  and  Alarm 
Settings. 

Once  in  the  Audio  Control  menu,  rotate  the 
knob until the desired option is displayed, press 
the volume knob to select. 

BASS  

The display will show BASS and its current level 
from  -6  to  +6.  Rotate  the  knob  clockwise  to 
increase  the  Bass  and  counterclockwise  to 
decrease it.  

MIDDLE 

The  display  will  show  MIDDLE  and  its  current 
level from -6 to +6. Rotate the knob clockwise to 
increase  the  Middle  and  counterclockwise  to 
decrease it.  

TREBLE 

The  display  will  show  TREBLE  and  its  current 
level from -6 to +6. Rotate the knob clockwise to 
increase  the  Treble  and  counterclockwise  to 
decrease it. 

FADE 

The display will show FADE and its current level 
from  -6  to  +6.  Rotate  the  knob  clockwise  to 
move  the  sound  to  the  front  speakers  and 
counterclockwise to move the sound to the rear 
speakers.  Fade  is  not  available  in  2-speaker 
mode. 

BALANCE 

The display will show BALANCE and its current 
level  from  L15  to  R15.  Rotate  the  knob 
clockwise  to  move  the  sound  to  the  right 
speakers and counterclockwise to move it to the 
left speakers.  

AUTO EQ 

The  display  will  show  the  current  selected 
option.  Rotate  the  knob  clockwise  and 

counterclockwise  to  cycle  through  auto  EQ 
options from 1 to 7. 
 
Options are: 
1. Pop 
2. Rock 
3. Country 
4. News 
5. Jazz 
6. Classical 
7. Manual 
 
To  select  the  desired  option,  press  the  knob 
again


CLOCK 

To  adjust  the  time  in  the  radio,  press  the  knob 
button to show the Audio Control Menu. Rotate 
the knob until the Clock is shown on the display 
and press the knob to enter the Clock Menu. 

Once in the Clock Menu you can select 12-Hour 
or  24-Hour  format  by  rotating  the  knob  and 
pressing it to confirm. 

Finally,  after  the  format  configuration  and 
confirmation,  adjust  the  time  settings  and 
confirm  the  changes  by  pressing  the  Knob 
button


ALARM 

To set the Alarm press, enter the Audio Control 
Menu,  select  Alarm  and  press  the  knob.  Once 
in  the  Alarm  Menu,  change  the  ALARM 
ON/OFF  by  rotating  the  knob  and  pressing  the 
knob  to  confirm  the  selection.  When  the  user 
selects  ALARM  ON,  the  Alarm  Icon  will  be  set 
to  ON  and  the  following  configuration  options 
will be shown: 
 

TIME:

 The alarm hour digits will begin to flash. 

The format will be the same as the current clock 

Summary of Contents for DEA5XX

Page 1: ...MY 2014 Delphi MY 2014 Owner s Manual DEA5XX Radios ...

Page 2: ...Storing Radio Station Presets 7 Tuning Radio Station Presets 7 SCAN 7 AUTOSCAN 7 WX 7 SXM If Equipped 7 SXM Display 7 SXM Categories 7 SXM Channel Selection 8 SXM Radio ID 8 SXM Messages 8 iPod 8 Playing from an iPod 9 iPod Menu 9 Playlists 9 Artists 9 Albums 9 Genres 9 Podcasts 9 Songs 9 Composers 9 Audio Books 9 PREV Previous 9 NEXT Next 9 FF FR Fast Forward Fast Reverse 9 RDM Random 10 RPT Repe...

Page 3: ... 14 TREBLE 14 FADE 14 BALANCE 14 AUTO EQ 14 CLOCK 14 ALARM 14 User Menu 15 Speakers SPEAKERS 15 Seek Sensitivity SEEK SEN 15 Tune Configuration TUNE CFG 15 Playback Configuration PLBK CFG 15 Dimming DIMMING 15 Category Enable Disable CAT E D 15 HUE Adjustment HUE ADJ 15 Audio Players 16 CD Player 16 To avoid damage to the CD player 16 Loading and Ejecting Discs 16 Playing an Audio CD 16 SCAN 16 Er...

Page 4: ... be heard 18 Rear Seat Audio RSA 19 The RSA shows no link 19 Trademarks and License Agreements19 Precautions 19 Product Cleaning 19 Moisture Condensation 19 Damage Disc 19 Bluetooth Distraction 19 Conformity assessment issues 19 FCC IC Regulatory Notice 19 Modification statement 19 Interference statement 19 Radiation Exposure Statement 20 FCC Class B digital device notice 20 CAN ICES 3 B NMB 3 B 2...

Page 5: ... Press and hold to turn radio OFF One Hour Timer With the ignition off pressing the SRC PWR button will turn on the receiver and activate the receiver s one hour timer The receiver will turn off after one hour or by pressing and hold the SRC PWR button VOLUME KNOB OK Press for less than 3 seconds to display Audio Control Menu Press for more than 3 seconds to Show the User Menu Rotate to Increase d...

Page 6: ... clock for a few seconds Radio Audio Source To access AM FM WX SXM if equipped iPod USB Rear Aux Front Aux CD or BT Audio do one of the following Press the SRC radio button to scroll through the options and select the desired one Press the SRC button and then scroll the source menu by knob rotation or NEXT PREV short presses and then select by short pressing the knob CD MP3 USB iPod Front AUX and ...

Page 7: ...mode is active To tune any of the 6 frequencies or to store new presets follow the steps defined in the Presets section To exit this mode and return to the original presets execute any of the following actions Press and hold the SCAN ASCAN button Press the SRC PWR button Turn off the radio Make an ignition cycle Disconnect the battery WX The WX band is for the Governmental weather radio services f...

Page 8: ...XM BUSY The audio system is acquiring and or processing audio and or text data No action is needed ART UNAVAIL There is not Artist Name related with the current song SONG UNAVAIL There is not Song Title related with the current song CHAN UNAVAIL There is no Channel Name related with the current channel CHECK ANTENNA SXM antenna or antenna cable is not connected to the radio or the antenna is short...

Page 9: ...t 3 Select an album 4 Select the song from the list to begin playback Albums 1 Press to view the albums on the iPod 2 Select an album name to view a list of all songs on the album or select All Songs to view all songs on the iPod 3 Select the song from the list to begin playback Genres 1 Press to view the genres on the iPod 2 Select a genre name to view a list of artists of that genre 3 Select an ...

Page 10: ...ating MP3 files otherwise the files might not play For MP3 Files Bit rates 32 40 48 56 64 80 96 112 124 160 192 224 256 320 kbps for MPEG 1 Audio Layer 3 Sampling frequencies 32 44 1 and 48 kHz for MPEG 1 Audio Layer 3 Maximum number of folders Eight folders with 255 files per folder Maximum of 1 000 files on a disc M3u and pls playlist versions supported Recorded on a CD R or CD RW with a maximum...

Page 11: ...anapacific com support Other devices may be connected and played but functionality cannot be guaranteed You can connect up to 10 devices to the radio the radio will connect to the first available paired device starting from the last paired connected device The Bluetooth Menu is available when the Phone button is pressed for more than 3 seconds To navigate through it rotate the knob The Bluetooth M...

Page 12: ...ONNECT PH 3 Press the knob to confirm the action The radio will show DISCONNECT PH for a short time Once the Phone is disconnected the radio will display DISCONNECTED and then the Bluetooth device name The Phone Icon will be inactive Deleting one or all Devices To delete from the radio one or all devices previously paired 1 Press the Phone button for more than 3 seconds The Bluetooth Menu will be ...

Page 13: ...of the following radio buttons ESC or PREV Ending a Call When a Hands Free call is in progress the radio will display the caller s number and the elapsed time To end a call press any of the following radio buttons Phone ESC or PREV Microphone Mute When a Hands Free call is in progress pressing Pause Play will mute the radio s microphone Press again to deactivate mute Call Transfer If a call is in ...

Page 14: ...se to decrease it TREBLE The display will show TREBLE and its current level from 6 to 6 Rotate the knob clockwise to increase the Treble and counterclockwise to decrease it FADE The display will show FADE and its current level from 6 to 6 Rotate the knob clockwise to move the sound to the front speakers and counterclockwise to move the sound to the rear speakers Fade is not available in 2 speaker ...

Page 15: ...4CH and press the Knob to select the desired option Seek Sensitivity SEEK SEN The display will show SEEK SENS and the current level from 2 to 2 Rotate the knob clockwise to increase the Sensitivity value and counterclockwise to decrease it Press the Knob to select the desired option This option is only available when radio is playing Tuner Mode Tune Configuration TUNE CFG The display will show TUN...

Page 16: ...formation displays when available Use the following controls to play the disc PREV Previous Press to seek to the beginning of the current or previous track If the track has been playing for less than ten seconds it seeks to the previous track If longer than ten seconds the current track starts from the beginning NEXT Next Press to seek to the next track Fast Reverse Fast Reverse FR FR To fast forw...

Page 17: ...phabetical order In this mode the folders are shown first and at the end the tracks of that folder Playlist Mode Press the Volume Knob to view the playlists stored on the disc Select a playlist to start playing the first track in the current selected playlist There might be a delay before the list displays Special Considerations Root Directory The root directory is treated as a folder All files co...

Page 18: ... of the following actions 1 Remove the device after that pair and connect the device Refer to DELETE ONE OR DELETE ALL DEVICES and to Pairing a Bluetooth Device and Connecting a Device sections 2 Make sure the device is turned on 3 Make sure the Bluetooth adapter on your radio is enabled Refer to Bluetooth Enabling Disabling section 4 The device might be out of range Try moving it closer The devic...

Page 19: ...ng due to the water condensation If this happens please remove the disc from the player and wait about an hour for the moisture to evaporate Damage Disc Don t attempt the following To play a cracked warped or damaged disc Playing a bad disc could severely damage the playback mechanism To grip or pull out the disc while it is being pulled back into the player by the automatic reloading mechanism To...

Page 20: ...he equipment off and on the user is encouraged to try to correct the interference by one or more of the following measures Reorient or relocate the receiving antenna Increase the separation between the equipment and receiver Connect the equipment into an outlet on a circuit different from that to which the receiver is connected Consult the dealer or an experienced radio TV technician for help CAN ...

Page 21: ...lectronics Safety oświadcza że DEA500jest zgodny z zasadniczymi wymogami oraz pozostałymi stosownymi postanowieniami Dyrektywy 1999 5 EC Portu gues e Delphi Electronics Safety declara que este DEA500 está conforme com os requisitos essenciais e outras disposições da Directiva 1999 5 CE Slov ak Delphi Electronics Safety týmto vyhlasuje že DEA500spĺňa základné požiadavky a všetky príslušné ustanoven...

Reviews: