background image

FILLING THE WATER TANK:

5.

Open the hinged lid of the water tank, located on top of the coffee maker.

6.

Fill the tank with the desired amount of cold water.  The water level must be

between the top and bottom cup marks.  

NOTE:

 Do not fill above the MAX level.

7.

Always use cold water.

NOTE: 

The amount of brewed coffee after the brewing process is complete will

always be slightly less than the amount of water placed in the coffee maker’s water

tank, since some water is absorbed by the coffee grounds and filter.  Add a little

extra water at the beginning so that you have the exact number of cups desired.

PREPARING THE  COFFEE:

8.

Open the filter holder door by pressing the “OPEN” button on the top of the

machine.  Swing the filter holder door to the left.  Be sure the filter basket and

filter are properly positioned inside the filter holder.  The permanent gold-tone

filter (included) may be used instead of or in addition to a paper filter (not

included).  If using paper filters, insert a #4 cone-shaped filter into the filter

basket before filling with coffee.

9.

Place the desired amount of ground coffee in the filter.  According to coffee

industry standards, use one standard coffee measure (2 level tablespoons) of

grounds for each cup/mug of water.  After using your coffee maker several

times, the amount of coffee may be adjusted to suit your particular taste by

decreasing or increasing the amount of coffee used.  

NOTE: 

Be sure to use

coffee grounds prepared specifically for use with automatic drip coffee makers.


PREPARING COFFEE MAKER FOR BREWING COFFEE:

1.

Place the coffee maker on a flat, level surface away from any edge.

2.

Plug the unit into a 120V / 60Hz only outlet.

3.

The lid of the carafe must be fitted properly during the brewing process.  And

the carafe must be set on the non-stick plate.

4.

WARNING:


The lid of the coffee maker and the filter basket door must be

completely closed during operation.

  If the filter basket door is not

completely closed, the Pause ‘N Serve feature will not function properly.  It

could cause hot water or hot coffee to overflow.

OPERATING YOUR COFFEE MAKER

-12-

Summary of Contents for DC87T Series

Page 1: ... istruzioni Macchine da caffè Register this product on line and receive a free trial issue of Cook s Illustrated Visit www prodregister com delonghi U S and Canada Enregistrez ce produit en ligne et recevez un numéro gratuit de Cook s Illustrated Visitez www prodregister com delonghi E U et Canada Registre este producto en línea y reciba un ejemplar gratis de Cook s Illustrated Visite www prodregi...

Page 2: ...d in every product every feature and every design And we are dedicated to creating products that enhance and benefit the lives of our consumers We hope that you ll enjoy your De Longhi appliance for years to come Now that you ve discovered us we think you ll agree that each and every De Longhi appliance is truly a Living Innovation Get to know us better visit us at www delonghi com for our full li...

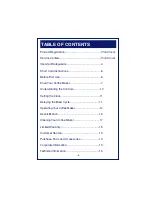
Page 3: ...6 Before First Use 6 Know Your Coffee Maker 7 Understanding the Controls 10 Setting the Clock 11 Delaying the Brew Cycle 11 Operating Your Coffee Maker 12 Decalcification 16 CleaningYour Coffee Maker 17 Limited Warranty 18 Customer Service 19 Purchase Parts and Accessories 19 Corporate Information 19 Technical Information 15 3 ...

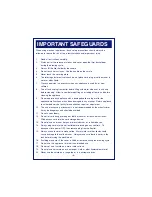
Page 4: ...ed by the manufacturer It may be dangerous and should be avoided 11 Do not use outdoors 12 Do not let cord hang over edge of table or counter or touch hot surfaces Wind excess cord into the cord storage device 13 Do not place on or near hot gas or electric burner or in heated oven 14 Always plug cord into the wall outlet before turning on any controls To disconnect turn power OFF then remove plug ...

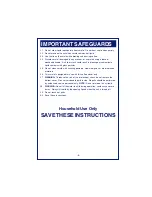
Page 5: ...uring powders steel wool pads or other abrasive materials 26 This carafe is designed for use with this coffee maker only 27 WARNING To reduce the risk of fire or electrical shock do not remove the bottom cover No user serviceable parts inside Repairs should be performed by authorized service personnel only NOTE Do not immerse in any liquid 28 WARNING Do not lift the water tank lid during operation...

Page 6: ...coffee IMPORTANT Use cold water only The automatic drip system works best with cold water 6 A short power cord is provided to reduce the risk resulting from entanglement or tripping over a longer cord Longer detachable power supply cords are available and may be used if care is exercised in their use If a longer detachable power cord or extension cord is used 1 the marked electrical rating of the ...

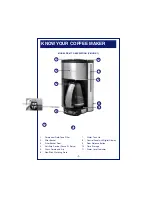
Page 7: ... Drip Device Pause N Serve 5 Glass Carafe and Lid 6 Non Stick Warming Plate 7 Water Tank Lid 8 Control Panel with Digital Display 9 Door Release Button 10 Cord Storage 11 Water Level Indicator 7 KNOW YOUR COFFEE MAKER MODEL DC87T DESCRIPTION FIGURE 1 2 1 7 9 8 3 6 10 11 5 4 ...

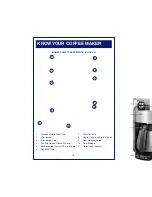
Page 8: ... Device Pause N Serve 5 Double Walled Thermal Carafe and Lid 6 Non Stick Plate 7 Water Tank Lid 8 Control Panel with Digital Display 9 Door Release Button 10 Cord Storage 11 Water Level Indicator KNOW YOUR COFFEE MAKER 8 3 MODEL DC89TTC DESCRIPTION FIGURE 2 2 1 7 8 9 11 4 10 5 6 ...

Page 9: ...y when coffee maker is not in use 8 PAUSE N SERVE Allows you to interrupt the brewing cycle and pour a cup of coffee before the entire carafe is finished brewing To restart the brewing process return the carafe to the plate and coffee will automatically begin flowing through filter basket Make sure carafe is placed all the way on the plate CAUTION Do not remove carafe for longer than 30 seconds or...

Page 10: ...his button controls three settings Press the button once for AUTO setting The light illuminates GREEN and will show AUTO in the upper left hand corner of the digital display Press the button twice for ON The light illuminates RED Press the button three times to the shut the unit OFF The light goes off The digital display will return back to the clock setting unless it is unplugged 4 HOUR MIN BUTTO...

Page 11: ...Clock section of this manual for details 2 Press the PROG button until the digital display shows BREW in the upper right hand corner This indicates that you are setting the delayed brew time 3 Press the HOUR MIN button until the desired brew HOUR is reached To set the minutes press the PROG button again and then press the HOUR MIN button until the desired brew MINUTES are reached 4 NOTE The AM PM ...

Page 12: ...uded If using paper filters insert a 4 cone shaped filter into the filter basket before filling with coffee 9 Place the desired amount of ground coffee in the filter According to coffee industry standards use one standard coffee measure 2 level tablespoons of grounds for each cup mug of water After using your coffee maker several times the amount of coffee may be adjusted to suit your particular t...

Page 13: ...the ON TIMER indicator light will illuminate RED 13 In a few minutes the coffee maker will complete the brewing cycle NOTE To terminate the brewing process at any time press the TIMER ON OFF button once and the ON TIMER indicator will no longer be illuminated 14 NOTE If you would like a cup of coffee before the full pot is brewed the Pause N Serve feature allows you to interrupt the brewing proces...

Page 14: ...the carafe from the non stick warming plate Once the desired amount of coffee has been poured return the carafe to the non stick warming plate DC89TTC Series Figure 5 Press the POUR button on the top of the carafe s handle and tilt the carafe to pour into a cup or mug 18 Push the TIMER ON OFF button to turn the unit OFF when the carafe is empty or when the coffee maker is not in use After brewing ...

Page 15: ... coffee grounds in a cool dry place Once coffee has been opened keep it tightly sealed in refrigerator to maintain freshness 5 For optimum coffee buy whole beans and grind them just before brewing 6 Do not re use coffee grounds since this will lessen coffee flavor 7 Reheating coffee is not recommended Coffee is at its peak flavor immediately after brewing 8 Small oil droplets on the surface of bre...

Page 16: ...er in the filter basket When the vinegar solution has finished brewing empty the carafe and rinse it out with cold water 4 Refill the water reservoir with cold water only and run another brew cycle to remove any remaining vinegar solution Repeat if necessary Calcium deposits may build up in the coffee maker as a result of minerals commonly found in drinking water The build up is normal and may res...

Page 17: ...ay be washed with warm soapy water Rinse and dry thoroughly Alternatively the carafe lid and filter basket may also be placed in the top rack of the dishwasher Do not place any other parts of the coffee maker in the dishwasher 5 To clean the permanent gold tone filter empty the grounds and rinse thor oughly 6 Do not clean the inside of the water tank with a cloth as the cloth may have a lint resid...

Page 18: ...w the exclusion or limitation of incidental or consequential damage so the above limitation may not apply to you How do you get service If repairs become necessary see contact information below U S Residents Please contact our toll free hotline at 1 800 322 3848 or log onto our website at www delonghi com For all accessories spare parts or replace ment parts please contact our parts division at 1 ...

Page 19: ...fill out the form provided IMPORTANT INFORMATION PURCHASE PARTS AND ACCESSORIES CORPORATE INFORMATION TECHNICAL INFORMATION CUSTOMER SERVICE 19 De Longhi America Inc Park 80 West Plaza One Saddle Brook NJ 07663 1 800 322 3848 De Longhi Canada Inc 6150 McLaughlin Court Mississauga Ontario L5R 4E1 Canada 1 888 335 6644 Centro Nacional de Servicio Fiducia Italiana S A de C V Hortencia 129 Col Florida...

Reviews: