background image

• 

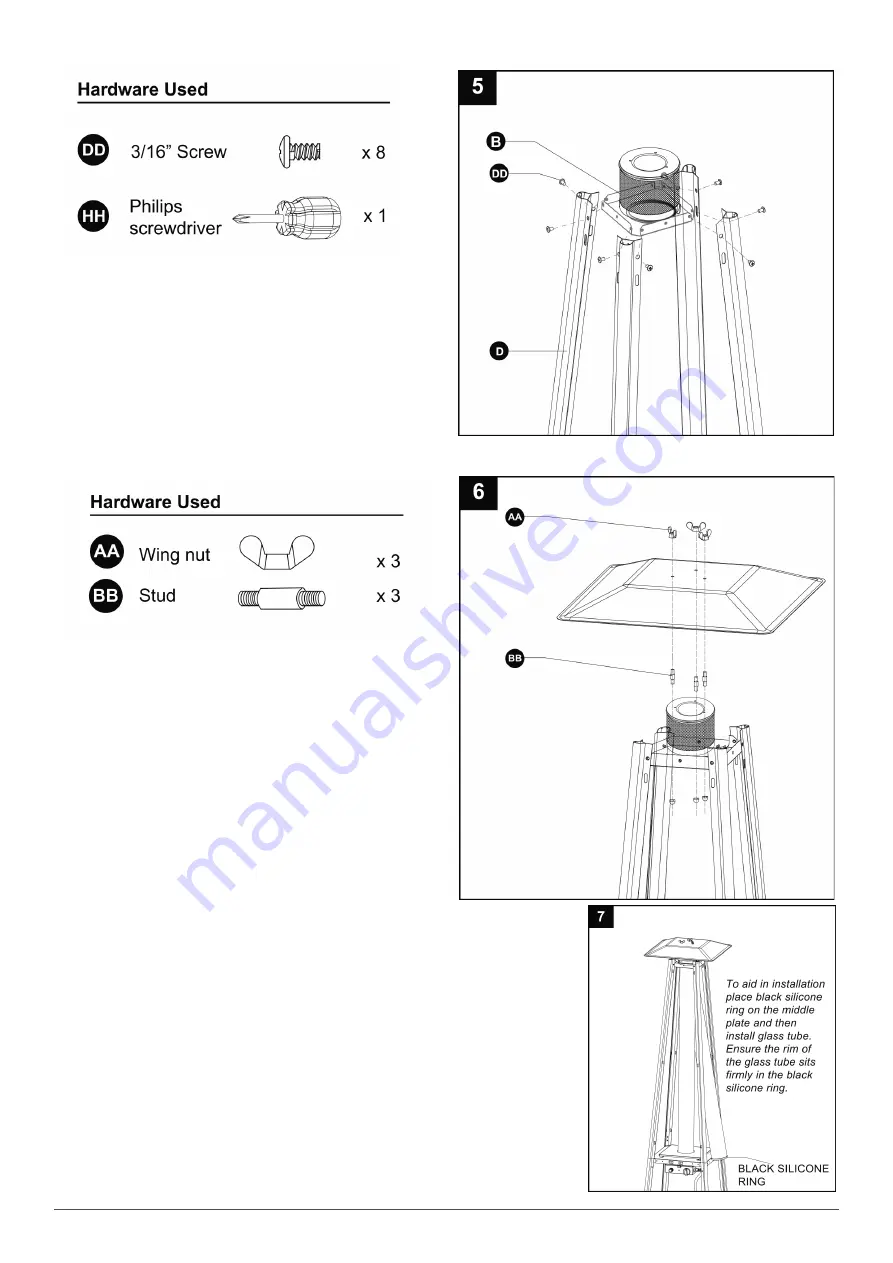
5. Assemble the top plate assy (B) to the upper support (D).Secure the top plate assy(B) to the upper support(D) using 8pcs screw 3/16” (

DD

)

• 

6. Assemble the reflector (A) onto the top plate assy (B). Screw the 3pcs stud (

BB

)  on  the  top plate assy (B), then put the reflector(A) onto the 

stud(

BB

), secure them with 3pcs wing nut (

AA

).

• 

7. Carefully install the glass tube (C) by lifting up and inserting through the center hole in the top 


plate (B). Ensure the black silicone ring (F) is attached to the lower edge of the glass tube (C) as 

illustrated. Slide the glass tube (C) through the hole of the lower plate cover and onto the middle 

plate (J). Check and ensure that the glass tube (C) is positioned properly and is completely 

covering the center hole of the middle plate(J).

Summary of Contents for DG98

Page 1: ...ed to a high standard this product will if used according to these instructions and properly maintained give you years of trouble free performance www dellonda co uk Dellonda Freestanding Gas Pyramid...

Page 2: ...the housing of the heater DO NOT store or use petrol or other flammable liquids or gases in the vicinity of the heater DO NOT store a gas cylinder that is not connected for use in the vicinity of thi...

Page 3: ...and ignition of clothing Children should be carefully supervised when they are in the vicinity of the heater DO NOT hang clothing or other flammable materials on the heater or place them near the hea...

Page 4: ...ighten the hose clip with a screwdriver 1 Assemble the wheel assembly M to the bottom plate N Fix the wheel assembly M to the bottom plate N using 4pcs bolt M8x12 EE and 4pcs flange nut M8 FF 2 Insert...

Page 5: ...Assy K to the Middle Plate J using 4pcs screw 3 16 DD Additional Note Unscrew the red ignition button and insert an AAA Battery 4 Assemble the upper support D Insert the 4pcs upper support D to the m...

Page 6: ...stud BB secure them with 3pcs wing nut AA 7 Carefully install the glass tube C by lifting up and inserting through the center hole in the top plate B Ensure the black silicone ring F is attached to th...

Page 7: ...of bottom plate N Leak Test Gas hose connections on the heater are leak tested at the factory prior to shipment A complete gas leak check must be performed at the installation site due to possible mis...

Page 8: ...e Only use regulators and hose approved for LPG at the above pressures The life expectancy of the regulator is estimated as 10 years It is recommended that the regulator is changed within 10 years of...

Reviews: