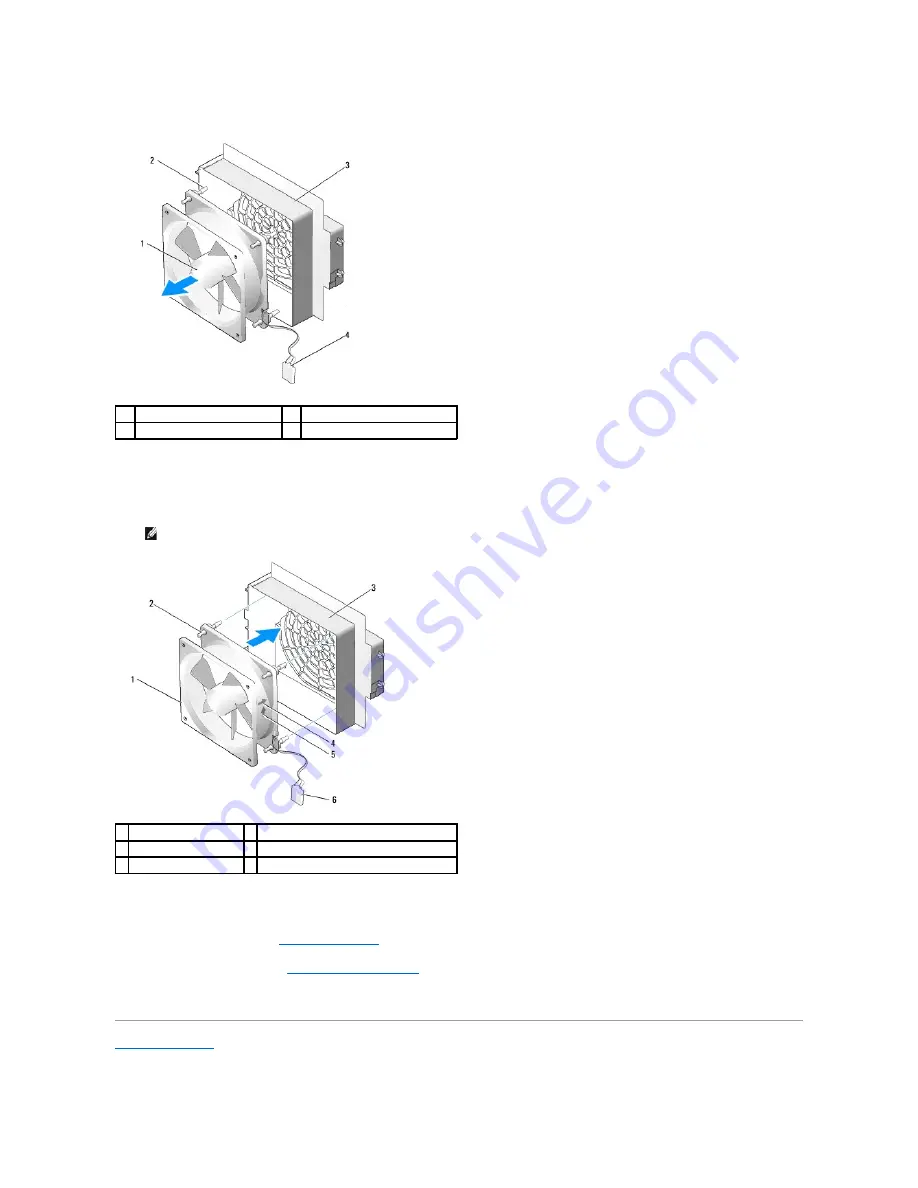
5.
In succession, carefully pull on each corner of the hard drive fan to detach the rubber grommets securing the hard drive fan to the hard drive fan cage.
6.
Set the hard drive fan aside in a secure location.
7.
To replace the hard drive fan, orient the hard drive fan cable downward. Align the rubber grommets in the fan with the openings in each corner of the
fan cage, then pull the grommets through until they snap into place.
8.
Insert the tab along the bottom of the hard drive fan cage into the corresponding slot on the chassis, then slide the hard drive fan cage behind the hard
drive bays until it snaps into place.
9.
Replace the card fan cage (see
Replacing the Card Fan
).
10.
Replace the computer cover (see
Replacing the Computer Cover
).
11.
Connect your computer and devices to electrical outlets, and then turn them on.
Back to Contents Page
1
hard-drive fan
2
rubber grommets (4)
3
hard-drive fan cage
4
hard-drive fan cable
NOTE:
Airflow direction and orientation are shown on the side of the fan.
1 hard-drive fan
2 rubber grommets (4)
3 hard-drive fan cage
4 hard-drive fan orientation direction arrow
5 air-flow direction arrow
6 hard-drive fan cable
Summary of Contents for XPS 625
Page 26: ......
Page 40: ...Back to Contents Page ...


