


Power Button Light Codes
The power LED located in the power button on the front of the computer illuminates and blinks or remains solid to indicate five different states:
l
No light
—
System is in the off state (S5, or mechanical (AC power not applied) OFF).
l
Solid Amber
—
System fault, but power supply is good
—
normal operating state (S0).
l
Blinking Amber
—
System fault error condition including Power Supply (only +5VSB working), Vreg failure, missing or bad CPU.
l
Blinking Green
—
System is in power saving states S1, S3 or S4. (Blink rate is 1Hz). No fault/error condition.
l
Solid Green
—
System is fully functional and is in S0 (ON) state.
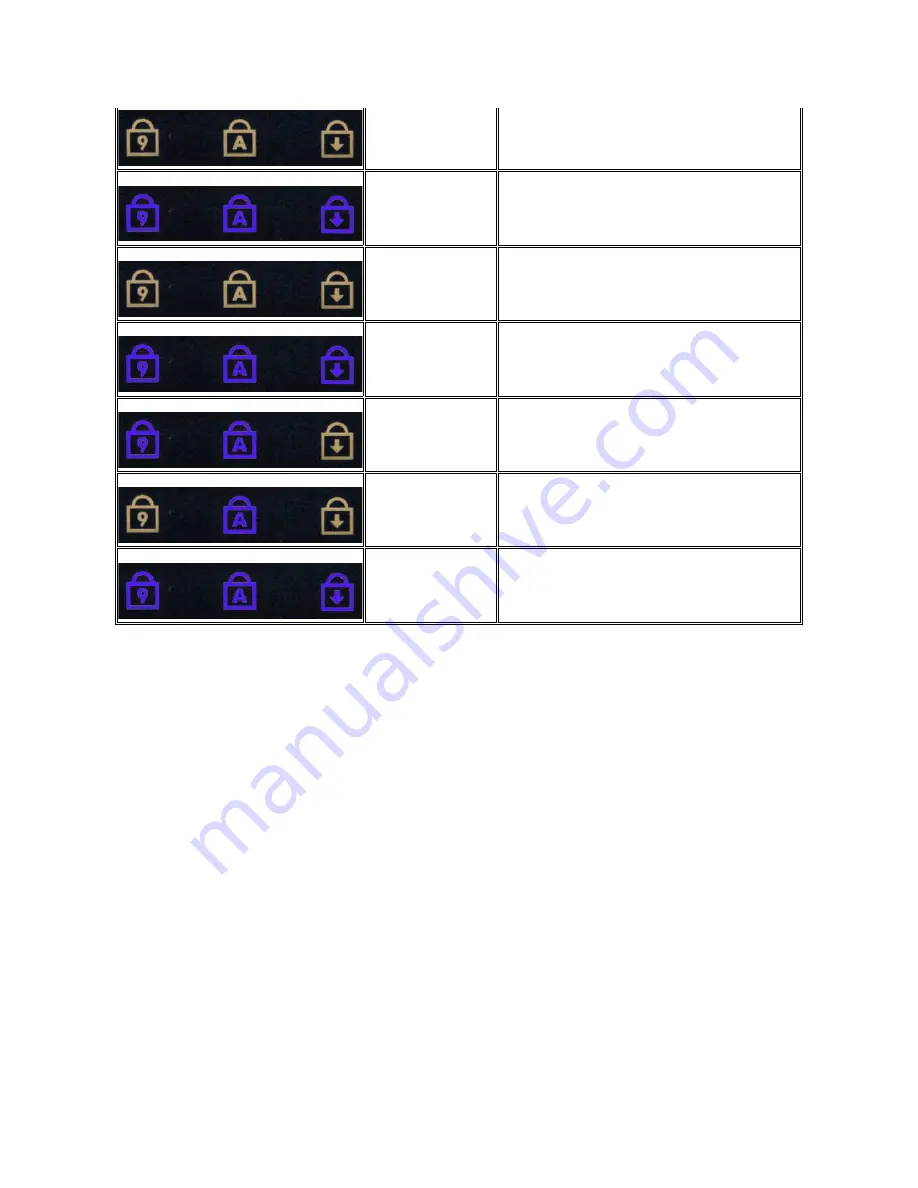
Memory compatibility error
2.
If two modules are installed remove one and test. Try the
other module in the same slot and test. Test the other slot
with both modules.
3.
Replace the memory.
4.
Replace the system board.
ON-FLASH-ON
Memory is detected but has
errors
1.
Reseat the memory.
2.
If two modules are installed remove one and test. Try the
other module in the same slot and test. Test the other slot
with both modules.
3.
Replace the memory
4.
Replace the system board.
OFF-FLASH-FLASH
Modem Error
1.
Reseat the modem.
2.
Replace the modem.
3.
Replace the system board.
FLASH-FLASH-FLASH
System board error
1.
Replace the system board.
FLASH-FLASH-OFF
Option ROM Error
1.
Reseat the device.
2.
Replace the device.
3.
Replace the system board.
OFF-ON-OFF
Storage device error
1.
Reseat the hard drive and optical drive.
2.
Test the computer with just the hard drive and just the optical
drive.
3.
Replace the device that is causing the failure.
4.
Replace the system board.
FLASH-FLASH-ON
Video card error
1.
Replace the system board.
Summary of Contents for Vostro 1320
Page 12: ...4 Slide the battery toward the back of the computer and remove ...
Page 14: ......
Page 16: ...5 Remove the bezel from the display assembly ...
Page 19: ......
Page 21: ......
Page 24: ......
Page 27: ......
Page 30: ...12 Lift and remove the display assembly from the computer ...
Page 32: ...6 Lift the fan and remove it from the computer ...
Page 35: ......
Page 40: ......
Page 43: ......
Page 45: ...5 Remove the memory module from the socket ...
Page 47: ...6 Remove the optical drive from the computer ...
Page 51: ...16 Remove the palm rest from the computer ...
Page 53: ...5 Remove the access panel ...
Page 56: ......
Page 58: ...15 Remove the speaker assembly from the computer ...
Page 62: ......
Page 64: ...6 Remove the WLAN card from the computer ...
Page 67: ...14 Remove the data cable from the computer 15 Remove the Bluetooth module from the computer ...
Page 68: ......


