


Replacing the I/O board
WARNING:
Before working inside your computer, read the safety information that shipped with your computer and follow the
steps in
Before working inside your computer
. After working inside your computer, follow the instructions in
. For more safety best practices, see the Regulatory Compliance home page at
Procedure
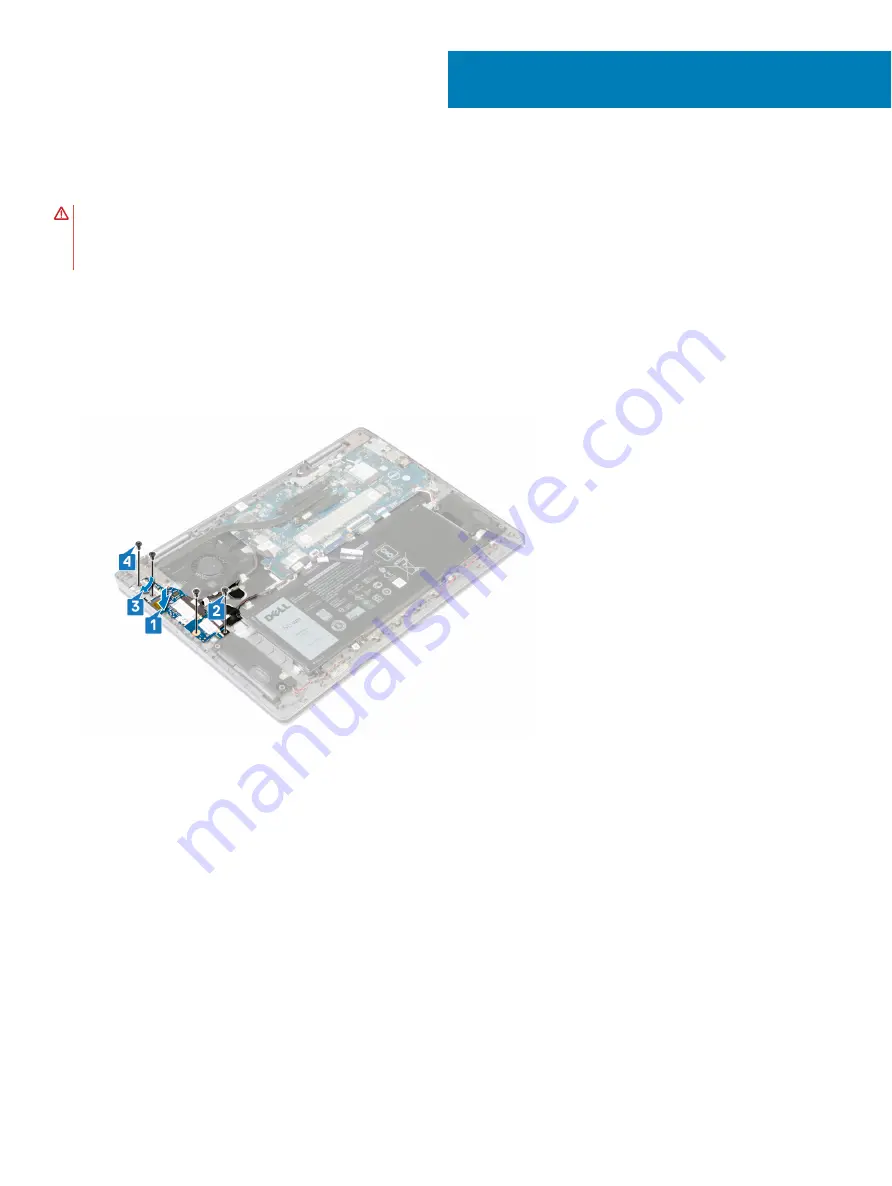
1
Align the screw holes on the I/O board with the screw holes on the palm-rest and keyboard assembly.
2
Replace the two screws (M2x4) that secure the I/O board to the palm-rest and keyboard assembly.
3
Align the screw holes on the I/O-board bracket with the screw holes on the I/O board.
4
Replace the two screws (M2x4) that secure the I/O-board bracket to the I/O-board.
5
Connect the cable to the connector on the I/O board.
6
Adhere the tape that secures the cable to the I/O board.
7
Route the cable through the routing guide on the palm-rest and keyboard assembly.
8
Adhere the tape that secures the I/O-board cable to the palm-rest and keyboard assembly.
9
Connect the cable to the connector on the I/O board.
10 Adhere the tape that secures the cable to the I/O board.
11 Route the cable through the routing guide on the palm-rest and keyboard assembly.
15
30
Replacing the I/O board
Summary of Contents for Inspiron Chromebook 7486
Page 16: ...16 Removing the base cover ...
Page 19: ...Replacing the base cover 19 ...
Page 29: ...Removing the I O board 29 ...
Page 31: ...Post requisites Replace the base cover Replacing the I O board 31 ...
Page 35: ...Removing the wireless card 35 ...
Page 87: ...2 Click Settings as highlighted from the screenshot below Troubleshooting 87 ...
Page 88: ...3 Click Show advanced settings to expand the menu 88 Troubleshooting ...
Page 89: ...4 Click the Powerwash button Troubleshooting 89 ...


