


support.dell.com
Options and Upgrades
2-9
% & $
$ ! $ &
$" $ " $ #
% $ # $
% $ %$ )
" $
& $
# & $ # $ $ #
$
1.
Save and close any open files, exit any open application programs, and shut down
the computer.
Wait for the computer’s power indicator to turn off before continuing this
procedure.
2.
Close the display, turn the computer over, and then remove the battery.
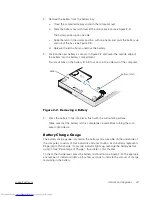
3.
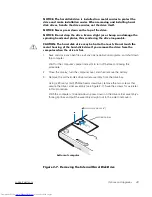
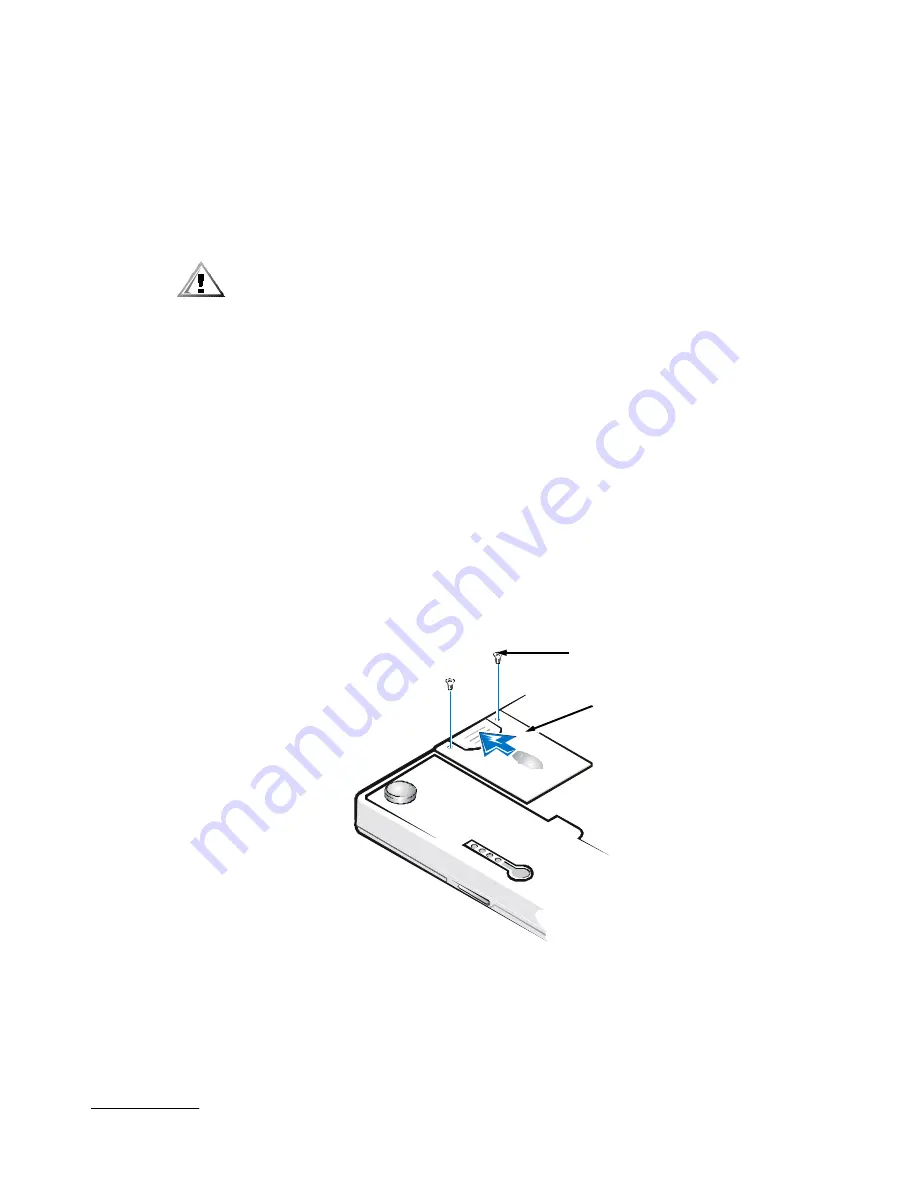
Remove the old hard-disk drive carrier assembly from the drive bay.
Using a #0 (very small) Phillips-head screwdriver, remove the two screws that
secure the drive carrier assembly (see Figure 2-7). Save the screws for use later
in this procedure.
With the computer still upside-down, press down on the drive carrier assembly's
three grip lines and pull the assembly straight out to the side to remove it.
0)1%2( /'/)
bottom of computer
screws (2)
drive carrier
Summary of Contents for Inspiron 2000
Page 1: ... ...
Page 8: ...x ...
Page 18: ...xx ...
Page 26: ...1 8 Dell Inspiron 2000 System Reference and Troubleshooting Guide ...
Page 38: ...2 12 Dell Inspiron 2000 System Reference and Troubleshooting Guide ...
Page 64: ...4 8 Dell Inspiron 2000 System Reference and Troubleshooting Guide ...
Page 84: ...5 20 Dell Inspiron 2000 System Reference and Troubleshooting Guide ...
Page 110: ...C 4 Dell Inspiron 2000 System Reference and Troubleshooting Guide ...
Page 128: ...E 8 Dell Inspiron 2000 System Reference and Troubleshooting Guide ...


