background image

Introduction 


Drive Description 

This is a read only drive and reads CD and DVD media (Refer to Specification section for 
specific media types). This drive has a slim form factor. 


Special Features Of The Drive


USB 2.0 Interface (480 Mbps).

Drawer load type, portable slim USB DVD-ROM Drive.

CD-R/RW, DVD-R/RW/RAM/+R/+RW/+R DL/-R DL, M-DISC (DVD+R SL) read

compatible.

CD Family and DVD-ROM read compatible.

Improved Buffer Under Run Error handling through the Preventive function.

Supports both 12 cm and 8 cm standard round-type disc.

PC USB powered, no AC adapter needed.

Eject button to eject the disc when the optical drive is powered by computer.

Emergency Eject hole to manually eject the disc in case of a drive failure or a


power outage.


Summary of Contents for DR3 16

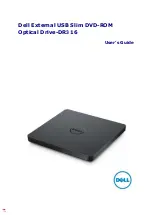
Page 1: ...Dell External USB Slim DVD ROM Optical Drive DR3 16 User s Guide ...

Page 2: ...NING indicates a potential for property damage personal injury or death Copyright 2021 Dell Inc All rights reserved This product is protected by U S and international copyright and intellectual property laws Dell and the Dell logo are trademarks of Dell Inc in the United States and or other jurisdictions All other marks and names mentioned herein may be trademarks of their respective compa nies 20...

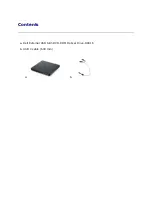
Page 3: ...Contents a Dell External USB Slim DVD ROM Optical Drive DR316 b USB Y cable 600 mm a b ...

Page 4: ...Index Introduction Using the Drive Connectivity Troubleshooting Specifications Regulatory Information in this document is subject to change without notice ...

Page 5: ...lim USB DVD ROM Drive CD R RW DVD R RW RAM R RW R DL R DL M DISC DVD R SL read compatible CD Family and DVD ROM read compatible Improved Buffer Under Run Error handling through the Preventive function Supports both 12 cm and 8 cm standard round type disc PC USB powered no AC adapter needed Eject button to eject the disc when the optical drive is powered by computer Emergency Eject hole to manually...

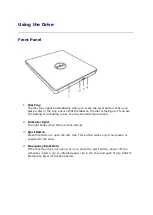
Page 6: ...isc the tray should remain closed 2 Indicator Light The light blinks when there is drive activity 3 Eject Button Press this button to open the disc tray This button works only when power is supplied to the drive 4 Emergency Eject Hole If the disc tray does not open when you press the eject button power off the computer insert a pin or unfolded paper clip in the hole and push firmly Refer to Emerge...

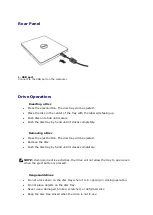
Page 7: ...etely Removing a Disc Press the eject button The disc tray will be ejected Remove the disc Push the disc tray by hand until it closes completely NOTE During some drive activities the drive will not allow the tray to open even when the eject button is pressed Usage Guidelines Do not press down on the disc tray when it is in opening or closing operation Do not place objects on the disc tray Never us...

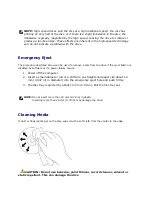
Page 8: ... drive if the eject button is disabled by software or if a power failure occurs 1 Power off the computer 2 Insert a small diameter rod or a stiff wire a straightened paper clip about 1 2 mm 0 047 in in diameter into the emergency eject hole and push firmly 3 The disc tray is ejected by about 10 mm 0 39 in Pull the disc tray out NOTE Do not insert more than 20 mm 0 79 in in depth Inserting more tha...

Page 9: ...pen the cover To reduce the risk of electric shock do not remove the cover There are no user serviceable parts inside Contact qualified service personnel for service While the drive is operating do not move or shake the drive since it can damage the disc Please pay attention to handling Electrostatic Sensitive Devices you may use anti static products such as wrist heel straps and mats to protect y...

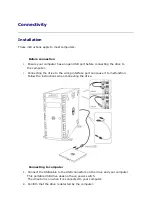
Page 10: ...ting the drive to the wrong interface port can cause it to malfunction Follow the instructions when connecting the drive Connecting to computer 1 Connect the USB cable to the USB connectors on the drive and your computer This portable USB drive does not have power switch The drive turns on when it is connected to your computer 2 Confirm that the drive is detected by the computer ...

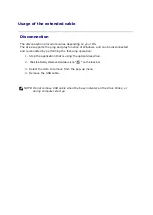
Page 11: ...an be disconnected and reconnected by performing the following operation 1 Stop the application that is using the optical disk drive 2 Click the Safely Remove Hardware icon on the task bar 3 Select the item to remove from the pop up menu 4 Remove the USB cable NOTE Do not remove USB cable when the busy indicator on the drive blinks or during computer start up ...

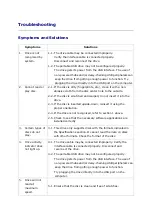
Page 12: ...side down reinsert it using the proper orientation 2 4 If the drive is not recognized refer to section 1 above 2 5 Check to see that the necessary software applications are installed correctly 3 Certain types of discs do not play 3 1 This drive only supports discs with the formats indicated in the Specifications section It cannot read the data on discs with other formats Check the format of the di...

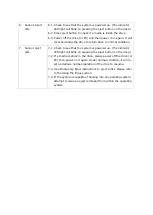
Page 13: ...eject disc 7 1 Check to see that the system is powered up The indicator LED light will blink on pressing the eject button on the drive 7 2 If a media is stuck in the drive please power off the drive or PC then power on it again Under normal condition it will re set and allows normal operation of the drive to resume 7 3 Use Emergency Eject instructions to eject a disc Please refer to the Using the ...

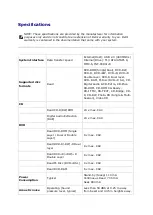
Page 14: ... DVD R Dual layer DVD RAM M Disc DVD R SL CD Digital Audio CD Extra CD Plus CD ROM CD ROM XA Ready CD I FMV CD TEXT CD Bridge CD R CD RW Photo CD Single Multi Session Video CD CD Read CD R RW ROM 24 x max CAV Digital Audio Extraction DAE 24 x max CAV DVD Read DVD ROM Single Layer Dual or Double Layer 8 x max CAV Read DVD R RW R Dual layer 8 x max CAV Read DVD R RW R Double Layer 8 x max CAV Read M...

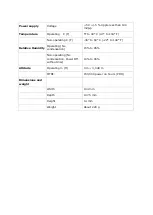
Page 15: ...on operating C F 30 to 60 C 22 to 140 F Relative Humidity Operating No condensation 15 to 85 Non operating No condensation Power Off without disc 10 to 90 Altitude Operating m ft 0 m 3 048 m MTBF 150 000 power on hours POH Dimensions and weight Width 144 mm Depth 137 5 mm Height 14 mm Weight About 220 g ...

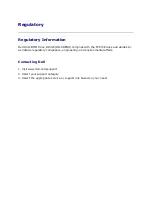
Page 16: ...8DENH complies with the FCC CE rules and abides by worldwide regulatory compliance engineering and environmental affairs Contacting Dell 1 Visit www dell com support 2 Select your support category 3 Select the appropriate service or support link based on your need ...

Reviews: