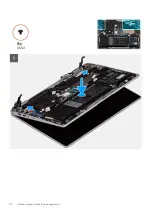


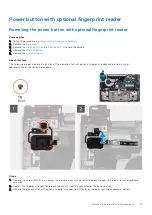
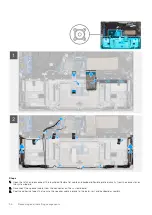
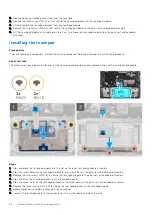


2. Peel the adhesive shielding cover from over the touchpad.
3. Remove the three screws (M2x2.5) that secure the touchpad bracket to the touchpad module.
4. Lift and remove the touchpad bracket from the touchpad module.
5. Remove the two screws (M2x1.8) that secure the touchpad module to the palm-rest and keyboard assembly.
6. Lift the touchpad module at an angle and slide it out to remove the touchpad module from the palm-rest and keyboard
assembly.
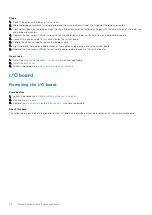
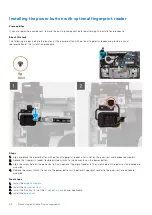
Installing the touchpad
Prerequisites
If you are replacing a component, remove the existing component before performing the installation procedure.
About this task
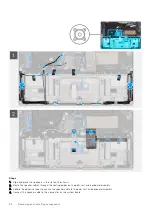
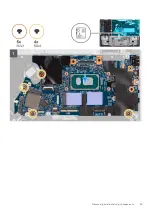
The following images indicate the location of the touchpad and provide a visual representation of the installation procedure.
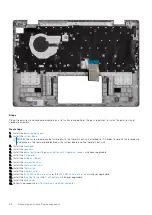
Steps
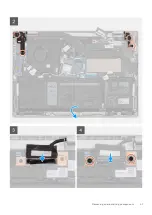
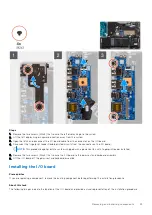
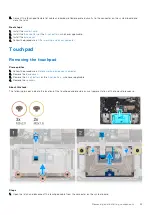
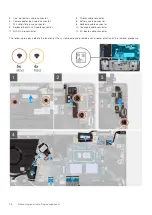
1. Align and place the touchpad module into the slot on the palm-rest and keyboard assembly.
2. Align the screw holes on the touchpad module to the screw holes on the palm-rest and keyboard assembly.
3. Replace the two screws (M2x1.8) to secure the touchpad module to the palm-rest and keyboard assembly.
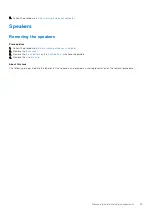
4. Align and place the touchpad bracket on the touchpad module.
5. Align the screw holes on the touchpad bracket to the screw holes on the palm-rest and keyboard assembly.
6. Replace the three screws (M2x2.5) to secure the touchpad bracket to the touchpad module.
7. Adhere the adhesive shielding cover over the touchpad.
8. Connect the touchpad cable to the connector on the system board and close the latch.
54
Removing and installing components
Summary of Contents for 3330
Page 12: ...12 Removing and installing components ...
Page 15: ...Removing and installing components 15 ...
Page 17: ...Removing and installing components 17 ...
Page 36: ...36 Removing and installing components ...
Page 37: ...Removing and installing components 37 ...
Page 40: ...40 Removing and installing components ...
Page 41: ...Removing and installing components 41 ...


