


www.defiant
-
tech.com
1
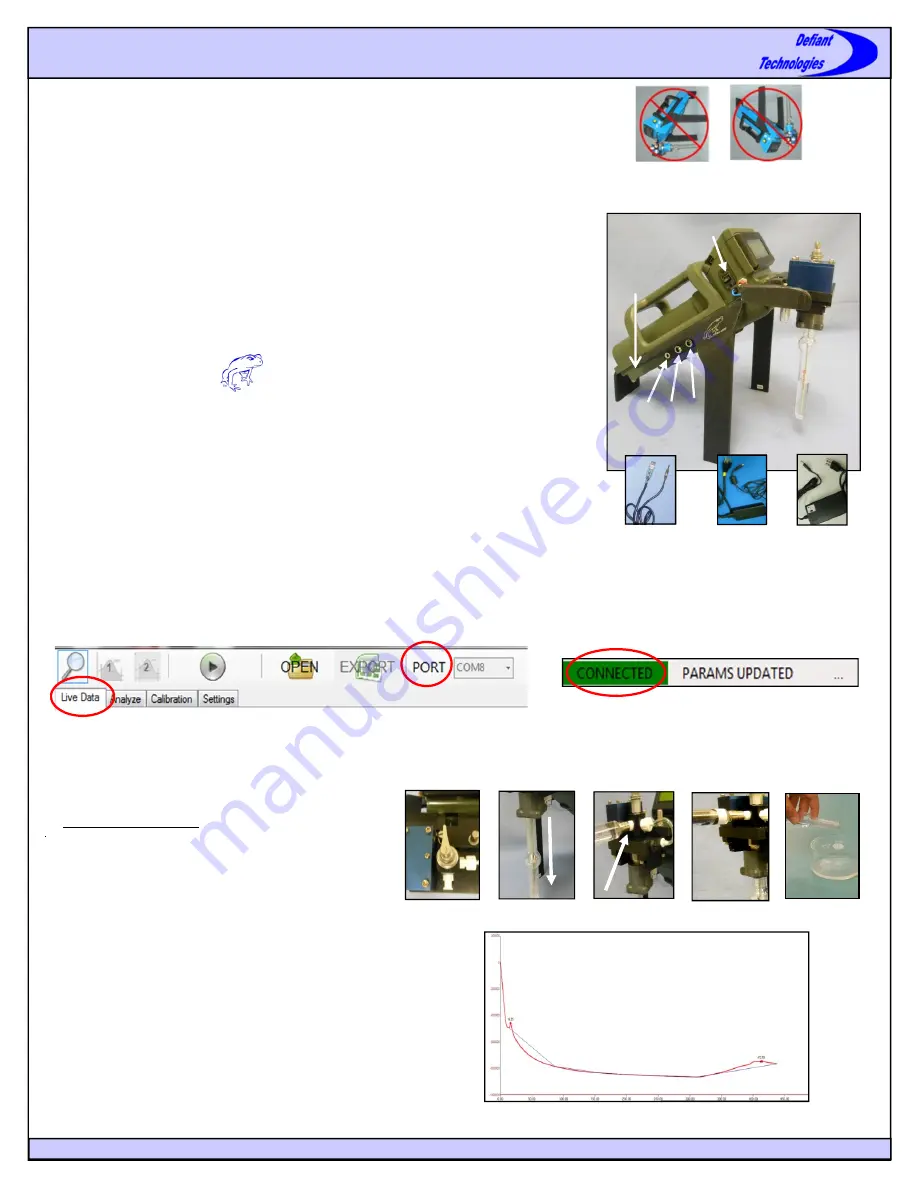
Precautions
DO NOT
invert the instrument with the sparge bottle attached.
DO NOT
transport or store the instrument with liquid in the sparge bottle.
DO NOT
handle or carry system when sample is being analyzed.
NOTE:
The battery is disconnected for shipping. To reconnect: remove the two thumb
-
screws on bottom near rear, slide off back cover, plug in battery, and replace back
cover.
Charging the Battery
1.
Plug the battery charger (supplied with the FROG) into battery charge port (S) and an
outlet source. The current switch can be on 0.9A or 1.8A.
2.
While the battery is charging, the light on the charger switch is red.
3.
When the battery is completely charged
,
the light on the charger switch is gre
en.
Connecting to Ellvin
Recommended Computer Specifications:
Pentium dual core or faster, Windows 7 or
more current, and 2 GB memory.
1. Install Ellvin onto laptop or PC. (Select setup on the Elvin software CD or USB
drive)
2.
Connect serial data cable (supplied) to serial data port (Q) and to USB port on
computer. The computer will search and find the driver for the cable in Ellvin.
3.
Connect power cable (supplied) to the instrument’s power port (R) 9V POWER, or
use battery power.
4. Turn the instrument power switch to the ON position (fully up). The instrument
display screen will be visible.
4.
Open Ellvin by double clicking on the Ellvin icon.
5.
Ellvin opens in the default Live Data Window.
6. Click on PORT and select the appropriate COM number to connect the instrument to
the computer.
NOTE: Refer to User’s Manual to adjust instrument settings or recalibrate the instrument , if necessary.
NOTE: If you cannot connect to the FROG, verify that you have the driver for the communication cable. If not, the driver is located on
the software disk (or USB drive) in a folder labeled “USBtoSerialDrivers”.
Preparing the Instrument
A.
Rinse the Instrument
1.
Place the load/analyze valve in the LOAD position.
2.
Attach sparge bottle in the DOWN position.
3.
Attach syringe with 5mL deionized water.
4.
Transfer the 5mL water into the sparge bottle.
5.
Remove and empty the sparge bottle.
6.
Repeat steps 3
-
5 for at least two rinses.
7. Create a clean baseline in Ellvin by running a blank sample.
Þ
Follow the instruction for “Loading a Sample “
and “Running a Sample” using 5mL deionized water. The
FROG must be connected to Ellvin to verify a clean baseline.
NOTE: It is best to have a clean baseline before attempting sample
analysis.
LOAD
1
2
3
4
5
ON
R
Q
S
Battery
Access
Power
Cable to R
Battery
Charger to S
Serial Data
Cable to Q
Clean Baseline in Ellvin
FROG
-
4000
TM
Quick Start Guide


