20
Use
Close the contact grill. Plug the appliance in.
Turn the thermostat knob (8) to the required
setting. The higher the setting, the higher the
temperature.
The indicator light (7) comes on to show that
the contact grill is on and is heating up.
Once the hotplates (2, 5) reach the preset
temperature, the indicator light (6) comes on.
Open the contact grill. Place the food on the
lower hotplate.
Do not attempt to grill large pieces of meat,
cuts containing bones or liquid foods.
Make sure that the food is equally thick so
that the upper hotplate comes into contact
with all the food.
Lower the upper hotplate down onto the
food. Due to the fl oating hinge (3) on the lid,
it can adjust to the thickness of the food.
The thermostat will then go on and off to
keep the contact grill at the set temperature.
Allow the food to grill for 3-5 minutes and
then check it to ensure it is not burning. The
food is grilled from the top and the bottom
at the same time.
Any excess meat juice or fat will run down
into the drip tray (9).
Once the food is ready, remove it from the
hotplates with a utensil made of wood or soft
plastic.
Do not use metal utensils, as they can
damage the non-stick coating on the
hotplates.
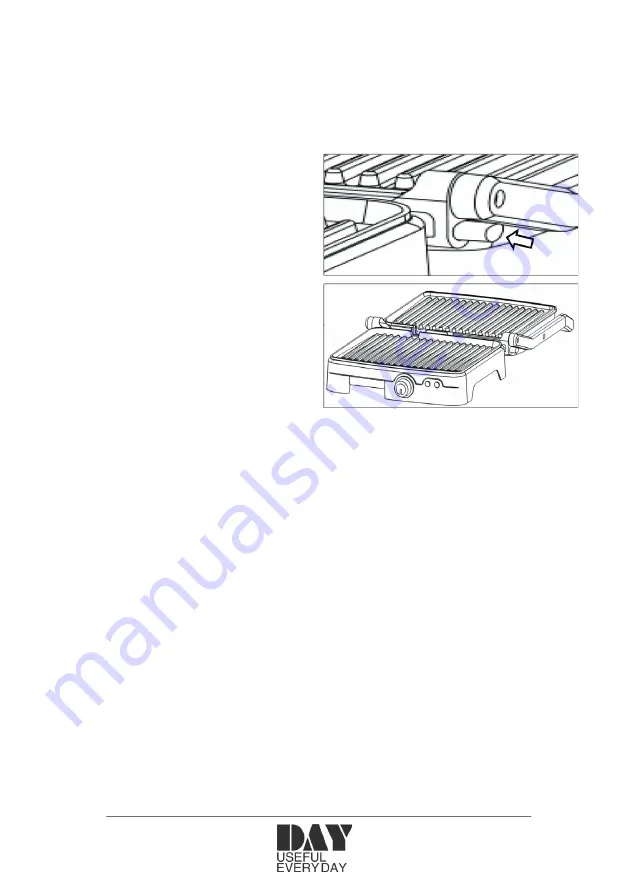
Use as a table grill
You can also use the contact grill as a table
grill.
Press the release button (4) and tilt the lid
(2) 180° so that the upper hotplate is facing
upwards.
Cleaning and maintenance
Unplug the contact grill and allow it to cool
before cleaning it.
Remove the drip tray, empty it and wash it
in warm water with a little detergent. It must
not be washed in the dishwasher. Dry the
drip tray thoroughly before replacing it.
Do not immerse the contact grill in water. All
external and internal surfaces can be cleaned
with a damp cloth.
Soften any food residues stuck to the
hotplates using a little cooking oil, and then
scrape them off using a utensil made of
wood or soft plastic.
Do not use sharp or abrasive objects when
cleaning the contact grill.


