background image

MF8i 270 PRINTER USER'S GUIDE

11

Using Power Options

Use the following options to power the printer:

AC — AC/DC Power Supply

DC — Cigarette Adapter

Batteries  —  NiMH

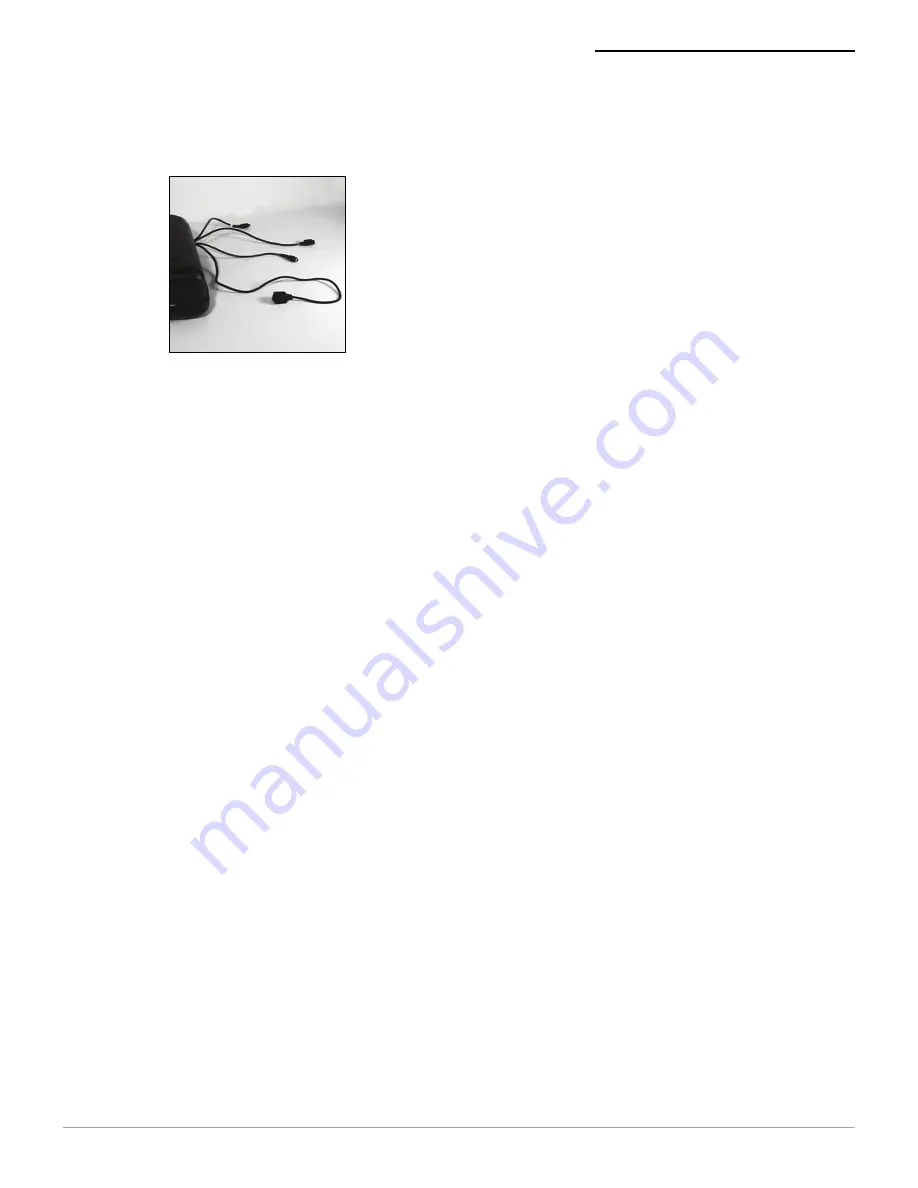
The red-tagged cable attached to the printer connects 

to the AC adapter cable. The white-tagged cable 

connects to the cigarette lighter adapter for use in 

vehicles. If neither the red nor the white cable is in use, 

the printer is running off the battery. 
The third cable (RJ11 telephone style) is the data cable 

(see Attaching Cables on page 12). The fourth cable, 

blue-tagged, is a third cradle connection used to 

connect to external cradle, either in a truck or a bag 

solution.

Figure 13

Summary of Contents for microFlash 8i 270

Page 1: ...MICROFLASH 8I 270 MICROFLASH 8I 270 110139 005 User Guide ...

Page 2: ......

Page 3: ...ry 3 Using the Ribbon 4 Ribbon Guidelines 4 Installing the Ribbon 4 Removing the Ribbon 4 Installing Paper 5 Paper Guidelines 6 Printing a Self Test 7 Setting Top of Form 7 Tearing the Paper 7 Using Buttons and Indicators 8 Control Panel 8 LED Indicators 8 Button Functions 9 Audio Indicators 10 Using Power Options 11 Attaching Cables 12 Configuring the Printer 12 Supplies 16 ...

Page 4: ...NTER USER S GUIDE 1 microFlash 8i 270 Printer Open View Closed View Battery well Battery cable Access cover Locking lever green knob Control panel Printer assembly Figure 1 Paper Exit Handle Control panel Figure 2 ...

Page 5: ...nd or Replacing Batteries 1 Open the printer s cover 2 Place the battery in the battery well Figure 3 3 Align and connect the cable connector to the battery Figure 4a Do not force the cable connector to fit to the battery the parts easily connect when properly aligned Figure 4b 4 Close the printer s cover 5 Charge the battery For more information see Charging the Battery on page 3 Figure 3 Figure ...

Page 6: ...ion if the battery is replaced by an incorrect type Dispose of used batteries according to the instructions Caution The operating temperature of this portable printer is 50 C However the operating temperature when used with Datamax O Neil power supply for charging the portable printer is limited to 35 C Please charge the printer in a suitable location that meets this temperature requirement Cautio...

Page 7: ...t a ribbon installed To install a ribbon perform the following 1 Open the printer s cover 2 Depress the locking lever green knob to open the print mechanism 3 Remove the ribbon from its packaging 4 Hold the ribbon by the flat handle 5 Install the ribbon on the printhead Figure 5 6 Turn the knob counter clockwise several times to fully seat the ribbon Removing the Ribbon 1 Grasp the flat handle 2 P...

Page 8: ...ip open the print mechanism and verify the center guide is centered 4 Lift the two tractor feed clips 5 Fold the stack of paper in half with the short sides together and with the top of the form coming out from the inside fold Figure 7 6 Place the paper into the paper cavity with the bottom edges under the paper lip in the bottom of the cavity Figure 8 Note Remove the orange label from the locking...

Page 9: ...el Figure 9 9 The left tractor feed is adjustable Lift the locking lever green knob to release the tractor feed 10 Verify that the paper is taut and the paper feeds correctly 11 Close the tractor feed clips the print mechanism and the printer s cover Figure 10 12 Set top of form For more information see Setting Top of Form on page 7 Paper Guidelines Form Parts Maximum Number of Sheets 1 200 2 90 3...

Page 10: ...t the edge of the case for easy tear up or tear down If necessary press Button 2 to back feed the paper 3 Turn the printer off by pressing buttons 1 and 2 simultaneously Figure 11 4 Press Button 1 to turn on the printer The top of form is automatically set Tearing the Paper 1 Set the paper to top of form For more information see Setting Top of Form on page 7 2 Grab one side of the paper at a leadi...

Page 11: ...cted Low temperature Connect battery Change environment Red flash fast High temperature Change environment Red to orange slow Low voltage Restart charge Red to orange fast High voltage Replace battery Orange flash slow Charge timeout Restart battery charge Orange flash fast Internal error Reset printer Green Charge completed None IrDA window Button 1 Power LED Charge LED Button 2 Figure 12 ...

Page 12: ...d indicates radio and printer are on None Orange flash fast If a radio card is installed indicates radio is on and printer is off None Function Description 1 line feed Press Button 1 once 5 line feeds Press and hold Button 1 Form feed Press and hold Button 1 then release Self test Press and hold Button 1 until printing starts Clear out of paper or head up Press Button 1 Back feed Press Button 2 Po...

Page 13: ...re None 2 short RF power is off when RF power button is pressed and was on None 3 mid length Low battery voltage Charge battery 4 short Charge is starting when external power is applied to printer None 5 double Out of paper Install paper 8 CRC firmware error Redownload firmware 10 Error writing to communication controller firmware Redownload firmware Infinite beeps toggle LEDs Comm controller fail...

Page 14: ...he AC adapter cable The white tagged cable connects to the cigarette lighter adapter for use in vehicles If neither the red nor the white cable is in use the printer is running off the battery The third cable RJ11 telephone style is the data cable see Attaching Cables on page 12 The fourth cable blue tagged is a third cradle connection used to connect to external cradle either in a truck or a bag ...

Page 15: ... the printer connects to your notebook and or computer or handheld HHC using an optional data cable or handheld cradle Configuring the Printer The printer has many configurable settings To configure or upgrade firmware download the Windows configuration programs at www datamax oneil com Figure 14 ...

Page 16: ...However there is no guarantee that interference will not occur in a particular installation If this equipment does cause harmful interference to radio or television reception which can be determined by turning the equipment off and on the user is encouraged to try to correct the interference by one or more of the following measures Reorient or relocate the receiving antenna Increase the separation...

Page 17: ...MF8i 270 PRINTER USER S GUIDE 14 ...

Page 18: ...a warranty claim if Datamax O Neil determines that damage to the printhead or printer mechanism was directly caused by the use of non certified or non approved supplies Datamax O Neil reserves the right to hold the user responsible for all labor and material charges required for the repair Copyright This manual and any examples contained herein are provided as is and are subject to change without ...

Page 19: ...lies certified by the Original Equipment Manufacturer OEM For OEM supplies please contact Datamax O Neil at 949 458 6400 For more information For more information about using the printer contact Datamax O Neil at 949 458 0500 or visit www datamax oneil com ...

Page 20: ...COPYRIGHT 2010 DATAMAX O NEIL ...

Reviews: