


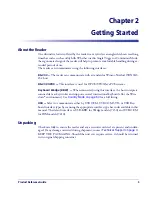


Getting Started
6
QuickScan
TM
Lite QW2100
Setting Up the Reader
Follow the steps provided in this section to connect and get your reader up and commu-
nicating with its host:
1.
2.
3.
(only if not using factory settings for that interface)
4.
(if modifications are needed from factory settings)
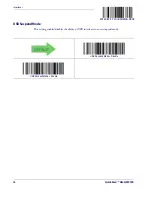
Install the Interface Cable
The reader kit you ordered to match your interface should provide a compatible cable for
your installation. If not, contact
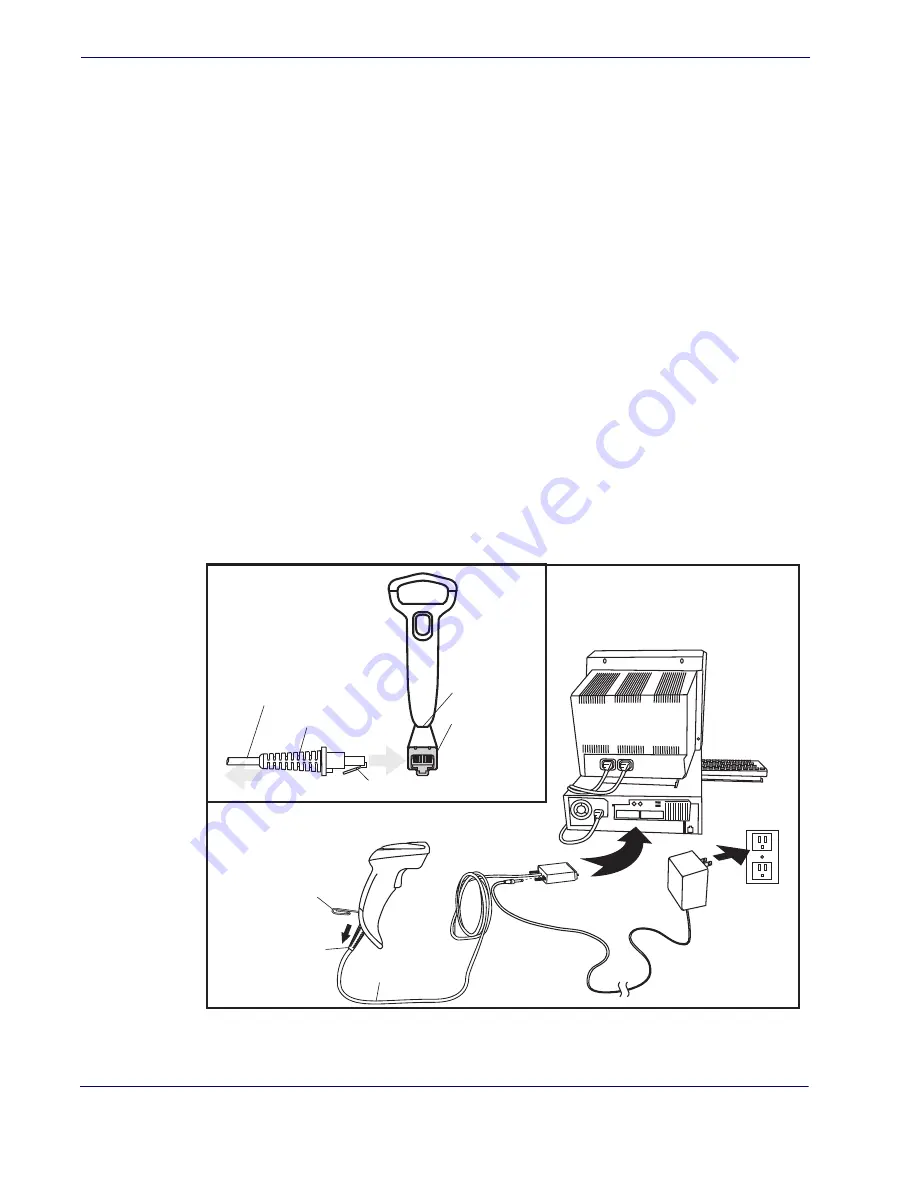
Seat the cable assembly into the reader, aligning both the connector, aligning the cable
clip with its opening as shown in the insert portion of
.
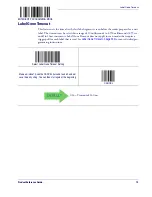
RS-232 Serial Connection —
Turn off power to the terminal/PC and connect the
reader to the terminal/PC serial port via the RS-232 cable as shown in
terminal will not support POT (Power Off the Terminal) to supply reader power, use the
approved power supply (AC Adapter). Plug the AC Adapter barrel connector into the
socket on the RS-232 cable connector and the AC Adapter plug into a standard power
outlet.
Figure 1. Connecting the Interface Cable/RS-232 Connection
Other connection types are described below and illustrated in
.
Cable Clip (Latch)
To Host
Cable
Connecting at
the Reader
Disconnecting at
the Reader
Cable Strain Relief
Bottom of Imager
Interface Cable Port
Insert a paperclip
into this hole to
release the
cable latch
Strain Relief
Cable
Summary of Contents for QuickScan Lite QW2100
Page 14: ...Introduction 4 QuickScanTM Lite QW2100 NOTES...
Page 52: ...RS 232 ONLY Interface 42 QuickScanTM Lite QW2100 NOTES...
Page 280: ...References 270 QuickScan TM Lite QW2100 NOTES...
Page 284: ...274 QuickScanTM Lite QW2100 NOTES...
Page 302: ...292 QuickScanTM Lite QW2100 NOTES...
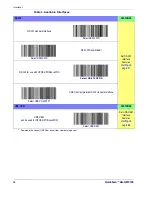
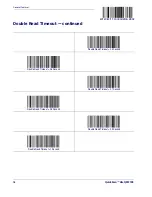
Page 304: ...294 QuickScanTM Lite QW2100 Sample Bar Codes continued Code 32 Codabar Code 93 Code 11...
Page 306: ...296 QuickScanTM Lite QW2100 NOTES...
Page 308: ...298 QuickScanTM Lite QW2100 6 7 8 9 A B C...
Page 309: ...Product Reference Guide 299 D E F...
Page 310: ...300 QuickScanTM Lite QW2100 NOTES...


