


Step 5
– Save and Apply Preset
To use directly from Lightroom, right click on the target image and select
“Edit In
SpyderCHECKR
”.
To use with Camera Raw, save the target image as an uncompressed .tiff file.
To use directly from Phocus, export the target image as a 16-Bit .tiff file then
choose
“SpyderCHECKR” as the export destination.
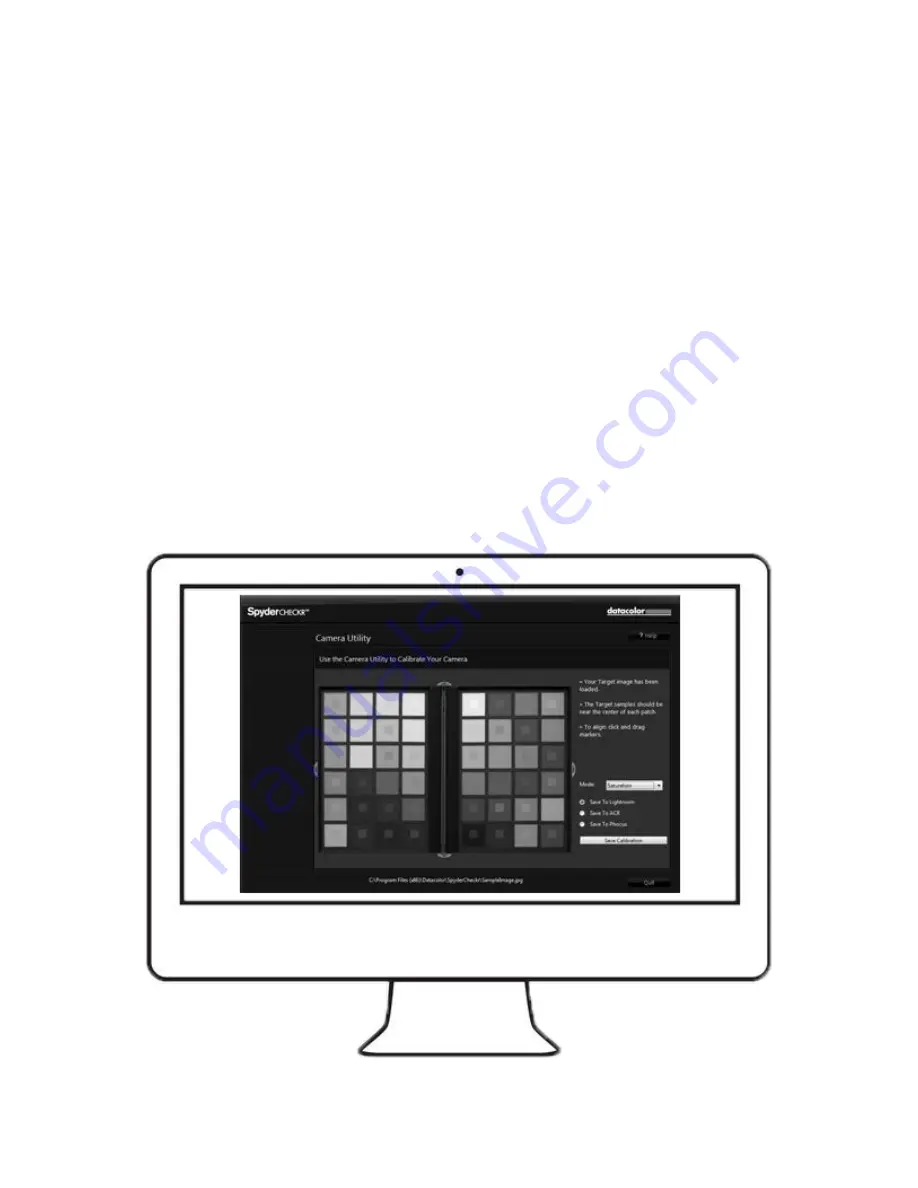
Launch the SpyderCHECKR software and open the target image. Adjust the
patch indicators as needed until the patch grid aligns as close to the center of
each patch of the SpyderCHECKR image as possible.
Move your cursor into the center area of the target image. Left click and
you can move the entire target grid.
Each side of the target grid can be adjusted by moving your cursor just
inside the blue half circle. When your cursor becomes two opposing
arrows, you will be able to left click and move that side of the target grid.


