SD160/SD260 Card Printers User’s Guide
29
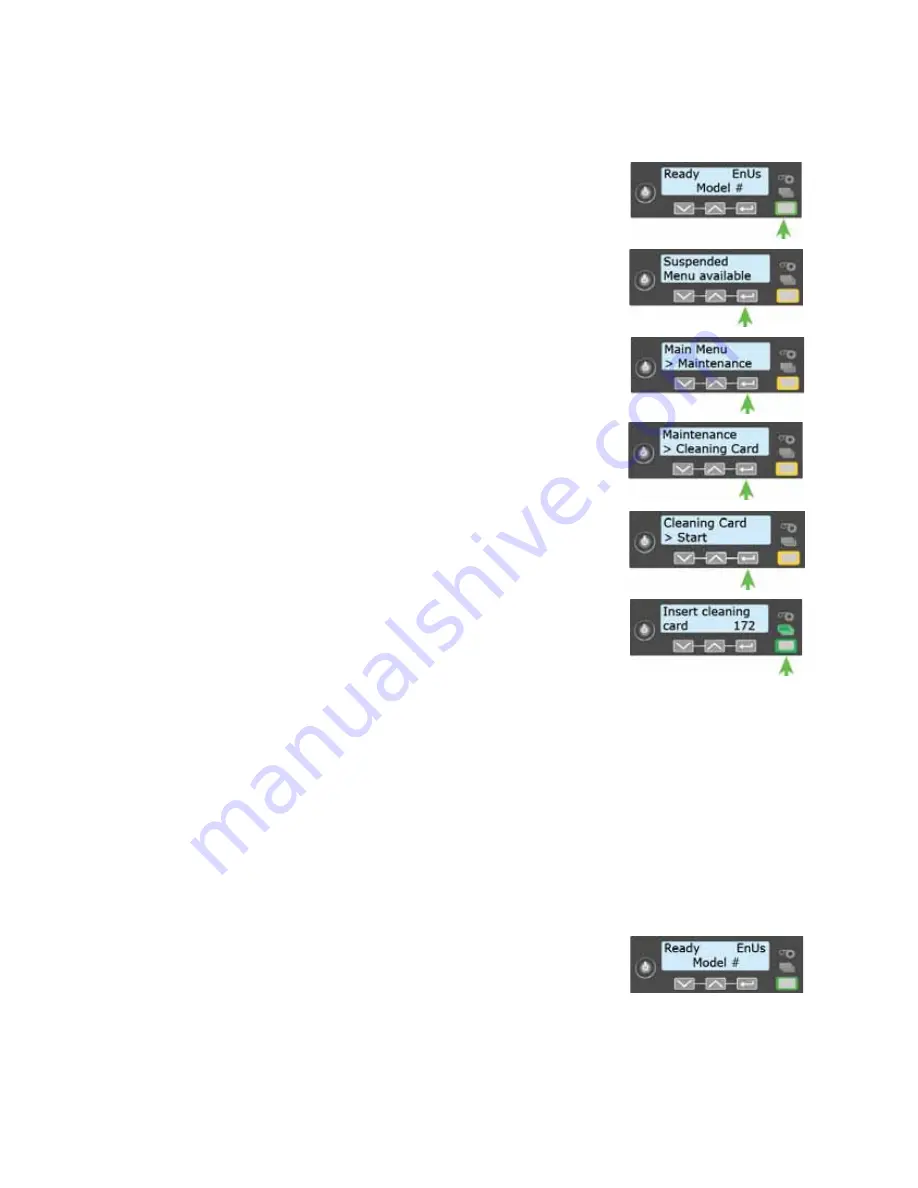
2.
Use
the
LCD
menu
system
to
start
the
cleaning
cycle.
a.
Begin
when
the
printer
displays
Ready
and
the
U
SER
button
shows
steady
green.
Press
the
U
SER
button.
Suspended
displays
on
line
1
of
the
LCD
panel.
b.
Press
E
NTER
to
enter
the
menu
system.
c.
Maintenance
displays
on
line
2
of
the
LCD
panel.
Press
E
NTER
to
enter
the
Maintenance
menu.
d.
Cleaning
Card
displays
on
line
2
of
the
LCD
panel.
Press
E
NTER
to
enter
the
Cleaning
Card
menu.
e.
Start
displays
on
line 2
of
the
LCD
panel.
Press
E
NTER
to
start
the
cleaning
process.
f.
Insert
cleaning
card
displays
on
the
LCD
panel.
If
the
cleaning
card
is
not
in
the
input
hopper,
insert
it
now.
Press
the
U
SER
button
to
start
the
cleaning
cycle.
The
printer
moves
the
card
through
the
printer
several
times
and
ejects
it
into
the
output
hopper.
3.
Remove
the
used
cleaning
card.
Wait
a
few
minutes
for
the
rollers
to
dry.
4.
Prepare
the
printer
for
use.
a.
Replace
the
cards
in
the
input
hopper.
b.
Install
a
new
cleaning
sleeve
on
the
ribbon
cartridge
and
remove
the
protective
cover.
Refer
to
“Load
the
Cleaning
Sleeve”
on
page 20
for
the
steps
to
follow.
c.
Replace
the
ribbon
cartridge
and
close
the
printer
cover.
Press
down
on
the
ridges
on
the
front
of
the
cover
to
latch
it
properly.
Press
the
U
SER
button
to
return
the
printer
to
Ready.
The
printer
is
available
to
cards
again.
d.
Discard
the
used
cleaning
card
and
cleaning
sleeve.
Summary of Contents for SD160
Page 1: ...Datacard SD160 SD260 Card Printers User s Guide February 2015 Part No 527526 001 Rev A...
Page 4: ...iv...
Page 10: ...x...
Page 14: ...xiv...
Page 16: ...2 Introduction...


