200W mezclador-amplificador /
mixer-ampliifier Manual del usuario / User's manual
11
use the 1/4” output phone jack (
LINE OUT) and a balanced
cable.
Powering up
Switch the signal source (mixer, CD player...) on.
Switch the unit on by pressing the power switch to the "|"
position.
Level Adjustments
Microphone level adjustment
Slowly rotate the main
LEVEL control clockwise to its
maximum position (for maximum power) or to an intermediate
position (for a more moderate power output).
If using a microphone plugged directly into the microphone
input, slowly rotate the microphone level control (
MIC)
clockwise until the desired volume is achieved. This operation
should be performed carefully, avoiding feedback. The
SIGNAL
presence indicator light will turn on when signal is received
into the microphone input.
If the main and microphone level controls do not allow you to
achieve the desired volume when the main level control is
adjusted to the maximum position, adjust the
MIC GAIN
control using a small (precision) flat blade screwdriver.
The level selected with the
MIC level control will determine
the level with which it will appear at the
LINE OUT connector.
If in the process of adjusting the levels the
OVERLOAD
indicator should turn on, this means that too much power is
being demanded from the amplifiers. It is normal if this LED
indicator turns on occasionally when operating at high levels.
However, if lit continuously, the sound will be distorted and
the microphone level should be reduced.
Line level adjustment
Slowly rotate the main
LEVEL control clockwise to its
maximum position (for maximum power) or to an intermediate
position (for a more moderate power output).
Slowly rotate the microphone level control (
LINE) clockwise
until the desired volume is achieved. This operation should be
performed carefully, avoiding feedback. The
SIGNAL presence
indicator light will turn on when signal is received into the line
input.
The level selected with the
LINE level control will determine
the level with which it will appear at the
LINE OUT connector.
If in the process of adjusting the levels the
OVERLOAD
indicator should turn on, this means that too much power is
being demanded from the amplifiers. It is normal if this LED
indicator turns on occasionally when operating at high levels.
However, if lit continuously, the sound will be distorted and
the line level should be reduced.
USE
Switch on-off
A sound system should be switched on sequentially. Switch
on the self-powered unit last in your sound system. Switch on
the sound sources such as CD players or turntables, then the
mixer and finally the self-powered unit. If you have several
units, it is recommended that you switch them on sequentially
one at a time.
Follow the inverse order when switching off, turning self-
powered units off before any other element in the sound
system.
Mute all signal sources before switching the unit on or off.
OVERLOAD indicator
It is recommended that the red
OVERLOAD LED indicator is
not lit continuously; at most it should blink only occasionally.
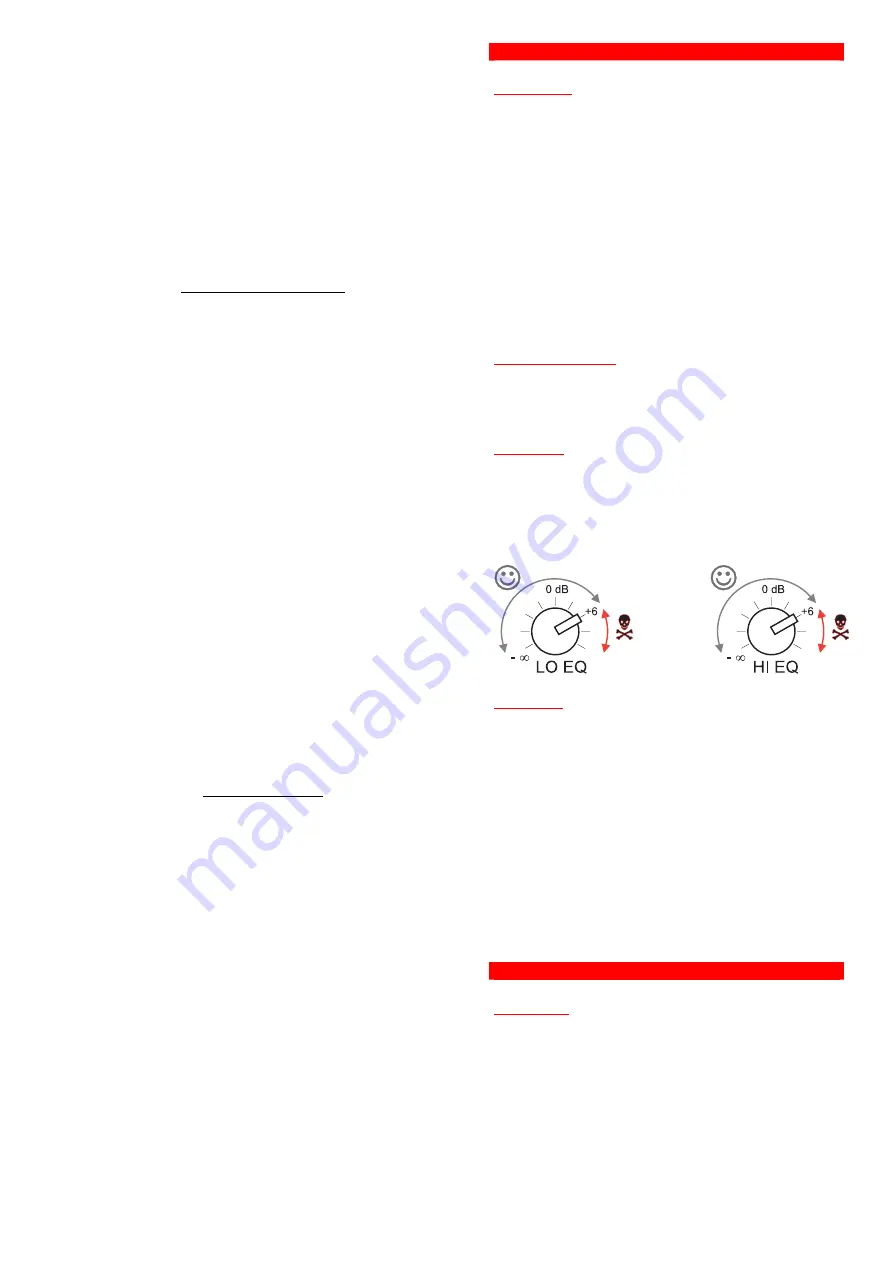
Equalisation
The units do not need extreme settings of equalisation to
produce quality sound. Avoid high levels of gain on the
equalisers. Gain values above +6 dB on a console's EQ are
not recommended.
Overheating
If the unit stops playing (or just the mid-high or the bass
sections), the amplifier’s overheating protection may be
activated to protect the components from thermal damage.
Overheating may be due to insufficient cooling, or to very
aggressive use in extremely hot conditions. Do not use the
unit in proximity to high power lights.
Once the amplifier cools down, it switches back on
automatically. If the unit should shut down again, try reducing
the volume a notch to avoid overheating.
4. CONNECTIONS
Signal wiring
There are two basic ways to transport an audio signal with
microphone or line level:
Un-balanced line: Utilising a two-conductor cable, it transports
the signal as the voltage between them. Electro-magnetic
interference can get added to the signal as undesired noise.
Connectors that carry un-balanced signals have two pins,
such as RCA (
Phono) and 1/4” (6.35 mm, often referred to as
jack) mono. 3-pin connector such as XLR (Cannon) may also
carry un-balanced signals if one of the pins is unused.


