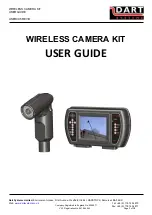
WIRELESS CAMERA KIT
USER GUIDE
USER005 REV B
Dart Systems Limited,
Environment House, First Avenue, Westfield Ind Est, RADSTOCK, Somerset, BA3 4BS
Web:
Company Registered in England No: 5395971
VAT Registration No. 851 0645 43 Page
14
of
15
Tel: +44 (0) 1761 404 870
Fax: +44 (0) 1761 404 871
9. CHARGING THE BATTERIES
N.B. When charging the batteries ensure that the AC adapter is NOT plugged in, damage to the
equipment may occur.
The internal and auxiliary external battery are charged by the same charger supplied with the system.
To charge the internal Battery
The power switch on the Handset should be switched off, and the charger 3 pin plug connected to the
socket on the underside of the Handset. The charger can then be plugged into a suitable mains outlet
and switched on. The charger will display a
Red
LED until fully charged then it will display
Green
.
To charge the internal Button Battery
The power switch on the Handset should be switched off, and the charger 3 pin plug connected to the
charging socket on the underside of the Handset. The charger can then be plugged into a suitable
mains outlet and switched on. Turn the DS100 Handset on and charge for 6 hours. After 6 hours turn
the DS100 Handset off and remove the charger. The internal Button Battery which runs the internal
clock is now fully charged.
THIS MUST BE DONE ONCE A MONTH.
10. POWERING THE SYSTEM FROM AN AC ADAPTER
N.B When the AC adapter is plugged in ensure that the battery charger is NOT as damage to the
equipment may occur.
The System can be powered from an AC adapter in the event that the battery is exhausted or if
prolonged surveillance is being carried out from a stationary position.
A 12V AC adapter can be plugged into the power jack on the back of the Handset to supply power to
the system.
11. QUICK TIPS
If you see a
“Stick Figure” symbol in the bottom right corner of the screen the unit has been switched
to Imotion and will start recording when there is movement in front of the camera lens. Refer to DVR
System Settings Screen 4 to change.
If the recorder starts to record automatically at system power on the recorder has been switched to
Auto. Refer to DVR System Settings Screen 4 to change.
Blue
Screen
– If you encounter a
Blue
screen and the LED on the LCD Control panel is
Red
, the
screen has been switched into a standby mode. To switch back press the
SEL
button on the LCD
control panel once!


