background image


21 


PA-5500TU 500W 100V Amplifier 

Product code: D6175 


Main Menu Options 

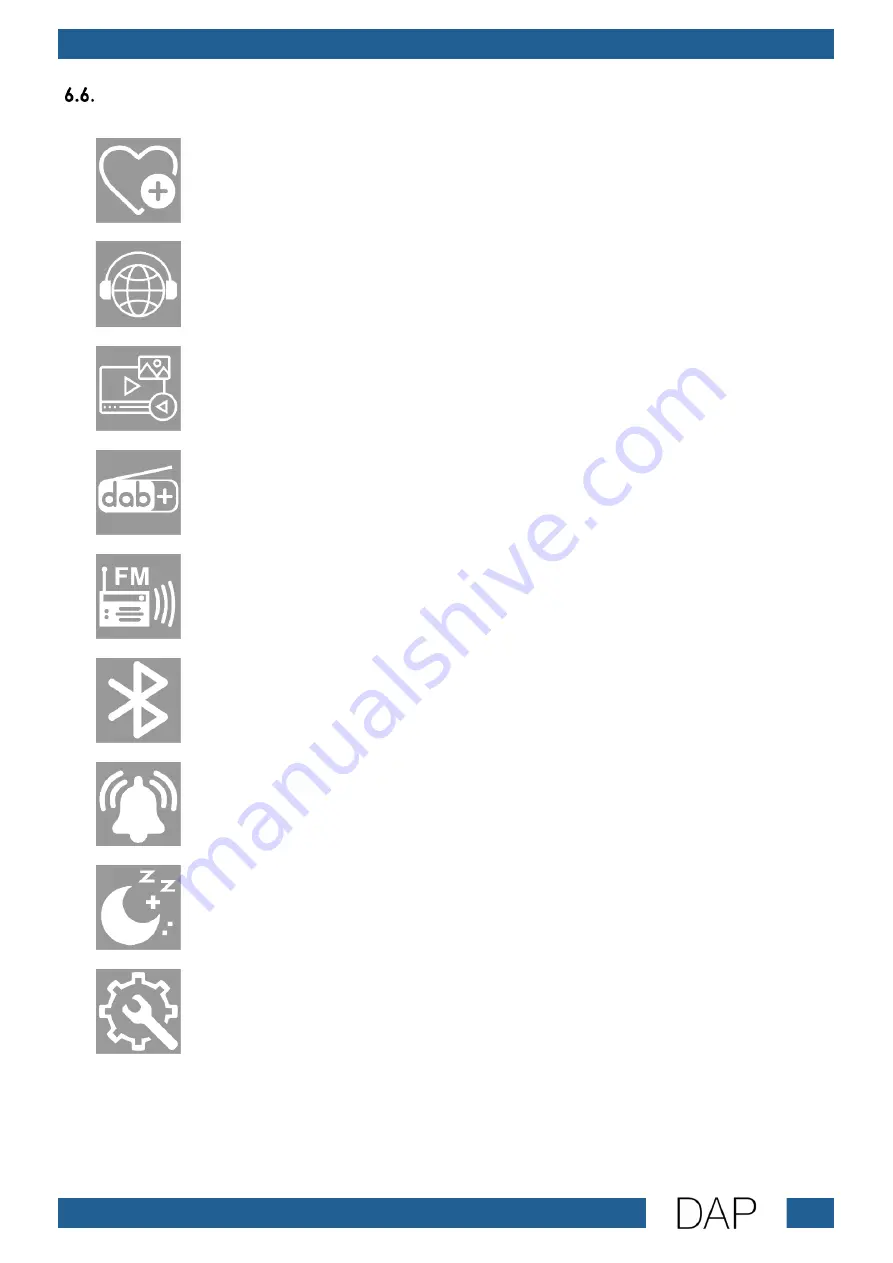
The main menu has the following options: 


My Favourite 

My Favorite (see 6.6.1. My Favourite


Internet Radio 

Internet Radio (see 6.6.2. Internet Radio


Media Centre 

Media Centre (see 6.6.3. Media Centre


DAB Radio 

DAB Radio (see 6.6.4. DAB Radio


FM Radio 

FM Radio (see 6.6.5. FM Radio


Bluetooth 

Bluetooth (see 6.6.6. Bluetooth


Alarm 

Alarm (see 6.6.7. Alarm


Sleep Timer 

Sleep Timer (see 6.6.8. Sleep Timer


Configuration 

Configuration (see 6.6.9. Configuration


Turn the TUNE/SELECT control to navigate through the menu and to choose options in submenus. 


Press the TUNE/SELECT control to open the submenus and to confirm your choices. 


Press the UP button to return to a previous menu screen or to cancel your latest input. 


Press the DOWN button to scroll for more options (if available). 


Summary of Contents for PA-5500TU

Page 1: ...PA 5500TU 500W 100V Amplifier Highlite International B V Vestastraat 2 6468 EX Kerkrade the Netherlands Product code D6175 USER MANUAL ENGLISH V1 ...

Page 2: ...f the device Non observance of the instructions in this user manual may result in serious injuries and damage of property 2022 DAP All rights reserved No part of this document may be copied published or otherwise reproduced without the prior written consent of Highlite International Design and product specifications are subject to change without prior notice For the latest version of this document...

Page 3: ... Connecting Audio Devices 11 DAB FM Signal Reception 11 Installation of the Batteries 12 Connecting to Power Supply 12 5 Setup 13 Warnings and Precautions 13 Turning On Off 13 Software Updates 13 Network Setup 13 Wi Fi Setup 13 Wi Fi Setup via Esptouch App 14 LAN Setup 14 Network Indicator Display Status 14 Entering Passwords and Searching for Phrases 15 Setup Examples 15 Stereo Mode 15 Bridge Mod...

Page 4: ...er 45 EQ 46 Buffer Time 47 Line Out Gain 47 Information 48 Software Update 49 Reset to Default 49 Saving Internet Radio Stations to My Favourite 49 Viewing Radio Station Information 50 Setting Volume 50 Manual FM Frequency Tuning 50 Editing Lists 51 Alarm 51 Remote Control 52 Functions of the Remote Control Buttons 52 Entering Passwords and Searching for Phrases 53 7 Troubleshooting 54 8 Maintenan...

Page 5: ... 1 5 m Wi Fi antenna DAB FM wire antenna Remote control User manual Fig 01 Intended Use This device is intended for use as a media player with an amplifier It is suitable only for indoor installation It is not suitable for households Any other use not mentioned under intended use is regarded as non intended and incorrect use Text Conventions Throughout the user manual the following text convention...

Page 6: ...roduct Important Read and observe the instructions in this document Electrical hazard Provides important information about the disposal of this product Symbols on the Information Label This product is provided with an information label The information label is located on the bottom plate of the device The information label contains the following symbols This device is designed for indoor use This ...

Page 7: ...r cable Make sure that the power cable is not crimped or damaged Examine the power cable periodically for any defects Do not immerse the device in water or other liquids Do not install the device in a location where flooding may occur Do not use the device during thunderstorms Disconnect the device from the electrical power supply immediately WARNING Electric shock caused by dangerous voltage insi...

Page 8: ...he warranty void Such modifications may result in injuries and material damage Attention Do not expose the device to conditions that exceed the rated IP class conditions This device is IP20 rated IP Ingress Protection 20 class provides protection against solid objects greater than 12 mm such as fingers and no protection against harmful ingress of water Requirements for the User This product may be...

Page 9: ...OFF 04 3 5 mm jack connector AUX IN 05 Input selector 06 Master volume control 07 Bass level control 08 Treble level control 09 Microphone level control 10 XLR 6 3 mm jack combo microphone connector IN 11 Infra red port 12 2 4 inch TFT display and control buttons 13 Tune Select control Back View Fig 03 14 Wi Fi antenna connector IN 15 RJ45 LAN connector IN 16 Digital connector TOSLINK OUT 17 Digit...

Page 10: ...ction THD level 0 1 Signal to noise ratio 100 dB Frequency response 20 Hz 20 kHz FM frequency 87 108 MHz FM antenna impedance 75 Ω DAB frequency 174 928 239 2 MHz Parametric main equalizer 2 bands Carrier frequency 2 4 GHz Bluetooth range 20 m Transformer 100 V Physical Dimensions 482 x 330 x 44 5 mm L x W x H Weight 3 2 kg Operation and control Control panel 2 4 inch TFT display and buttons Conne...

Page 11: ...ive humidity must not exceed 50 with an ambient temperature of 40 C Rack Mounting The device can be mounted in a standard 19 inch rack The device requires 1 rack unit RU of space which is 44 5 mm high Make sure that the rack is sufficiently secured to prevent it from becoming unstable or falling over To mount the device in a two post rack follow the steps below 01 Insert 4 cage nuts in the opening...

Page 12: ... audio devices such as an additional amplifier a mixer a console etc If your audio device has digital inputs connect those to the digital TOSLINK connector 16 or the coaxial connector 17 Connect the speaker terminals 23 to 2 speakers Stereo mode 1 speaker Bridge mode a speaker group of 260 W or 1 x 100 V PA speaker See 5 6 1 Stereo Mode 5 6 2 Bridge Mode or 5 6 3 100 V Mode on pages 15 16 for more...

Page 13: ...batteries with correct polarity orientation Connecting to Power Supply DANGER Electric shock caused by short circuit The device accepts AC mains power at 220 240 V and 50 Hz Do not supply power at any other voltage or frequency to the device This device falls under IEC protection class I Make sure that the device is always electrically connected to the ground earth Before connecting the device to ...

Page 14: ...en the device is turned off Software Updates When a new software update is available it will be downloaded and installed automatically the next time the device is on and connected to the internet Do not turn the device off when the software is being updated Network Setup The PA 5500TU can be connected to a computer laptop tablet or smartphone with a wireless module Wi Fi It is also possible to con...

Page 15: ...play shows Enter the password of your Wi Fi network in PASSWORD field Choose MULTICAST Click CONFIRM Choose ADD AP SMARTCONFIG in Wi Fi Network menu See Wi Fi Network on page 37 for more information The PA 5500TU will connect to the network When the connection is successful the device s display reads Association complete LAN Setup If the device is connected to your router with a network cable inte...

Page 16: ... If you make a mistake press the UP button to remove the wrong character Press and hold down the TUNE SELECT control for 5 seconds to confirm Setup Examples Depending on the way you want to use the speaker s you can use the device in Stereo Bridge or 100 V mode Stereo Mode In Stereo mode you can connect 2 speakers or 2 speaker groups The device delivers 2 x 460 W for 4 Ω speakers and 2 x 240 W for...

Page 17: ...oth terminals to connect the speaker s The minimum total impedance is 8 Ω Fig 09 Note Make sure that the stereo bridge selector 22 is in BRIDGE 100V position 100 V Mode In 100 V mode you can connect 1 x 100 V PA speaker or a speaker group of 260 W Use both terminals to connect the speaker s Fig 10 Note Make sure that the stereo bridge selector 22 is in BRIDGE 100V position ...

Page 18: ... to establish an internet connection See 5 4 Network Setup on page 13 for more information The PA 5500TU supports the following control modes Internet radio Media centre UPnP DLNA DAB radio FM radio Bluetooth See pages 26 31 for more information Control Panel A TFT display B MENU button C TUNE SELECT control D UP button E DOWN button Fig 11 Use the MENU button to switch between the main menu and t...

Page 19: ... the device will automatically connect to the network If you use Wi Fi you will have to configure the network See 5 4 Network Setup on page 13 for more information When the network is configured or when you use LAN and on each subsequent start up the display shows After 5 seconds the display shows the main menu After a few seconds the device will enter the previously used operation mode Note If no...

Page 20: ...19 PA 5500TU 500W 100V Amplifier Product code D6175 Menu Overview ...

Page 21: ...20 PA 5500TU 500W 100V Amplifier Product code D6175 ...

Page 22: ...FM Radio see 6 6 5 FM Radio Bluetooth Bluetooth see 6 6 6 Bluetooth Alarm Alarm see 6 6 7 Alarm Sleep Timer Sleep Timer see 6 6 8 Sleep Timer Configuration Configuration see 6 6 9 Configuration Turn the TUNE SELECT control to navigate through the menu and to choose options in submenus Press the TUNE SELECT control to open the submenus and to confirm your choices Press the UP button to return to a ...

Page 23: ...dio stations you need to search for and save them on the device See 6 6 2 Internet Radio on page 26 and 6 7 Saving Internet Radio Stations to My Favourite on page 49 for more information Turn the TUNE SELECT control to choose one of the available radio stations Press the TUNE SELECT control to confirm The display shows the information screen Set the volume See 6 9 Setting Volume on page 50 for mor...

Page 24: ... browser Enter the IP address in the address bar of your internet browser The screen shows You can view edit the following options ID Number on the list Channel Name Station name Channel URL Audio stream DAB FM data address Play Activate station Edit Edit station information Delete Delete station from the list Move Move station on the list Channel Playing On Device Currently active station Delete ...

Page 25: ...ew and edit My Favourite with the Skytune radio portal Connect your PC smartphone to the same Wi Fi network as the PA 5500TU Open an internet browser Enter www skytune net in the address bar of your internet browser Click BROWSE SEARCH button on the screen The screen shows Search for a desired radio station The screen shows ...

Page 26: ...O STATION ON MY RADIO DEVICE Listen to the station without adding to My Favourite Find the device s IP address See Network Information on page 48 for more information Enter the IP address in the IP address field Click SEND to confirm the action The desired radio station will be added to My Favourite You will be redirected to My Favourite screen See 6 6 1 1 Managing My Favourite With a PC or Smartp...

Page 27: ... TUNE SELECT control to choose one of the 5 options GLOBE MOST POPULAR Most popular internet radio stations in the world LOCAL RADIO Local internet radio stations GLOBE ALL All internet radio stations GLOBE BY GENRE Internet radio stations grouped by genre GLOBE BY REGION Internet radio stations grouped by continent country and genre Press the TUNE SELECT control to confirm Turn the TUNE SELECT co...

Page 28: ...confirm The display shows Turn the TUNE SELECT control to choose characters and press the TUNE SELECT control to confirm Repeat this step to type in the desired word or phrase The available characters are uppercase letters digits punctuation marks and some symbols Note If you make a mistake press the UP button to remove the wrong character Press and hold down the TUNE SELECT control for 5 seconds ...

Page 29: ...LECT control to activate the chosen internet radio station Media Centre In this menu you can stream music from a media server e g a PC with Windows Media Player 10 and higher via UPnP or DLNA Enable UPnP on your router and on your PC Read the user manuals of your PC s operating system and of your router for more information On your PC enable sharing of the folders containing music files Read the u...

Page 30: ... 3 2 My Playlist on page 29 for more information My Playlist In this menu you can browse through and listen to your favorite UPnP music files You can add up to 99 music files Note To be able to browse through your favorite UPnP music files you need to add them first See 6 6 3 1 UPnP on page 29 for more information Turn the TUNE SELECT control to choose one of the available music files Press the TU...

Page 31: ...e available DAB radio stations Press the TUNE SELECT control to confirm The display shows the information screen FM Radio In this menu you can browse through and listen to FM radio stations Also it is possible to manually tune the FM radio frequency See 6 10 Manual FM Frequency Tuning on page 50 for more information Note To browse through FM radio stations you need to search for and save them on t...

Page 32: ...o be able to stream Bluetooth signals the PA 5500TU needs to be paired with your mobile device Start Bluetooth on your mobile device On your mobile device scan for the available Bluetooth devices The ID of the PA 5500TU is PA 5500TU On your mobile device connect with the PA 5500TU The display shows On your mobile device search for and play any music or video file or visit streaming services The PA...

Page 33: ...ne of the 2 options TURN ON Set the alarm See step 4 below TURN OFF The display will return to the previous screen Press the TUNE SELECT control to confirm The display shows Turn the TUNE SELECT control to choose one of the 5 options TIME Time settings See 6 6 7 1 Time SOUND Sound settings See 6 6 7 2 Sound REPEAT Alarm repetition options See 6 6 7 3 Repeat ALARM VOLUME Alarm volume See 6 6 7 4 Al...

Page 34: ... In this menu you can choose the sound source of the alarm You can choose the default alarm tone or one of the available favorite internet FM or DAB radio stations Turn the TUNE SELECT control to choose one of the 4 options TONE Default alarm tone MY FAVOURITE My Favorite See 6 6 1 My Favourite on page 22 for more information FM RADIO FM Radio See 6 6 5 FM Radio on page 30 for more information DAB...

Page 35: ...e alarms are set to EVERYDAY To change the settings Press the TUNE SELECT control The display shows Turn the TUNE SELECT control to choose ONCE Press the TUNE SELECT control to confirm The display shows Turn the TUNE SELECT control to choose the desired day of the week and press the TUNE SELECT control to confirm Repeat this step as many times as required to choose the other days ...

Page 36: ...urn the TUNE SELECT control to set the alarm duration The adjustment range is 15 180 minutes 8 increments 15 30 45 60 90 120 150 180 minutes Press the TUNE SELECT control to confirm Sleep Timer In this menu you can set the sleep timer Turn the TUNE SELECT control to set the sleep timer The adjustment range is 15 180 minutes 8 increments 15 30 45 60 90 120 150 180 minutes and TURN OFF Sleep timer o...

Page 37: ...tions on page 44 POWER ON OPTIONS Power on settings See 6 6 9 9 Power on Options on page 45 DIMMER Dimmer settings See 6 6 9 10 Dimmer on page 45 EQ Equalizer settings See 6 6 9 11 EQ on page 46 BUFFER TIME Buffer settings See 6 6 9 12 Buffer Time on page 47 LINE OUT GAIN Line out gain settings See 6 6 9 13 Line Out Gain on page 47 INFORMATION Network and system information See 6 6 9 14 Informatio...

Page 38: ...d ADD AP WPS BUTTON The device will scan for available WPS routers Choose the desired network confirm and press the WPS button on your router to connect ADD AP SMARTCONFIG Configure the network via Esptouch app on your smartphone See 5 4 1 1 Wi Fi Setup via Esptouch App on page 14 REMOVE AP Choose a network and confirm to remove it AP Indication of active networks SIGNAL Signal quality indicator I...

Page 39: ...nfirm Time Zone In this submenu you can set the time zone Turn the TUNE SELECT control to choose one of the 2 options AUTO SET TIME ZONE Time zones will be chosen automatically MANUAL SET TIME ZONE Choose the correct time zone manually The time zones are grouped by continent and country Press the TUNE SELECT control to confirm Set Time Format In this submenu you can set the time display format Tur...

Page 40: ...r automatic time setting Turn the TUNE SELECT control to choose characters and press the TUNE SELECT control to confirm Repeat this step to type in the address of the time server The available characters are uppercase and lowercase letters digits punctuation marks and some symbols Note If you make a mistake press the UP button to remove the wrong character Press and hold down the TUNE SELECT contr...

Page 41: ... to DAB radio stations Turn the TUNE SELECT control to choose one of the 2 options DAB FULL SCAN The device will search for and save all available DAB radio stations DAB STATION LIST Browse through DAB radio stations Press the TUNE SELECT control to confirm Note To be able to browse through DAB radio stations you need to search for and save them on the internet radio Press the TUNE SELECT control ...

Page 42: ... FM STATION LIST Browse through FM radio stations Press the TUNE SELECT control to confirm FM Area In this submenu you can choose the FM area where the device will search for FM radio stations Turn the TUNE SELECT control to choose one of the 3 FM areas ASIA OTHERS AMERICAS EUROPE OTHERS Press the TUNE SELECT control to confirm Scan Setting In this submenu you can adjust the FM search settings Tur...

Page 43: ...l to sound AUTO STEREO The device will use multiple channels to convert multiple signals to sound Press the TUNE SELECT control to confirm FM Full Scan In this submenu the device will search for and save all available FM radio stations When the scan is complete the display shows Turn the TUNE SELECT control to choose one of the available FM radio stations Press the TUNE SELECT control to confirm T...

Page 44: ... SELECT control to confirm The display shows the information screen Local Radio In this submenu you can adjust the local radio settings Turn the TUNE SELECT control to choose one of the 2 options AUTO SET LOCAL RADIO The device will automatically scan for radio stations in your area MANUAL SET LOCAL RADIO Choose your local area manually The local areas are grouped by continent and country Press th...

Page 45: ... will play all tracks once in a random order NORMAL The device will play all tracks once Press the TUNE SELECT control to confirm Resume Play Options In this menu you can decide whether the device on start up will run the last active operation mode or will stay in the main menu Turn the TUNE SELECT control to choose one of the 2 options RESUME ONCE READY The device will run the last active operati...

Page 46: ... the behavior of the display LEVEL Set the display brightness Press the TUNE SELECT control to confirm Mode In this submenu you can set the display behavior Turn the TUNE SELECT control to choose one of the 2 options NORMAL The display will remain at full brightness DIM The display will be dimmed after 15 seconds Press the TUNE SELECT control to confirm Level In this submenu you can set the displa...

Page 47: ...VANCED Press the TUNE SELECT control to confirm If you chose ADVANCED please read steps 3 6 below Advanced Turn the TUNE SELECT control to choose one of the 7 settings PREAMP GAIN Preamp gain From 18 dB to 0 dB 105 Hz From 12 dB to 12 dB 300 Hz From 12 dB to 12 dB 850 Hz From 12 dB to 12 dB 2 4 kHz From 12 dB to 12 dB 6 9 kHz From 12 dB to 12 dB 3D DEPTH 3D depth 0 100 Press the TUNE SELECT contro...

Page 48: ...time to lower the number of interruptions Turn the TUNE SELECT control to choose one of the 2 options 2 seconds 5 seconds Press the TUNE SELECT control to confirm Line Out Gain In this menu you can set the line output gain level Turn the TUNE SELECT control to choose one of the 9 options FOLLOW HEADPHONE Follow headphone Not applicable in this version of the device 0 dB 3 dB 6 dB 9 dB 12 dB 15 dB ...

Page 49: ...ORMATION Network s settings SYSTEM INFORMATION System settings Press the TUNE SELECT control to confirm Network Information In this submenu you can view the device s network settings Turn the TUNE SELECT control to scroll through all the entries System Information In this submenu you can view the device s system information Turn the TUNE SELECT control to scroll through all the entries ...

Page 50: ... Yes The device will restore the default factory settings NO No The display will return to the main menu Press the TUNE SELECT control to confirm Saving Internet Radio Stations to My Favourite It is possible to save internet radio stations to My Favourite You can browse through the saved internet radio stations See 6 6 1 My Favourite on page 22 for more information When an internet radio station i...

Page 51: ...each screen depend on the currently active radio station Setting Volume It is possible to set the volume of the currently active internet DAB or FM radio station Activate an internet DAB or FM radio station See 6 6 1 My Favourite 6 6 2 Internet Radio 6 6 4 DAB Radio and 6 6 5 FM Radio on pages 22 30 for more information Turn the TUNE SELECT control to the left right to decrease increase the volume...

Page 52: ...station Press the DOWN button The display shows Turn the TUNE SELECT control to choose one of the 5 options MOVE DOWN Move down The radio station will move down by one position MOVE UP Move up The radio station will move up by one position DELETE Delete The radio station will be removed from the list MOVE TO TOP Move to top The radio station will move to the top of the list MOVE TO BOTTOM Move to ...

Page 53: ...add a station to My Favourite My Favourite Opens My Favourite menu Up cursor Move up Down cursor Move down Left cursor Moves to the left Moves to a previous menu screen Cancels actions Right cursor Moves to the right When in radio station list activates Editing Lists menu See 6 11 Editing Lists on page 51 OK Select Confirms choices and opens sub menus Alarm Activates Alarm menu Sleep timer Activat...

Page 54: ... to confirm Repeat this step to type in the desired word or phrase The available characters are uppercase letters digits punctuation marks and some symbols Note Alternatively you can repeatedly press the 0 9 buttons to type in words or phrases Each button 0 9 has a set of letters assigned to it Note If you make a mistake press the LEFT cursor to remove the wrong character Press and hold down the O...

Page 55: ...nt list of your router AP Wi Fi signal is too weak Check the distance between the device and the Wi Fi router Move the device closer to the router Unsupported encryption method Set the encryption method to WEP WPA or WPA2 Incorrect Wi Fi password Enter the correct Wi Fi password Some radio stations do not work Stations are not broadcasting at this time of the day time zone The maximum number of li...

Page 56: ... the steps below Disconnect the device from the electrical power supply Allow the device to cool down for 5 minutes 03 Clean the device with a soft lint free cloth Attention Do not immerse the device in liquid Do not use alcohol or solvents Corrective Maintenance The device does not contain user serviceable parts Do not open the device and do not modify the device Refer repairs and servicing to in...

Page 57: ...ling of electrical and electronic equipment This is to avoid environmental damage or personal injury due to uncontrolled waste disposal For more detailed information about recycling of this product contact the local authorities or the authorized dealer 11 Approval Hereby Highlite International declares that the device is in compliance with Directive 2014 53 EU RED Radio Equipment Directive The ful...

Page 58: ...57 PA 5500TU 500W 100V Amplifier Product code D6175 ...

Page 59: ...58 PA 5500TU 500W 100V Amplifier Product code D6175 ...

Page 60: ... 2022 DAP ...

Reviews: