MONTHLY
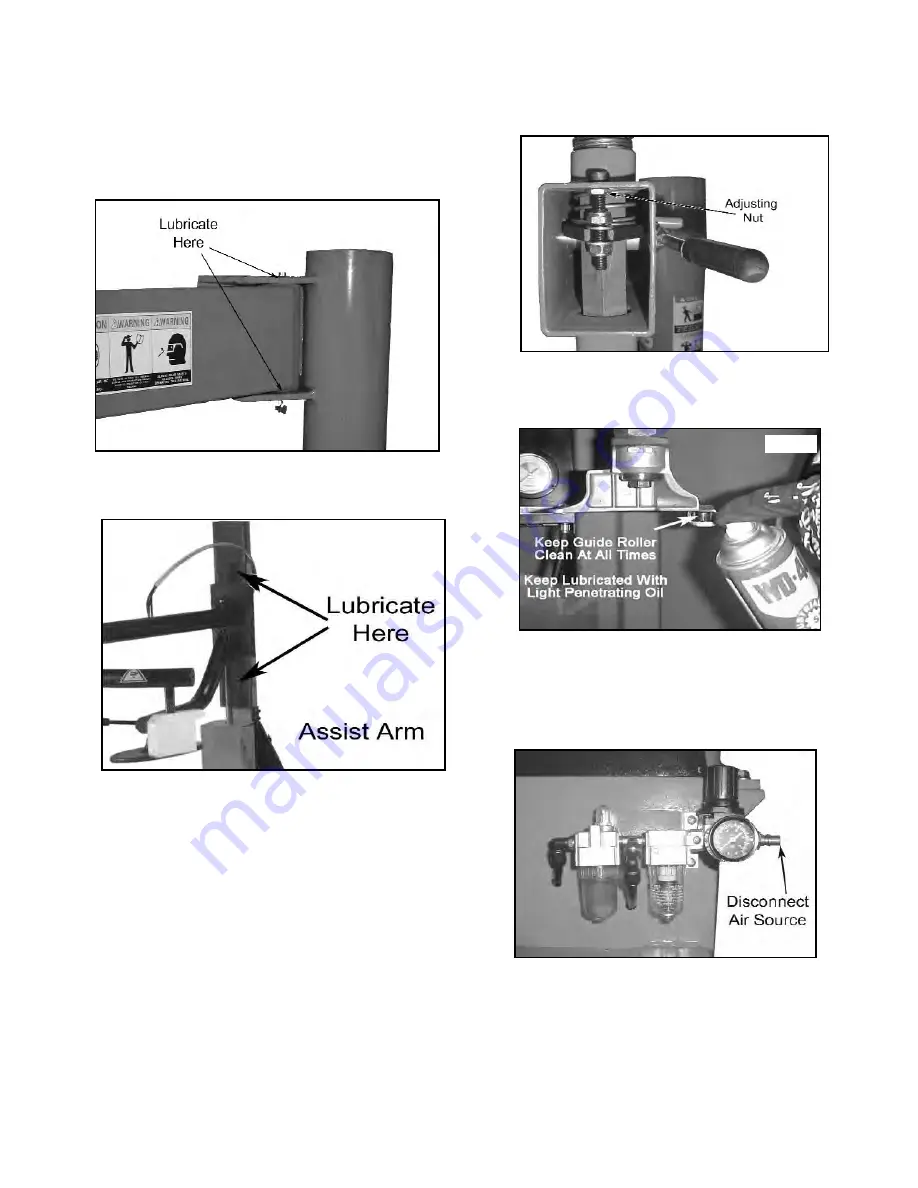
Lubricate the arm Pivot Pin. If so equipped, the vertical
slides should be cleaned with a vaporizing solvent and then
lubricated with chassis grease once a month.
(See Fig. 1-2)
Check adjustment of the mount/demount head monthly.
Check function of the inflation hose pressure limiter/
regulator monthly. Always secure/stow the cover if
adjustments are made.
The pressure regulator should
never be adjusted to exceed 60 PSI.
The table top, clamps, steel mount/demount head, and
other working surfaces should be cleaned with a vaporizing
solvent every month.
On a daily basis, inspect the unit and check to be
certain that all systems are operating normally. Follow
detailed inspection and testing procedures as specified for
various components at regular intervals.
Replace any damaged or missing safety decal's. They
are available from the factory.
Mount/Demount Tool Head Adjustment
To adjust tool head lift, adjust locking nut up or down until lift
clearance is 1/8" to 3/16". Recheck clearance before
replacing cover. (See Fig. 3)
Mount/Demount Head Cleaning
Clean dirt and debris from the mount/demount tool roller
with small screw driver or pick. (See Fig. 4)
Water Separator/Lubricator Maintenance
Check oil and water levels regularly, and perform these
maintenance items weekly:
Disconnect air supply to machine. (See Fig. 5)
Observe the sight glass on the water separator/filter
unit. If water is observed, drain by pressing upwards on the
drain plug at the bottom of the reservoir. (See Fig. 6)
Add oil to the lubricator if the fluid level is below the
middle of the sight glass. Remove the reservoir by turning
counter-clockwise and pulling down. Add SAE 10W non-
detergent oil or an air tool oil if necessary.
22
Fig. 1
Fig. 2
Fig. 3
Fig. 5
Fig. 4
Note: Air Fitting Not Included
Summary of Contents for T-100
Page 1: ......
Page 2: ......
Page 5: ......
Page 6: ......
Page 8: ......
Page 9: ...Note Air Fitting Not Included...
Page 10: ......
Page 14: ......
Page 24: ...24...
Page 25: ......
Page 30: ...14 Insert cone attachment into fitting 15 Secure with pin 16 See final unit assembled...
Page 31: ......
Page 56: ......


