background image

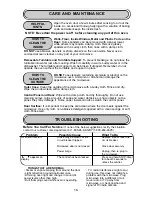
CARE AND MAINTENANCE

HELPFUL

HINTS

Open the oven door a few minutes after cooking to air out the
inside. An occasional thorough wiping with a solution of baking
soda and water keeps the inside fresh. 

NOTE: Be certain the power is off  before cleaning any part of this oven. 

HOW TO

CLEAN THE

INSIDE

Walls, Floor, Inside Window, Metal and Plastic Parts on the
Door:

Some spatters can be removed with a paper towel,

while others may require a damp cloth. Remove greasy 
spatters with a sudsy cloth, then rinse with a damp cloth. 

DO NOT

use abrasive cleaners or sharp utensils on the oven walls. Never use a 

commercial oven cleaner on any part of your microwave. 

Removable Turntable and Turntable Support:

To prevent breakage, do not place the

turntable into water just after cooking. Wash it carefully in warm, sudsy water or in the 
dishwasher. The turntable and support can be broken if dropped. Remember, do not
operate the oven without the turntable and support in place.

HOW TO

CLEAN THE

OUTSIDE

DO NOT

use cleaners containing ammonia or alcohol on the

microwave oven. Ammonia or alcohol can damage the 
appearance of the microwave. 

Outer Case: 

Clean the outside of the microwave with a sudsy cloth. Rinse and dry.

Wipe the window clean with a damp cloth.

Control Panel and Door:

Wipe with a damp cloth and dry thoroughly. Do not use

cleaning sprays, large amounts of soap and water, abrasive or sharp objects on the
panel- they may damage it. Some paper towels can also scratch the control panel. 

Door Surface:

It is important to keep the area clean where the door seals against the

microwave. Use only mild, non-abrasive detergents applied with a clean sponge or soft
cloth. Rinse well. 

TROUBLESHOOTING

Before You Call For Service: 

If none of the below suggestions rectify the situation,

contact our customer care department at 1-800-26- DANBY (1-800-263-2629)

Problem

Possible Cause

What To Do

Oven will not start

A fuse may be blown, or the

Replace fuse or reset the

circuit breaker tripped.

circuit breaker.

Microwave door is not closed

Close door securely.

Power surge.

Unplug, then re-plug in 
the microwave.

appears on 

The control has been locked.

Press and hold STOP/Clear

display. 

for about 3 seconds to 
unlock the control.

THINGS THAT ARE NORMAL: 

• Steam or vapor escaping from around the door.       • TV- radio interference might occur 

• Light reflection around door/outer case.

during use- this does not indicate a

• Dimming oven light and change in sound at

problem with the microwave. Plug

power levels other than high.

microwave into a different circuit,

• Dull thumping sound while oven is operating.

move radio or TV away from
microwave, or check position and
signal of TV/radio antenna.

16

Summary of Contents for DMW1158

Page 1: ...ety rules and operating instructions before first use of this product MISE EN GARDE Lisez et suivez toutes les consignes de sécurité et d utilisation avant la première utilisation de ce produit Microwave Oven Table of Contents 1 Safety Instructions Menu Cooking Guide Operation Care and Maintenance Troubleshooting Four à micro ondes Table des matières 18 Consignes de sécurité Guide de programmes de...

Page 2: ...cial Notes About Microwaving 5 OPERATING INSTRUCTIONS Features of Your Microwave 10 Controls of Your Microwave 11 Menu Cooking Guide 12 Start Cooking 14 Changing the Power Levels 15 Defrost Guide 16 Menu Cooking 17 Other Features 20 HELPFUL INFORMATION Microwave Terms 22 Care and Maintenance 23 TROUBLESHOOTING Before You Call For Service 24 1 ...

Page 3: ... each time you use your microwave That s important because your new microwave will be part of your family for a long time BEFORE USING YOUR MICROWAVE NEED HELP Before you call for service there are a few things you can do to help us serve you better Read this manual It contains instructions to help you use and maintain your microwave properly If you received a damaged oven Immediately contact the ...

Page 4: ... S A ONLY This equipment generates and uses ISM frequencies and if not installed and used properly that is in strict accordance with the manufacturer s instructions may cause interference to radio and television reception It has been type tested and found to comply with limits for ISM Equipment pursuant to Part 18 of FCC Rules which are designed to provide reasonable protection against such interf...

Page 5: ...s jars may explode and should not be heated in this oven Do not store this appliance outdoors Do not use this product near water for example in a wet basement near a swimming pool or near a sink Keep power cord away from heated surfaces 4 Do not immerse power cord or plug in water See door surface cleaning instructions in the Care and Maintenance section s of this manual This appliance should be s...

Page 6: ...e popcorn labeled for use in microwave ovens Some products such as whole eggs with shell sealed containers and closed jars will explode and should not be heated in this microwave oven Heating these products in the microwave oven could result in injury Do not boil eggs in a microwave oven Pressure will build up inside egg yolk and will cause it to burst possibly resulting in injury Operating the mi...

Page 7: ...n To prevent burns from splashing liquid we recommend the following before removing the container from the oven allow the container to stand in the oven for 30 to 40 seconds after the oven has shut off Do not boil liquids in narrow necked containers such as soft drink bottles wine flasks and especially narrow necked coffee cups Even if the container is opened excessive steam can build up and cause...

Page 8: ...ially uncovered because they form a tight seal When cooking with containers tightly covered with plastic wrap remove covering carefully and direct steam away from hands and face 7 Paper towels waxed paper and plastic wrap can be used to cover dishes in order to retain moisture and prevent splattering Be sure to vent plastic wrap so steam can escape How to test for a microwave safe dish 1 Place in ...

Page 9: ...gation to have it replaced with a properly grounded 3 prong wall outlet DO NOT under any circumstances cut or remove the third ground prong from the power cord DO NOT use an adapter plug with this appliance DO NOT use an extension cord with this appliance If the power cord is too short have a qualified electrician or service technician install an outlet near the appliance For best operation plug t...

Page 10: ...g a time or selecting a powerl level Some MENU COOKING programs give the option of specifying between two portion sizes 2 POWER Used to set the power level 3 DEFROST by Weight or Time Touch to defrost food by weight or by time The oven automatically sets the defrosting time in By Weight setting and power level 4 MEMORY Set pre programmed cooking times and power levels 5 EXPRESS COOKING 6 KITCHEN T...

Page 11: ...3 Times 3 Beverages 4 min 20 sec Approx vol of 1 beverage 8 5 oz 250mL SOUP Once 4 0 oz 118 mL 1 min 30 sec Twice 8 0 oz 236mL 2 min 50 sec Touch START 30 Sec 3 Times 12 0 oz 356mL 4 min 10 sec 4 Times 16 0 oz 472mL 5 min 30 sec DINNER PLATE Once 9 0 oz 255 grams 3 min Twice 12 0 oz 340 grams 4 min Touch START 30 Sec 3 Times 18 0 oz 510 grams 6 min 20 sec FRESH VEGETABLES Once 4 0 oz 113 4 grams 3...

Page 12: ...ient oil butter etc as Regular popcorn so cooking time will be substantially reduced When the popping action slows down or stops stop the microwave immediately otherwise popcorn will overcook burn or possibly catch on fire DINNER PLATE Notes on Menu Cooking Follow package instructions using Timer Cooking see pg 10 if the package is less than 9 oz or larger than 18 0z FRESH AND FROZEN VEGETABLES Fo...

Page 13: ...ing time will use the same power level that is currently being used by the microwave For example if the Power Level is currently set to 50 PL5 on the display then the added cooking time will use a Power Level of 50 IMPORTANT You can pause or cancel cooking operation at any time by touching STOP Clear or opening the microwave door 12 This method is ideal for recipies that require a reduced cooking ...

Page 14: ...ating or turning over Most cooking will be done on default High PL10 A lower setting will cook more evenly and need less stirring or rotating of food Some foods may have a better flavor texture or appearance if a lower setting is used Use a lower power level when cooking foods that have a tendency to boil over such as scalloped potatoes Rest periods when the microwave energy cycles off give time f...

Page 15: ...his time turn food over and break apart or rearrange pieces for more even defrosting Touch START 30Sec to resume the program NOTE During DEFROST BY TIME dEF2 and DEFROST BY WEIGHT dEF1 a dull thumping noise may be heard This sound is normal when the oven is not operating at High Power Conversion Guide If the weight of food is shown only in pounds the pounds must be converted to ounces DEFROSTING T...

Page 16: ...econds 3 Touch the START 30Sec pad The timer will begin to countdown until it reaches zero 0 00 on the display The oven will then resume showing the time of day if set and sound five beeps To Cancel the KITCHEN TIMER 1 Touch STOP CLEAR The display will resume showing the clock if set NOTE The KITCHEN TIMER program can not be used in conjunction with or during the process of any other programs STOP...

Page 17: ...h a damp cloth Control Panel and Door Wipe with a damp cloth and dry thoroughly Do not use cleaning sprays large amounts of soap and water abrasive or sharp objects on the panel they may damage it Some paper towels can also scratch the control panel Door Surface It is important to keep the area clean where the door seals against the microwave Use only mild non abrasive detergents applied with a cl...

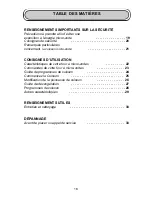
Page 18: ...on micro onde 21 CONSIGNES D UTILISATION Caractéristiques de votre four à micro ondes 22 Commandes de votre four à micro ondes 23 Guide de programmes de cuisson 24 Commencez la Cuisson 25 Modification de la puissance de cuisson 26 Guide de décongélation 27 Programmes de cuisson 28 Autres caractéristiques 29 RENSEIGNEMENTS UTILES Entretien et nettoyage 33 DÉPANNAGE Avant de placer un appel de servi...

Page 19: ...portant votre nouveau four à micro ondes fera longtemps partie de votre famille Avant d utiliser votre four à micro ondes BESOIN D AIDE Avant de téléphonez pour une réparation voici quelques petites choses que vous pouvez faire afin que nous puissions mieux vous servir Lisez ce guide Il contient des instructions qui vous aideront à utiliser et entretenir correctement votre four à micro ondes Si vo...

Page 20: ...uences sur bande ISM S il n est pas installé et utilisé correctement c est à dire selon les directives du fabricant ces fréquences peuvent entraîner des interférences dans les réceptions radiophoniques et télévi suelles Cet équipement a été mis à l essai et déclaré conforme aux limitations de l équipement ISM énoncées à l article 18 de la réglementation de la Commission dont le but est d offrir un...

Page 21: ...ts de verre fermés peuvent exploser et ne devraient pas être chauffés dans ce four Ne rangez pas cet appareil à l extérieur N utilisez pas ce produit près d une source d eau tel un sous sol humide une piscine ou un évier Éloignez le cordon d alimentation de toute surface chauffée N immergez pas le cordon d alimentation ou la fiche Consultez les directives de nettoyage de la surface de la porte aux...

Page 22: ...four à micro ondes qu à l aide d un accessoire de cuisson spécialement conçu à cet effet à moins que vous n utilisiez du maïs soufflé identifié pour l utilisation au four à micro ondes Certains produits tels les œufs entiers dans leur coquille les contenants hermétiques et les pots de verre fermés peuvent exploser et ne devraient pas être chauffés dans ce four à micro ondes Ne faites pas bouillir ...

Page 23: ...ouillir pendant qu on le retire du four à micro ondes ou immédiatement après Afin d éviter les blessures causées par un éclaboussement nous vous recommandons de laisser le contenant reposer entre 30 et 40 secondes dans le four éteint avant de l en retirer Ne faites pas bouillir de liquide dans des contenants à col mince tels les bouteilles de boissons gazeuses les flacons de vinet surtout les tass...

Page 24: ... Lors de la cuissonde contenants couverts hermétiquement à l aide de pellicule plastique soyez prudent en retirant la pellicule et dirigez la vapeur loin des mains et du visage Les essuie tout le papier ciré et la pellicule plastique peuvent être utilisés pour couvrir les plats afin de retenir l humidité et d empêcher les éclaboussures Assurez vous d aérer la pellicule plastique afin que la vapeur...

Page 25: ...rre Ne coupez pas et ne retirez pas la troisième lame mise à la terre du cordon d alimentation peu importe les circonstances N utilisez pas d adaptateur de fiche avec cet appareil N utilisez pas de rallonge avec cet appareil Si le cordon d alimentation est trop court faites installer une prise près de l appareil par un électricien qualifié ou un technicien d entretien Pour un meilleur fonctionneme...

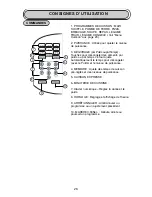
Page 26: ...sé pour ajuster le niveau de puissance 3 DÉGIVRAGE par Poids ou par Temps Touchez pour décongeler des aliments par poids ou par temps Le four ajuste automatiquement le temps pour décongeler avec le Poids et le niveau de puissance 4 MÉMOIRE Ajuste des temps de cuisson pré réglés et des niveaux de puissance 5 CUISSON EXPRESSE 6 MINUTERIE DE CUISSINE 7 Clavier numérique Réglez la durée et le poids 8 ...

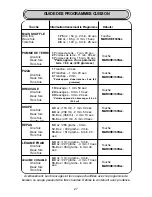
Page 27: ... Pomme de terre 7 min 30 sec 2 Pommes de terre 11 min 00 sec 3 Pommes de terre 15 min 00 sec Poids approx d une pomme de terre 8 3 oz 230 grammes 1 Tranche 40 sec 2 Tranches 1 min 20 sec 3 Tranches 2 min Poids approx d une tranche 3 oz 85 grammes 1 Breuvage 1 min 50 sec 2 Breuvages 3 min 10 sec 3 Breuvages 4 min 20 sec Volume approx d un breuvage 8 5 oz 250 ml 4 0 oz 118 ml 1 min 30 sec 8 0 oz 236...

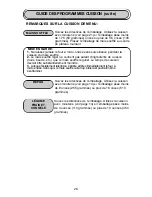
Page 28: ...uile beurre etc que le maïs soufflé régulier Le temps de cuisson devrait être substantiellement moindre 3 Lorsque l éclatement ralentit ou s arrête arrêtez immédiatement le four à micro ondes Sans quoi le maïs soufflé cuira trop brûlera et pourrait même s enflammer REPAS REMARQUES SUR LA CUISSON DE MENU Suivez les directives de l emballage Utilisez la cuisson avec minuterie voir page 14 si l embal...

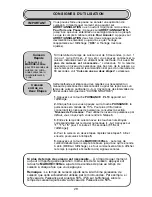
Page 29: ... d 1 min ou 1 min et 30 sec 2 min etc vous pouvez commencer la cuisson instantanément en utilisant cette méthode Voir aussi Si plus de cuisson est nécessaire ci dessous Si la recette nécessite un niveau de puissance plus bas lors de la cuisson ou que le temps de cuisson recommandé n est pas d un intervalle de 30 secondes voir Cuisson une ou deux étapes ci dessous Cette méthode est idéale pour les ...

Page 30: ...ournés ou retournés plus souvent La plupart de la cuisson est effectuée à la valeur par défaut puissance maximale Un réglage plus faible cuira de façon plus égale et nécessitera moins souvent de mélanger ou tourner les aliments Certains aliments peuvent offrir de meilleures saveur texture ou apparence avec une puissance inférieure Utilisez une puissance de cuisson inférieure pour les aliments qui ...

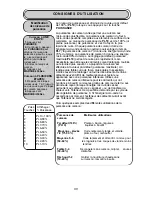
Page 31: ... pour une décongélation plus égale Appuyez sur MARCHE 30Sec pour poursuivre le programme REMARQUE Pendant la décongélation rapid e un bruit sourd peut se faire entendre Ce son est normal lorsque le four ne fonctionne pas à la puissance maximale Guide de conversion Si le poids des aliments ne s affiche qu en livres les livres doivent être converties en onces Trucs de décongélation Les aliments cong...

Page 32: ...t ensuite 5 05 15 sur l affichage 3 Appuyez sur la touche MARCHE 30Sec La minuterie débutera son compte à rebours jusqu à ce qu elle se rende à zéro 0 00 sur l affichage Le four commencera alors à afficher le temps si ajuster et émettera cinq signaux sonores Pour Annuler la MINUTERIE DE CUISINE 1 Appuyez sur ARRÊT ANNULER L affichage affichera de nouveau l horloge si elle est ajustée REMARQUE Le p...

Page 33: ...endant le fonctionnement du four Vous remarquerez peut être une interférence avec les signaux télévisuels et radiophoniques Semblable àl interférence causée par d autres petits appareils électriques elle ne signifie pas qu il y ait un problème avec le four à micro ondes Branchez le four à micro ondes dans un autre circuit électrique déplacez la radio ou la télévision le plus loin possible du four ...

Page 34: ...isit your nearest service depot To request service and or the location of the service depot nearest you call the TOLL FREE NUMBER When requesting service or ordering parts always provide the following information Product Type Model Number Part Description Four à micro ondes Le numéro du modèle se trouve sur la plaque de série sur le panneau arrière de l appareil Toutes les pièces de réparation son...

Reviews: