11
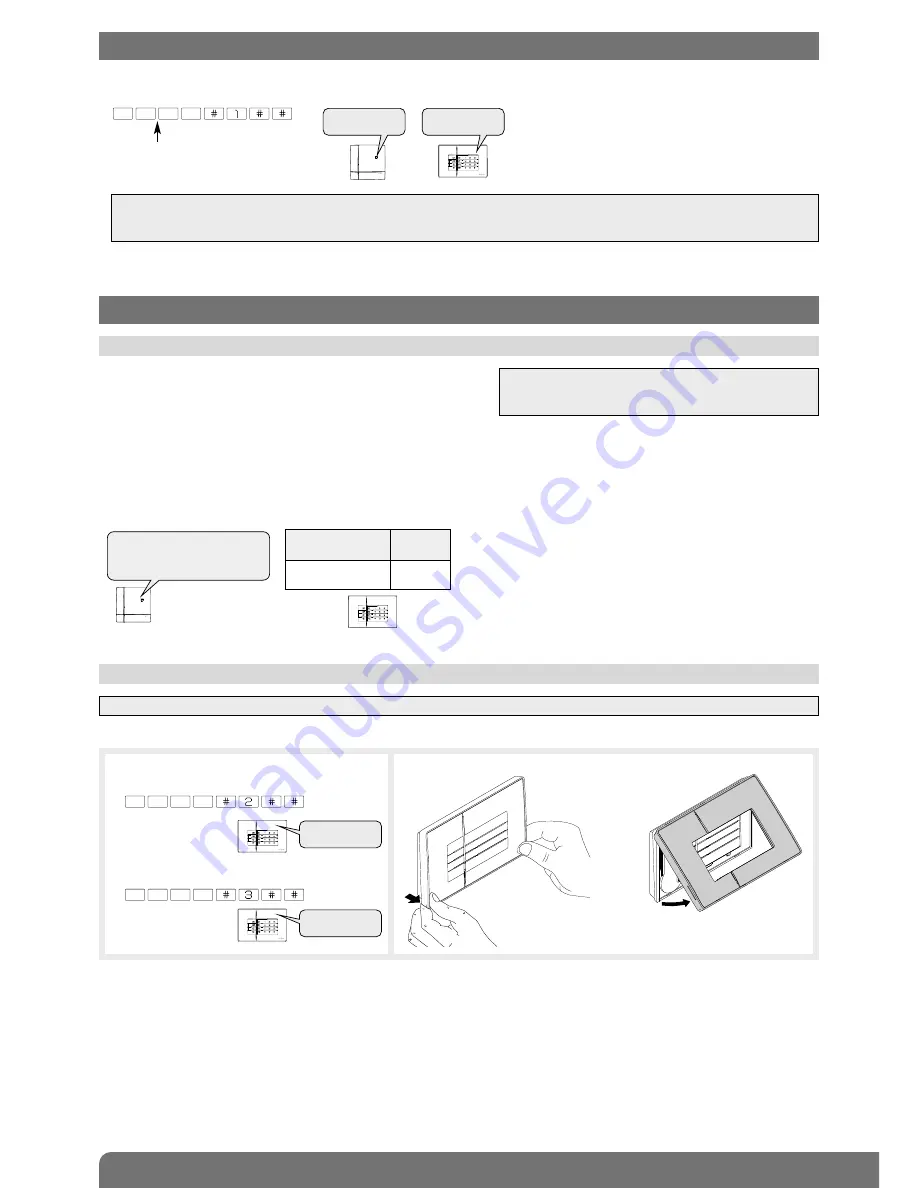
To change the battery:
1.
Switch the system to installation mode
using the keypad to enter:
then
master code
installer code
IMPORTANT: if the battery fails, the red LED and back-lighting no longer come on when a key is pressed.
8.2 Changing the battery
2.
Remove the keypad front panel.
“bip”
“bip”
8.1 Fault indications
The control panel supervises and identifies the keypad.
It monitors the state of:
• the
battery
,
• the
radio link
,
• the
tamper contact
.
If a fault has been memorised, the control panel issues a voice message indicating the fault following a system command
(see § Fault indications in the control panel installation manual).
The keypad also issues an audible and visual signal of faults following a command issued from the keypad.
8. Maintenance
Once the radio range test has been performed:
1.
Switch the keypad to user mode by entering:
7. Switching to user mode
IMPORTANT: putting the keypad in user mode automatically puts the control panel in user mode. Consequently, the keypad
should only be switched to user mode when all the parameters have been set on the different system products (keypads,
detectors, etc.).
installer code
2.
Put the front cover back on the control panel.
• Example: following a system status query command issued from the keypad, the keypad battery fault is indicated:
IMPORTANT: a keypad battery fault is also indicated by
the red LED not being lit and by the absence of back-
lighting when a button is pressed.
LED colour
and status
Buzzer
Lights up steady
RED for 1.5 s
3 short
beeps
“bip”
“bip, Off”
“Bip, system status, armed
partial 2, bip, on 12/03/2012
at 12 PM, fault, voltage,
remote control unit 1”


