Service Manual
Inverter Pair
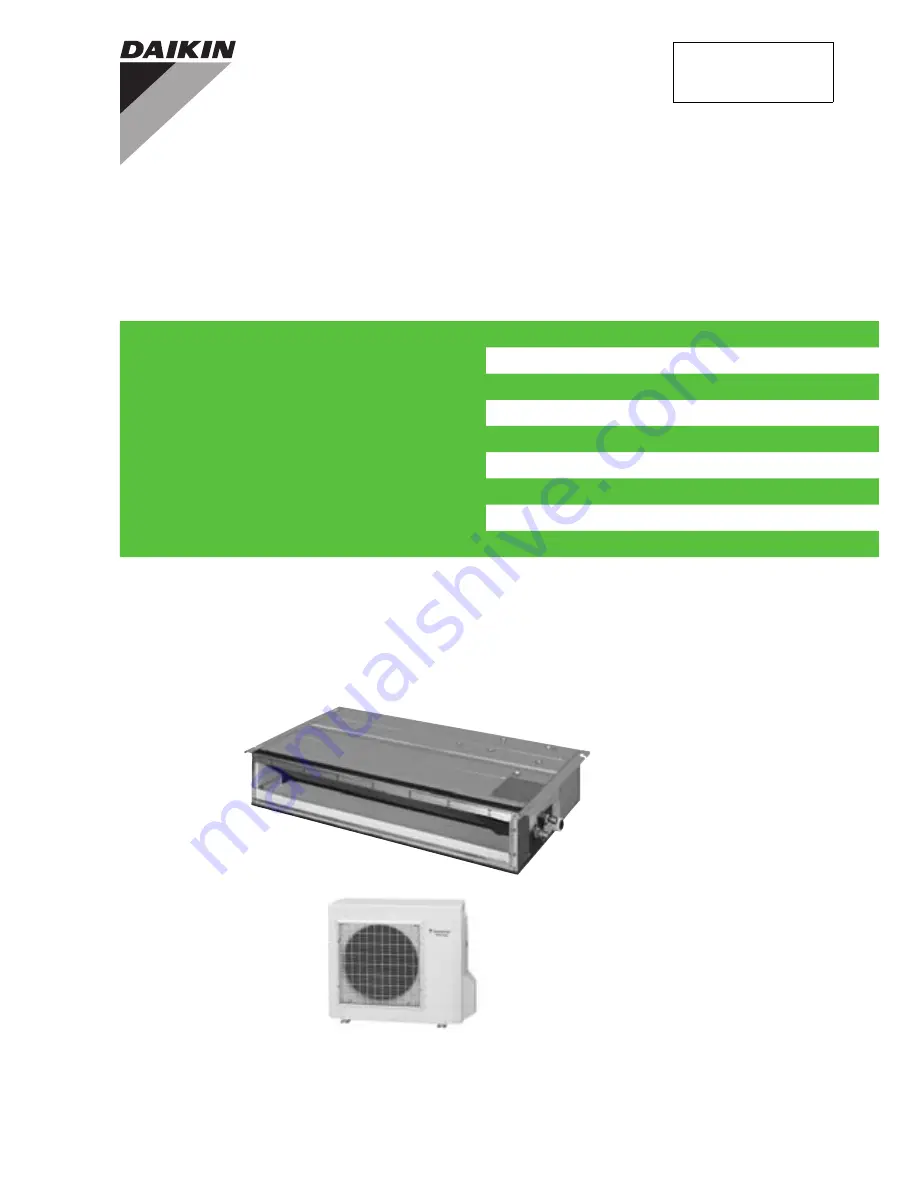
Duct Connected Type C-Series
SiBE07-618_D
[Applied Models]
●
Inverter Pair : Cooling Only
Inverter Pair : Heat Pump
Page 1: ...Service Manual Inverter Pair Duct Connected Type C Series SiBE07 618_D Applied Models Inverter Pair Cooling Only Inverter Pair Heat Pump...
Page 2: ...Type C Series zCooling Only Indoor Unit FDKS50CVMB FDKS60CVMB Outdoor Unit RKS50E2 3 V1B RKS50F2V1B RKS50G2V1B RKS60E2 3 V1B RKS60F2 3 V1B zHeat Pump Indoor Unit FDXS50CVMB FDXS60CVMB Outdoor Unit RX...
Page 3: ...Operation 21 1 5 Automatic Operation 22 1 6 Thermostat Control 23 1 7 NIGHT SET Mode 24 1 8 HOME LEAVE Operation 25 1 9 Inverter POWERFUL Operation 26 1 10 Other Functions 27 2 Function of Thermistor...
Page 4: ...rload 68 4 10 Compressor Lock 69 4 11 DC Fan Lock 70 4 12 Input Overcurrent Detection 71 4 13 Four Way Valve Abnormality 72 4 14 Discharge Pipe Temperature Control 74 4 15 High Pressure Control in Coo...
Page 5: ...ngs 130 4 1 When 2 Units are Installed in 1 Room 130 4 2 Facility Setting Switch cooling at low outdoor temperature 131 4 3 Jumper and Switch Settings 131 5 Application of Silicon Grease to a Power Tr...
Page 6: ...wer cable plug from the plug socket before disassembling the equipment for repair Working on the equipment that is connected to the power supply may cause an electrical shock If it is necessary to sup...
Page 7: ...lectrical shock Do not clean the air conditioner by splashing water Washing the unit with water may cause an electrical shock Be sure to provide the grounding when repairing the equipment in a humid o...
Page 8: ...eat generation or fire When wiring between the indoor and outdoor units make sure that the terminal cover does not lift off or dismount because of the cable If the cover is not mounted properly the te...
Page 9: ...event children from swallowing it If a child swallows the coin battery see a doctor immediately Warning Caution Installation of a leakage breaker is necessary in some cases depending on the conditions...
Page 10: ...e to install the packing and seal on the installation frame properly If the packing and seal are not installed properly water may enter the room and wet the furniture and floor For unitary type only C...
Page 11: ...SiBE07 618_D List of Functions 1 Part 1 List of Functions 1 Functions 2...
Page 12: ...ability Auto Restart after Power Failure 3 D Airflow Self Diagnosis Digital LED Display Comfort Control Auto Fan Speed Wiring Error Check Indoor Unit Quiet Operation Anti Corrosion Treatment of Outdoo...
Page 13: ...Restart after Power Failure 3 D Airflow Self Diagnosis Digital LED Display Comfort Control Auto Fan Speed Wiring Error Check Indoor Unit Quiet Operation Anti Corrosion Treatment of Outdoor Heat Excha...
Page 14: ...Durability Auto Restart after Power Failure 3 D Airflow Self Diagnosis Digital LED Display Comfort Control Auto Fan Speed Wiring Error Check Indoor Unit Quiet Operation Anti Corrosion Treatment of Ou...
Page 15: ...SiBE07 618_D Specifications 5 Part 2 Specifications 1 Specifications 6 1 1 Cooling Only 6 1 2 Heat Pump 9...
Page 16: ...roof Removable Washable Mildew Proof Running Current Rated A 0 64 0 74 Power Consumption Rated W 140 160 Power Factor 95 1 94 0 Temperature Control Microcomputer Control Microcomputer Control Dimensio...
Page 17: ...shable Mildew Proof Running Current Rated A 0 64 0 74 Power Consumption Rated W 140 160 Power Factor 95 1 94 0 Temperature Control Microcomputer Control Microcomputer Control Dimensions H W D mm 200 9...
Page 18: ...e Washable Mildew Proof Running Current Rated A 0 64 0 74 Power Consumption Rated W 140 160 Power Factor 95 1 94 0 Temperature Control Microcomputer Control Microcomputer Control Dimensions H W D mm 2...
Page 19: ...able Washable Mildew Proof Removable Washable Mildew Proof Running Current Rated A 0 64 0 64 0 74 0 74 Power Consumption Rated W 140 140 160 160 Power Factor 95 1 95 1 94 0 94 0 Temperature Control Mi...
Page 20: ...shable Mildew Proof Removable Washable Mildew Proof Running Current Rated A 0 64 0 64 0 74 0 74 Power Consumption Rated W 140 140 160 160 Power Factor 95 1 95 1 94 0 94 0 Temperature Control Microcomp...
Page 21: ...e Washable Mildew Proof Removable Washable Mildew Proof Running Current Rated A 0 64 0 64 0 74 0 74 Power Consumption Rated W 140 140 160 160 Power Factor 95 1 95 1 94 0 94 0 Temperature Control Micro...
Page 22: ...07 618_D 12 Printed Circuit Board Connector Wiring Diagram Part 3 Printed Circuit Board Connector Wiring Diagram 1 Printed Circuit Board Connector Wiring Diagram 13 1 1 Indoor Unit 13 1 2 Outdoor Unit...
Page 23: ...eat exchanger thermistor 6 H1 H2 H3 Connector for terminal board 7 GND Connector for terminal board earth 8 JA Address setting jumper Refer to page 130 for detail JB Fan speed setting when compressor...
Page 24: ...or Wiring Diagram SiBE07 618_D 14 Printed Circuit Board Connector Wiring Diagram PCB Detail PCB 1 Control PCB PCB 2 Display PCB S1 H2 S7 S26 S32 JC JB JA S21 2P131149 1 LED A FU1 H1 H3 V1 GND S1 LED3...
Page 25: ...otor 6 S80 Connector for four way valve coil 7 S90 Connector for thermistors outdoor temperature outdoor heat exchanger discharge pipe 8 AC1 AC2 Connector for terminal board power supply 9 HR1 HR2 Con...
Page 26: ...Circuit Board Connector Wiring Diagram PCB Detail PCB 1 Main PCB PCB 2 Service Monitor PCB V3 V11 AC1 E1 E2 FU2 3 15A HR1 HR2 FU3 3 15A 2P169046 1 2P169046 5 2P169046 7 S40 S20 S70 S90 S51 W V U S10 A...
Page 27: ...n 25 1 9 Inverter POWERFUL Operation 26 1 10 Other Functions 27 2 Function of Thermistor 28 3 Control Specification 29 3 1 Mode Hierarchy 29 3 2 Frequency Control 30 3 3 Controls at Mode Changing Star...
Page 28: ...tion The target frequency is set by the following 2 parameters coming from the operating indoor unit The load condition of the operating indoor unit The difference between the room thermistor temperat...
Page 29: ...the set temperature is reached the energy saving operation enables to maintain the room temperature at low power Frequency Limits The following functions regulate the minimum and maximum frequency Fo...
Page 30: ...d operation the step SL is not available The airflow rate is automatically controlled within this range when the FAN setting button is set to automatic Cooling The following drawing explains the princ...
Page 31: ...mperature at start up and the target temperature is divided into two zones Then the unit operates in the dry mode with an appropriate capacity for each zone to maintain the temperature and humidity at...
Page 32: ...ction value 1 The set temperature Ts determines the target temperature Tt Ts 18 30 C 2 The target temperature Tt is calculated as Tt Ts C where C is the correction value C 0 C 3 Thermostat ON OFF poin...
Page 33: ...er being in the zone A The system resumes from defrost control in any zones except A The operation turns on in any zones except A The monitoring time has passed while the temperature difference is in...
Page 34: ...of heating This prevents excessive cooling in summer and excessive heating in winter to ensure comfortable sleeping conditions and also conserves electricity Cooling Heating 0 5 C 0 5 C R12237 0 5 C A...
Page 35: ...on the display of the remote controller The indoor unit is operated according to the set temperature and airflow rate for HOME LEAVE which were pre set in the memory of the remote controller The LED...
Page 36: ...inutes Ex POWERFUL operation in cooling mode Operation mode Fan speed Target temperature COOL H tap 50 rpm 18 C DRY Dry rotating speed 50 rpm Lowered by 2 5 C HEAT H tap 50 rpm 30 C FAN H tap 50 rpm A...
Page 37: ...to start operation Press once again to stop it This button is useful when the remote controller is missing or the battery has run out The operation mode refers to the following table Forced cooling op...
Page 38: ...e pipe temperature used in place of the inner temperature of the compressor rises abnormally the operating frequency becomes lower or the operation halts 2 The discharge pipe thermistor is used for de...
Page 39: ...include defrosting Note Unless specified otherwise an indoor dry operation command is regarded as cooling operation Air conditioner control mode Forced operating mode Forced cooling for Pump Down Ope...
Page 40: ...unctions Compressor protection input current discharge pipe temperature freeze up protection 3 Determine lower limit frequency The maximum value is set as an lower limit frequency among the frequency...
Page 41: ...me airflow rate and other factors PI Control Determine Frequency Up Down by D Signal 1 P control The D value is calculated in each sampling time 20 seconds and the frequency is adjusted according to i...
Page 42: ...liminate the switching sound when the heating is stopped as the four way valve coil switches from ON to OFF the OFF delay switch of the four way valve is carried out after the operation stopped Detail...
Page 43: ...pe temperature rises above a certain level the upper limit of frequency is set to keep this temperature from going up further Detail FCG3 Hz Frequency Sec Time FCG2 FCG1 TCG1 TCG2 TCG3 R10540 FCG 1 FC...
Page 44: ...the compressor is stopped Drooping zone The upper limit of the compressor frequency is defined as operation frequency 2 Hz After this the output frequency is pulled down by 2 Hz every second until it...
Page 45: ...t exchanger temperature determines the frequency upper limit to prevent abnormal high pressure Detail R4561 Reset zone Up zone Keep zone Drooping zone Stop zone 0 C 3 C 5 C 7 C 13 C Indoor heat exchan...
Page 46: ...n speed of the outdoor fan is reduced by the command of the indoor outdoor quiet operation 7 Fan control for POWERFUL operation The rotation speed of the outdoor fan is increased while the POWERFUL op...
Page 47: ...and the outdoor heat exchanger temperature The system is in heating operation The compressor operates for 6 minutes 44 minutes of accumulated time pass since the start of the operation or ending of th...
Page 48: ...lve control when the discharge pipe thermistor is disconnected Feedback Control 1 Discharge pipe temperature control Detail The followings are the examples of control which function in each mode by th...
Page 49: ...inimum opening of the electronic expansion valve are limited Detail The electronic expansion valve is fully closed when cooling is stopped and is opened at fixed degree during defrosting 3 11 4 Starti...
Page 50: ...ndoor heat exchanger temperature Adjustment when the thermistor is disconnected When the disconnection is ascertained the compressor continues operation for 9 minutes and then stops When the compresso...
Page 51: ...the inverter current exceeds 20 A the system shuts down the compressor 3 12 3 Refrigerant Shortage Control Outline I Detecting by power consumption If the power consumption is below the specified val...
Page 52: ...peration Manual 1 System Configuration 43 2 Operation Manual 44 2 1 Remote Controller 44 2 2 AUTO DRY COOL HEAT FAN Operation 45 2 3 POWERFUL Operation 47 2 4 OUTDOOR UNIT QUIET Operation 48 2 5 HOME...
Page 53: ...er method of using it In order to meet this expectation of the users giving sufficient explanations taking enough time can be said to reduce about 80 of the requests for servicing However good the ins...
Page 54: ...on page 12 5 TEMPERATURE adjustment buttons It changes the temperature setting 6 ON OFF button Press this button once to start operation Press once again to stop it 7 MODE selector button It selects t...
Page 55: ...peration mode of your choice From the next time on the air conditioner will operate with the same operation mode 1 Press MODE selector button and select a operation mode 2 Press ON OFF button 3 Press...
Page 56: ...e room After the start of heating operation it takes some time before the room gets warmer In heating operation frost may occur on the outdoor unit and lower the heating capacity In that case the syst...
Page 57: ...OWERFUL operation When using POWERFUL operation there are some functions which are not available is displayed on the LCD disappears from the LCD 1 Press POWERFUL button 2 Press POWERFUL button again N...
Page 58: ...DOOR UNIT QUIET operation Note on OUTDOOR UNIT QUIET operation This function is available in COOL HEAT and AUTO modes This is not available in FAN and DRY mode POWERFUL operation and OUTDOOR UNIT QUIE...
Page 59: ...next time you use the unit To change the recorded information repeat steps 1 3 2 Press HOME LEAVE button again 1 Press HOME LEAVE button is displayed on the LCD The HOME LEAVE lamp lights up The HOME...
Page 60: ...onditioner will adjust capacity to the set temperature for normal operation When you enter the living room in the morning the temperature will be just right Disengaging HOME LEAVE Operation will retur...
Page 61: ...again 4 Press CANCEL button Every pressing of either button increases or decreases the time setting by 10 minutes Holding down either button changes the setting rapidly The TIMER lamp lights up The TI...
Page 62: ...rapidly The TIMER lamp lights up The TIMER lamp goes off A sample setting for combining the two timers is shown below Present time 11 00 p m The unit operating To use ON TIMER operation To cancel ON...
Page 63: ...and Outdoor Unit 66 4 8 Outdoor Unit PCB Abnormality 67 4 9 OL Activation Compressor Overload 68 4 10 Compressor Lock 69 4 11 DC Fan Lock 70 4 12 Input Overcurrent Detection 71 4 13 Four Way Valve Abn...
Page 64: ...f the indoor unit or the outdoor unit is activated or when the thermistor malfunctions 2 When a signal transmission error occurs between the indoor unit and the outdoor units In either case conduct th...
Page 65: ...eating operation cannot be used when the outdoor temperature is 18 C or higher and cooling operation cannot be used when the outdoor temperature is below 10 C Diagnose with remote controller indicatio...
Page 66: ...Note 1 A short beep pi and two consecutive beeps pi pi indicate non corresponding codes 2 To return to the normal mode hold the timer cancel button down for 5 seconds When the remote controller is lef...
Page 67: ...until you hear the sound of beep or pi pi 3 Diagnose by the sound pi The figure of the ten s place does not accord with the error code pi pi The figure of the ten s place accords with the error code...
Page 68: ...both figures of the ten s and one s place accord with the error code 7 Determine the error code The figures indicated when you hear the beep sound are error code Error codes and description Refer to p...
Page 69: ...oom temperature thermistor or related abnormality 64 Outdoor Unit E1 Outdoor unit PCB abnormality 67 E5 OL activation compressor overload 68 E6 Compressor lock 69 E7 DC fan lock 70 E8 Input overcurren...
Page 70: ...n of connector Troubleshooting Note Check the following connector Check the combination of the indoor and outdoor unit OK Check the connection of connectors See Note Correct the connection OK Error re...
Page 71: ...ing heating operation the temperature detected by the indoor heat exchanger thermistor is used for the heating peak cut control operation halt outdoor fan stop etc Malfunction Decision Conditions Free...
Page 72: ...an the air filter Clean the indoor heat exchanger Replace the indoor unit PCB Replace the thermistor Does it conform to the thermistor characteristic chart Check the air filter Check the dust accumula...
Page 73: ...P 101 NO NO NO Check No 16 Check Hall IC NO NO NO YES YES YES YES YES YES R11411 Caution Replace the fan motor or the indoor unit PCB Replace the fan motor Replace the indoor unit PCB Replace the cap...
Page 74: ...ompressor operation Supposed Causes Disconnection of connector Defective thermistor Defective indoor unit PCB Troubleshooting Check No 06 Refer to P 95 C4 Indoor heat exchanger thermistor C9 Room temp...
Page 75: ...hooting Check No 10 Refer to P 97 Check No 10 Check the power supply waveform Check the voltage of the connection wires on the indoor terminal board between No 1 and No 3 and between No 2 and No 3 YES...
Page 76: ...iring of connection wires Wrong indoor unit PCB or outdoor unit PCB mounted Defective indoor unit PCB Defective outdoor unit PCB Troubleshooting R11707 Caution NO YES YES YES NO NO Check the code numb...
Page 77: ...ning order Supposed Causes Defective outdoor unit PCB Noise Momentary fall of voltage Momentary power failure Troubleshooting R7183 Caution Be sure to turn off the power switch before connecting or di...
Page 78: ...ective stop valve Troubleshooting Check No 04 Refer to P 93 Check No 05 Refer to P 94 Check No 06 Refer to P 95 Check No 11 Refer to P 97 R11971 Caution YES NG Discharge pipe thermistor NO OK OK NG Re...
Page 79: ...shooting Check No 14 Refer to P 99 Turn off the power Disconnect the harnesses U V and W R8065 Caution Be sure to turn off the power switch before connecting or disconnecting connectors or parts may b...
Page 80: ...es Disconnection of the fan motor Foreign matters stuck in the fan Defective fan motor Defective outdoor unit PCB Troubleshooting Check No 15 Refer to P 101 R11708 Caution YES YES NO YES NO NO YES NO...
Page 81: ...efore connecting or disconnecting connectors or parts may be damaged An input overcurrent may result from wrong internal wiring If the wires have been disconnected and reconnected for part replacement...
Page 82: ...lfunction Decision Conditions A following condition continues over 1 minute after operating for 10 minutes Cooling Dry room thermistor temp indoor heat exchanger temp 5 C Heating indoor heat exchanger...
Page 83: ...e check procedure Replace the four way valve defective or dust clogged Reconnect in position Caution Be sure to turn off the power switch before connecting or disconnecting connectors or parts may be...
Page 84: ...emperature thermistor Defective electronic expansion valve or coil Refrigerant shortage Defective four way valve Water mixed in refrigerant Defective stop valve Defective outdoor unit PCB Troubleshoot...
Page 85: ...thermistor Defective outdoor unit PCB Troubleshooting Check No 04 Refer to P 93 Check No 06 Refer to P 95 Check No 07 Refer to P 96 Check No 08 Refer to P 96 Check No 09 Refer to P 97 R11897 Caution...
Page 86: ...operly R7174 NO YES Connect it properly NO YES Replace the reactor NO YES Replace the compressor or the compressor relay harness Restart the operation again and if the error occurs again replace the o...
Page 87: ...r running condition through the position detection circuit Malfunction Decision Conditions If the error repeats 8 times the system is shut down Reset condition Continuous run for about 5 minutes witho...
Page 88: ...rrect the power supply Voltage as rated R11471 NO NO YES NO YES YES Check No 14 Check with the inverter checker Turn off the power Disconnect the harnesses U V and W Turn on the power Check the electr...
Page 89: ...cy and CT detected input current Malfunction Decision Conditions The compressor running frequency is more than A Hz and the CT input current is below B A If the error repeats 4 times the system is shu...
Page 90: ...n the power again and restart operation Compressor running 320 50 VDC Any LED OFF Running current as shown at right with relay cable 1 or 2 Voltage within the allowable range Supply voltage 15 Replace...
Page 91: ...V with the power on J3 error is judged if the discharge pipe temperature is lower than the outdoor heat exchanger temperature Supposed Causes Disconnection of the connector for the thermistor Defecti...
Page 92: ...ollowing thermistors Outdoor temperature thermistor Discharge pipe thermistor Outdoor heat exchanger thermistor Cooling Outdoor heat exchanger temperature Heating Indoor heat exchanger temperature Rep...
Page 93: ...n Decision Conditions With the compressor off the radiation fin temperature is above A C The error is cleared when the radiation fin temperature drops below B C To cool the electrical components the o...
Page 94: ...mperature rises above C C and stops when it drops below B C R11409 YES NO Slightly dirty NG Too dirty OK NO YES Turn off the power and turn it on again Check the radiation fin temperature Check No 07...
Page 95: ...fin temperature with the compressor on is above A C The error is cleared when the radiation fin temperature drops below B C If the error repeats the system is shut down Reset condition Continuous run...
Page 96: ...tart the system Check the radiation fin temperature Check No 07 Check the installation condition NO YES YES Radiation fin dirty Above A C Check No 09 Check the outdoor fan or related Error displayed a...
Page 97: ...urs while the compressor is running A speed error occurs while the compressor is running An output overcurrent signal is fed from the output overcurrent detection circuit to the microcomputer If the e...
Page 98: ...Check No 07 Check the installation condition Check No 14 Check with the inverter checker Turn off the power and disconnect the harnesses U V and W Turn off the power and reconnect the harnesses Turn...
Page 99: ...tion I The following conditions continue for 7 minutes DC current A Output frequency B Output frequency C Refrigerant shortage detection II The following conditions continue for 80 seconds Target open...
Page 100: ...epair the pipe flare or replace the union Check the power transistor harness for looseness Correct it as required Also replace the cracked pipe Check the pipes for improper contact Correct them as req...
Page 101: ...ssor stops if the error occurs and restarts automatically after 3 minute standby Supposed Causes Supply voltage is not as specified Defective DC voltage detection circuit Defective over voltage detect...
Page 102: ...data sent from the PM1 can not be received for 9 seconds The error counter is reset when the data from the PM1 can be successfully received Supposed Causes Defective outdoor unit PCB Troubleshooting...
Page 103: ...atching sound 3 If the EV does not generate latching sound in the above step 2 disconnect the connector and check the continuity using a tester 4 Check the continuity between the pins 1 6 and 3 6 and...
Page 104: ...he power and turn it on again Disconnect the four way valve coil from the connector and check the continuity Start heating operation Four way valve coil Cooling Dry No continuity Heating Continuity Re...
Page 105: ...ture and resistance is shown in the table and the graph below For the models in which the thermistor is directly mounted on the PCB disconnect the connector for the PCB and measure Thermistor temperat...
Page 106: ...ocation or direction Check the allowable dimensions of the air suction and discharge area Is the airflow blocked by obstacles or winds blowing in the opposite direction R12221 NG YES YES YES Is the di...
Page 107: ...rm disturbance near the zero cross sections circled in Fig 2 5 1 8 Inverter Units Refrigerant System Check Check No 11 R7159 YES YES NO NO Outdoor fan system is functioning Check the outdoor fan syste...
Page 108: ...he outdoor unit PCB To disengage the connector press the protrusion on the connector Follow the procedure below to measure resistance between the terminals of the DB1 and the terminals of the compress...
Page 109: ...voltage of the built in smoothing electrolytic capacitor drops to 10 VDC or below before carrying out the service work Reference If the terminals of the compressor are not FASTON terminals difficult...
Page 110: ...ck if there is any solder cracking on the PCB 4 If any solder cracking is found replace the PCB or repair the soldered section If there is no solder cracking replace the PCB Caution 1 When the output...
Page 111: ...check the outdoor fan motor for proper function If NG in step 2 Defective PCB Replace the outdoor unit PCB If NG in step 4 Defective Hall IC Replace the outdoor fan motor If OK in both steps 2 and 4 R...
Page 112: ...Removal of Outer Panels 103 1 2 Removal of Outdoor Fan Fan Motor 107 1 3 Removal of Electrical Box 111 1 4 Removal of PCB 116 1 5 Removal of Sound Blanket Thermistors 119 1 6 Removal of Four Way Valv...
Page 113: ...0 minutes or more after turning off all power supplies before disassembling work Step Procedure Points 1 Remove the panels Take care not to cut your finger by the fins of the outdoor heat exchanger 1...
Page 114: ...scharge grille has 4 hooks 3 Remove the 6 screws of the front panel 4 Push the front panel and lift the shield plate to unfasten the hooks Step Procedure Points Front panel R12284 Shield plate R5248 1...
Page 115: ...t side hooks and then the right side hook Remove the front panel Lift the front panel while pushing the left side panel inwards Lift the front panel and unfasten the right side hook When reassembling...
Page 116: ...Procedure 2 Remove the stop valve cover 1 Remove the screw of the stop valve cover 2 Pull down the stop valve cover to unfasten the hooks and remove it The stop valve cover has 6 hooks Step Procedure...
Page 117: ...dure Points 1 Remove the electrical box cover Preparation Remove the top panel and the front panel according to the Removal of Outer Panels This procedure is not necessary to remove the outdoor fan on...
Page 118: ...07 618_D 108 Removal Procedure 2 Remove the fan motor 1 Disconnect the connector for the fan motor S70 2 Release the fan motor lead wire from the 7 hooks Step Procedure Points R5258 S70 R5259 Fan moto...
Page 119: ...n with D cut section of the motor shaft 4 Remove the lower 2 screws from the fan motor first Be sure to remove the lower screws first If the upper screws are removed first the fan motor the center of...
Page 120: ...Release the fan motor lead wire from the 2 hooks and pull the fan motor out When reassembling put the fan motor lead wire through the back of the fan motor so as not to be entangled with the outdoor f...
Page 121: ...assembling work Step Procedure Points 1 Remove the 2 screws of the shield plate Preparation Remove the top panel and the front panel according to the Removal of Outer Panels 2 Slide the shield plate u...
Page 122: ...iBE07 618_D 112 Removal Procedure 4 Disconnect the 2 earth wires 5 Remove the 3 screws of the right side panel 6 Remove the screw of the electrical box Step Procedure Points Earth wires R5269 R5270 Ri...
Page 123: ...the 2 hooks of the lower part and the 1 hook of the upper back 8 Disconnect the connectors of the front side S20 electronic expansion valve coil S40 overload protector S80 four way valve coil S90 ther...
Page 124: ...Release the clamp of the compressor relay harness with pliers 11 Detach the clamp and release the thermistor lead wires from the hook 12 Remove the screw Step Procedure Points R5277 Compressor relay h...
Page 125: ...7 618_D Outdoor Unit Removal Procedure 115 13 Release the harness of the outdoor temperature thermistor from the hook 14 Lift and remove the electrical box Step Procedure Points R9403 R5279 Electrical...
Page 126: ...e disassembling work Step Procedure Points 1 Disconnect the connectors from the service monitor PCB S52 S102 Preparation Remove the electrical box according to the Removal of Electrical Box 2 Detach t...
Page 127: ...asten the hook on the right 5 Open the terminal board 6 Disconnect the harnesses 1 Black 2 White 3 Red L1 Black L2 Brown N1 White N2 Blue 7 Disconnect the 2 connectors for the reactor HR1 HR2 Step Pro...
Page 128: ...7 618_D 118 Removal Procedure 8 Remove the 3 screws of the main PCB 9 Unfasten the 4 hooks 10 Lift up and remove the main PCB Refer to page 16 for detail Step Procedure Points Main PCB R5287 R5288 Hoo...
Page 129: ...more after turning off all power supplies before disassembling work Step Procedure Points 1 Remove the sound blanket back 2 Remove the sound blanket outer Since the piping ports are torn easily remove...
Page 130: ...ease the discharge pipe thermistor Be careful not to lose the clip for the thermistor 7 Cut the clamp and pull out the outdoor heat exchanger thermistor Step Procedure Points Sound blanket top lower R...
Page 131: ...1 Restore the piping by non oxidation brazing 2 It is required to prevent the carbonization of the oil inside the four way valve and the deterioration of the gaskets affected by heat Keep below 120 C...
Page 132: ...s brazing machine Warning If the refrigerant gas leaks during work ventilate the room If the refrigerant gas is exposed to flames toxic gas may be generated Caution From the viewpoint of global enviro...
Page 133: ...sor Procedure Warning Be sure to wait for 10 minutes or more after turning off all power supplies before disassembling work Step Procedure Points 1 Remove the terminal cover 2 Disconnect the lead wire...
Page 134: ...d to flames toxic gas may be generated Warning Since it may happen that the refrigerant oil in the compressor catches fire prepare wet cloth so as to extinguish fire immediately Caution From the viewp...
Page 135: ...easy to disconnect and restore 2 Cut pipes on the main unit with a tube cutter in order to make it easy to disconnect Note Do not use a metal saw for cutting pipes by all means because the sawdust com...
Page 136: ...tion 127 2 Forced Cooling Operation Mode 128 3 Trial Operation 129 4 Field Settings 130 4 1 When 2 Units are Installed in 1 Room 130 4 2 Facility Setting Switch cooling at low outdoor temperature 131...
Page 137: ...Detail 1 Remove the valve caps from the liquid stop valve and the gas stop valve 2 Carry out forced cooling operation 3 After 5 to 10 minutes close the liquid stop valve with a hexagonal wrench 4 Aft...
Page 138: ...s not operating The forced cooling operation is allowed when the above both conditions are met Start Press the forced cooling operation ON OFF button SW1 on the indoor unit for 5 seconds Command frequ...
Page 139: ...then restarts operation with the previous mode when the circuit breaker is restored In cooling mode select the lowest programmable temperature in heating mode select the highest programmable temperatu...
Page 140: ...ed in 1 room 1 of the 2 pairs of indoor unit and wireless remote controller can be set for different addresses Both the indoor unit PCB and the wireless remote controller need alteration Indoor Unit P...
Page 141: ...not place humidifiers or other items which might raise the humidity in rooms where facility settings are being used A humidifier might cause dew jumping from the indoor unit outlet vent 4 Use the indo...
Page 142: ...r encouraging the heat radiation of the power transistor and the diode bridge Applying the paste should be implemented in accordance with the following instruction Remark There is the possibility of f...
Page 143: ...SiBE07 618_D Appendix 133 Part 9 Appendix 1 Piping Diagrams 134 1 1 Indoor Unit 134 1 2 Outdoor Unit 135 2 Wiring Diagrams 136 2 1 Indoor Unit 136 2 2 Outdoor Unit 137...
Page 144: ...Indoor Unit FDKS50 60CVMB FDXS50 60CVMB FIELD PIPING FIELD PIPING A CuT 6 4CuT INDOOR UNIT SIROCCO FAN 6 4CuT A CuT FAN MOTOR M REFRIGERANT FLOW HEAT EXCHANGER COOLING HEATING 12 7 FDXS50CVMB FDXS60C...
Page 145: ...S STOP VALVE WITH SERVICE PORT LIQUID STOP VALVE MUFFLER WITH FILTER MOTOR OPERATED VALVE MUFFLER WITH FILTER OUTDOOR AIR TEMPERATURE THERMISTOR CAPILLARY TUBE 2 CAPILLARY TUBE 3 3D051636N OUTDOOR UNI...
Page 146: ...H1 Z1C N 2 GRN GRN WHT BLK RED YLW YLW X1M 2 3 1 CAUTION FIELD WIRING 2 3 1 outdoor SIGNAL RECEIVER TERMINAL FOR CENTRALIZED CONTROL WIRELESS REMOTE CONTROLLER TRANSMISSION CIRCUIT NOTE THAT OPERATIO...
Page 147: ...FERRITE CORE X1M X2M TERMINAL STRIP Y1E ELECTRONIC EXPANSION VALVE COIL V2 V3 V5 V6 V11 VARISTOR SA2 SURGE ARRESTER FU1 FU2 FU3 FUSE AC1 AC2 U V W X11A X12A E1 E2 HR1 HR2 CONNECTOR outdoor indoor FIEL...
Page 148: ...4 LOCAL SETTING SW SW4 MRM10 MRM20 MRC W MAGNETIC RELAY R1T R3T THERMISTOR S2 S102 CONNECTOR LEDA PILOT LAMP outdoor SA2 FIELD WIRING YLW GRN SHEET METAL X1M indoor 4 WHT 5 E2 BLK S90 3 15A BLU 1 U BR...
Page 149: ...OTECTOR PM1 POWER MODULE PCB1 2 PRINTED CIRCUIT BOARD Y1R REVERSING SOLENOID VALVE COIL SHEET METAL TERMINAL STRIP FIXED PLATE 3D050706K L1R GRN GRN YLW Z1C WHT WHT X1M HR2 GRN HR1 E1 Z5C E2 L SA2 MRM...
Page 150: ...l carefully before using this product The User s Manual provides important safety instructions and warnings Be sure to follow these instructions and warnings If you have any enquiries please contact y...