EWAD120~340MBYNN
Packaged air-cooled water chillers
4PW22683-1
Operation manual
12
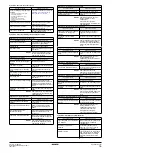
Defining the pump control settings
The
screen of the user settings menu allows the user
to define the pump-leadtime and pump-lagtime.
■
: used to define the time that the pump must run
before the unit (or the compressor in case
is selected in a DICN configuration) can start up.
■
: used to define the time that the pump keeps
running after the unit (or the compressor in case
is selected in a DICN configuration) has been
stopped.
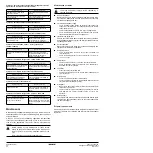
Defining the schedule timer
To activate the screens of the schedule timer or holiday period, these
first need to be enabled by changing their setting to
in the
appropriate screen. To de-activate the schedule timer or holiday
period, their setting needs to be reset to
. (See
The
screen of the user settings menu allows the
user to define the schedule timer settings.
Each day of the week can be appointed to a group. The actions
defined in a group will be executed in each day belonging to that
group.
■
,
,
,
,
,
and
: used to define to which
group each day of the week belongs (
/
/
/
"
/
#
).
■
For each of the four groups up to nine actions can be set, each
with their respective timing. Actions include: putting the unit on
(
), putting the unit off (
), setting a setpoint (
,
,
,
) and setting capacity limitation (
,
,
"
,
#
,
).
■
Beside these four groups there is also a holiday period group
which is set the same way as the other groups. Up to 12 holiday
periods can be entered in the
screen. During these
periods the schedule timer will follow the settings of the holiday
period group.
Defining dual evaporator pump control
The
&
screen of the user settings menu allows the
user to define the steering of two evaporator pumps (for this to be
possible a changeable digital output has to be configured for a
second evaporator pump in the service menu). Refer to the
installation manual.
■
: used to define which kind of control will be used for the
two evaporator pumps. When automatic rotation is chosen the
offset on running hours also has to be entered.
•
: pump 1 and pump 2 will alternate to the offset on RH.
•
: pump 1 will always start up first.
•
: pump 2 will always start up first.
■
: used to define the offset in running hours
between the two pumps. Used to switch over between pumps
when they work in automatic rotation mode.
Defining the floating setpoint settings
The
screen of the user settings menu allows
the active setpoint to be modified in function of the ambient. The
source and settings of the floating setpoint can be configured by the
user.
■
: used to define the mode of the floating setpoint.
•
: floating setpoint is not activated.
•
: floating setpoint is altered based on the ambient
temperature.
■
4&
: used to define maximum value that can be added
to the active setpoint.
■
: used to define the ambient (source) at which the floating
setpoint value is equal to zero.
■
: used to define the rise in floating setpoint value for 10°C
drop in ambient.
Defining the display settings
The
screens of the usersettings menu allows
the user to define the choice of language, time and date.
■
: used to define the language of the displayed
information of the controller (on the first screen). (Push the
q
button repeatedly to change the operating language).
■
: used to define the present time (on the second screen).
■
: used to define the present date (on the second screen).
Defining free cooling
The
screen of the usersettings menu allows the user
to control a 3-way water valve when the unit is in free cooling state.
To make this possible a changeable digital output has to be
configured for free cooling in the service menu. (Refer to the
installation manual.)
■
: used to define the free cooling mode.
•
: free cooling is not active.
•
: free cooling is based on ambient temperature.
•
: free cooling is based on the difference
between inlet water temperature and ambient temperature.
■
: setting of the free cooling setpoint.
■
: setting of the free cooling difference.
Defining the network settings
The
screen of the user settings menu allows the user to
define the network settings.
■
: Define the number of slaves connected to the
master (1 to 3). This menu can only be accessed at the “Master”
unit.
The
screen of the network menu allows the user to set the
of the unit, the
time and the condition when the pump
must operate.
■
: Define the mode of the unit as
,
or
.
•
: The unit is controlled by the network. Loading and
unloading is decided by the central control of the netwerk. Putting
this unit ON or OFF will also put all other units ON or OFF, unless
their status is
. (see further)
Changing
or
to
this unit, will apply to all other units.
on such
a unit is not possible. Refer to
"Defining and activating the control
.
NOTE
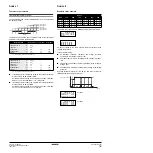
A functional diagram showing the schedule timer
working can be found in
NOTE
The unit always works with “last command”. This
means that the last command given, whether manually
by the user or by the schedule timer, is always
executed.
Examples of command that can be given are switching
the unit on/off or changing a setpoint.
NOTE
In case of a DICN network, defining the schedule timer
will only be possible through the master unit. In case of
power failure of the master unit, the slave units
however, will still operate according to settings of the
schedule timer.
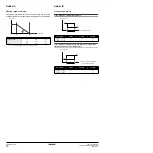
NOTE
A functional diagram showing the floating setpoint
working can be found in
NOTE
A functional diagram showing the free cooling working
can be found in
.


