Service Manual
Inverter Pair
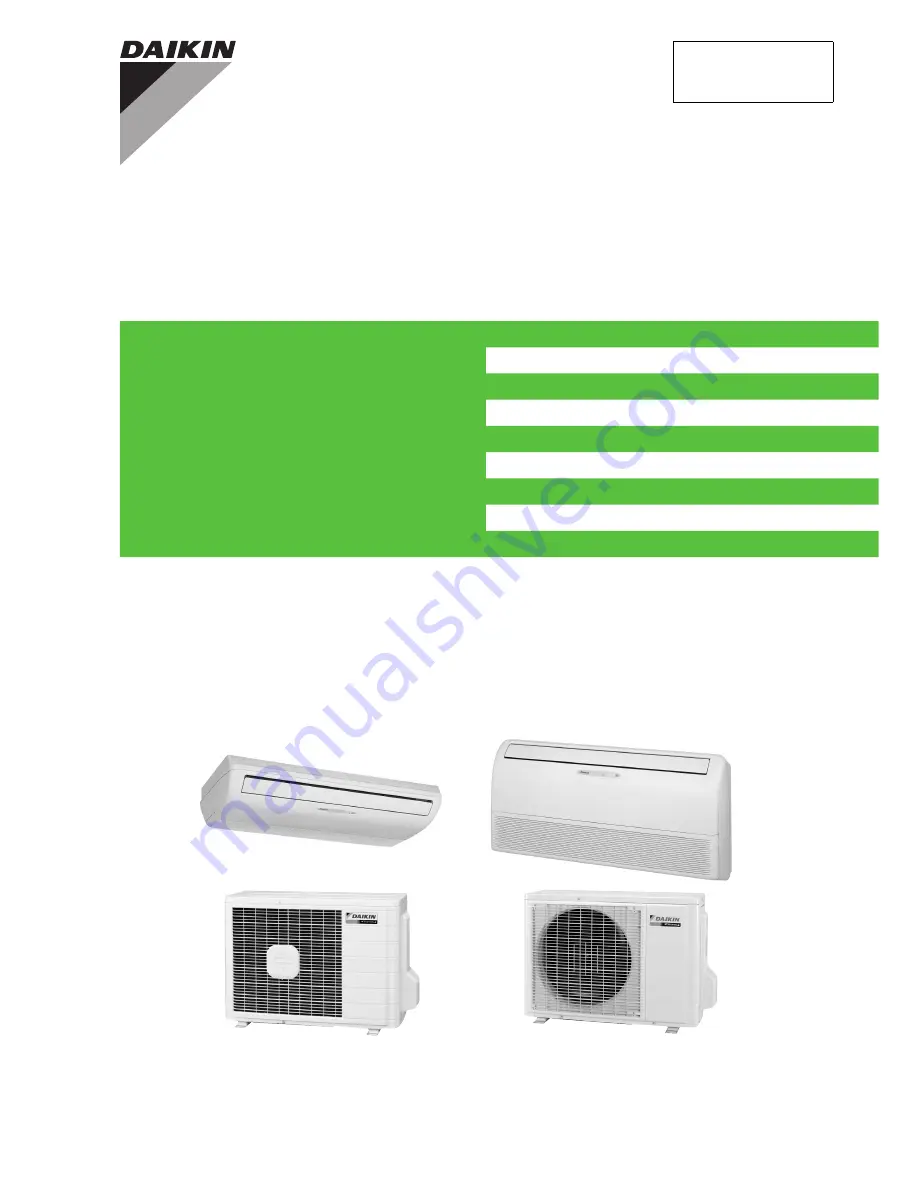
Floor / Ceiling Suspended Dual TypeBA-Series
SiBE05-722ED
[Applied Models]
●
Inverter Pair : Cooling Only
Inverter Pair : Heat Pump
Page 1: ...Service Manual Inverter Pair Floor Ceiling Suspended Dual Type BA Series SiBE05 722ED Applied Models Inverter Pair Cooling Only Inverter Pair Heat Pump ...
Page 2: ...oor Unit FLKS25BAVMB FLKS35BAVMB Outdoor Unit RKS25E2V1B RKS25G2V1B RKS35E2V1B RKS35G2V1B RKS25G2V1B9 RKS35G2V1B9 zHeat Pump Indoor Unit FLXS25BAVMB FLXS35BAVMB9 FLXS35BAVMB Outdoor Unit RXS25E2V1B RXS25G2V1B RXS25J2V1B RXS35L2V1B RXS35E2V1B RXS35G2V1B RXS35J2V1B RXS25G2V1B9 RXS25K3V1B RXS35G2V1B9 RXS35K2V1B ...
Page 3: ...6 1 Main Functions 27 1 1 Temperature Control 27 1 2 Frequency Principle 27 1 3 Airflow Direction Control 29 1 4 Fan Speed Control for Indoor Unit 29 1 5 Program Dry Operation 30 1 6 Automatic Operation 31 1 7 Thermostat Control 32 1 8 NIGHT SET Mode 33 1 9 HOME LEAVE Operation 34 1 10 Inverter POWERFUL Operation 35 1 11 Clock Setting 36 1 12 Other Functions 37 2 Function of Thermistor 38 3 Contro...
Page 4: ...Abnormality 75 4 11 OL Activation Compressor Overload 76 4 12 Compressor Lock 78 4 13 DC Fan Lock 79 4 14 Input Overcurrent Detection 80 4 15 Four Way Valve Abnormality 81 4 16 Discharge Pipe Temperature Control 83 4 17 High Pressure Control in Cooling 84 4 18 Compressor System Sensor Abnormality 85 4 19 Position Sensor Abnormality 86 4 20 DC Voltage Current Sensor Abnormality 88 4 21 Thermistor o...
Page 5: ...ration 114 4 Field Settings 115 4 1 When 2 Units are Installed in 1 Room 115 4 2 Facility Setting Jumper cooling at low outdoor temperature 116 4 3 Jumper and Switch Settings 117 5 Silicon Grease on Power Transistor Diode Bridge 118 Part 8 Appendix 119 1 Piping Diagrams 120 1 1 Indoor Unit 120 1 2 Outdoor Unit 121 2 Wiring Diagrams 123 2 1 Indoor Unit 123 2 2 Outdoor Unit 123 ...
Page 6: ...s Warning Do not store the equipment in a room with successive fire sources e g naked flame gas appliance electric heater Be sure to disconnect the power cable plug from the plug socket before disassembling the equipment for repair Working on the equipment that is connected to the power supply may cause an electrical shock If it is necessary to supply power to the equipment to conduct the repair o...
Page 7: ...R 22 in the refrigerant system If air enters the refrigerating system an excessively high pressure results causing equipment damage and injury Warning Caution Do not repair the electrical components with wet hands Working on the equipment with wet hands may cause an electrical shock Do not clean the air conditioner by splashing water Washing the unit with water may cause an electrical shock Be sur...
Page 8: ... heat generation or fire Be sure to use an exclusive power circuit for the equipment and follow the local technical standards related to the electrical equipment the internal wiring regulations and the instruction manual for installation when conducting electrical work Insufficient power circuit capacity and improper electrical work may cause an electrical shock or fire Be sure to use the specifie...
Page 9: ...conducted securely the equipment may fall and cause injury Check to make sure that the power cable plug is not dirty or loose then insert the plug into a power outlet securely If the plug has dust or loose connection it may cause an electrical shock or fire Be sure to install the product correctly by using the provided standard installation frame Incorrect use of the installation frame and imprope...
Page 10: ...y grounded Improper grounding may cause an electrical shock Be sure to measure the insulation resistance after the repair and make sure that the resistance is 1 MΩ or higher Faulty insulation may cause an electrical shock Be sure to check the drainage of the indoor unit after the repair Faulty drainage may cause the water to enter the room and wet the furniture and floor Do not tilt the unit when ...
Page 11: ...tion is used when there is danger that the reader through incorrect manipulation may damage equipment loose data get an unexpected result or has to restart part of a procedure Note Note A Note provides information that is not indispensable but may nevertheless be valuable to the reader such as tips and tricks Reference A Reference guides the reader to other places in this binder or in this manual ...
Page 12: ...SiBE05 722ED 1 List of Functions Part 1 List of Functions 1 Functions 2 ...
Page 13: ...agnosis digital LED display z z Auto swing right and left Wiring error check function 3 D airflow Anti corrosion treatment of outdoor heat exchanger z z Comfort Control Auto fan speed z z Indoor unit quiet operation z z Flexibility Multi split split type compatible indoor unit z z NIGHT QUIET mode automatic OUTDOOR UNIT QUIET operation manual z z Flexible power supply correspondence INTELLIGENT EY...
Page 14: ...s digital LED display z z Auto swing right and left Wiring error check function 3 D airflow Anti corrosion treatment of outdoor heat exchanger z z Comfort Control Auto fan speed z z Indoor unit quiet operation z z Flexibility Multi split split type compatible indoor unit z z NIGHT QUIET mode automatic OUTDOOR UNIT QUIET operation manual z z Flexible power supply correspondence INTELLIGENT EYE oper...
Page 15: ...sis digital LED display z z Auto swing right and left Wiring error check function 3 D airflow Anti corrosion treatment of outdoor heat exchanger z z Comfort Control Auto fan speed z z Indoor unit quiet operation z z Flexibility Multi split split type compatible indoor unit z z NIGHT QUIET mode automatic OUTDOOR UNIT QUIET operation manual z z Flexible power supply correspondence INTELLIGENT EYE op...
Page 16: ...iagnosis digital LED display z z Auto swing right and left Wiring error check function 3 D airflow Anti corrosion treatment of outdoor heat exchanger z z Comfort Control Auto fan speed z z Indoor unit quiet operation z z Flexibility Multi split split type compatible indoor unit z z NIGHT QUIET mode automatic OUTDOOR UNIT QUIET operation manual z z Flexible power supply correspondence INTELLIGENT E...
Page 17: ...swing right and left Wiring error check function 3 D airflow Anti corrosion treatment of outdoor heat exchanger z Comfort Control Auto fan speed z Indoor unit quiet operation z Flexibility Multi split split type compatible indoor unit z NIGHT QUIET mode automatic OUTDOOR UNIT QUIET operation manual z Flexible power supply correspondence INTELLIGENT EYE operation Chargeless 10 m Quick warming funct...
Page 18: ...SiBE05 722ED 7 Specifications Part 2 Specifications 1 Specifications 8 1 1 Cooling Only 8 1 2 Heat Pump 11 ...
Page 19: ...vable Washable Mildew Proof Removable Washable Mildew Proof Running Current Rated A 0 33 0 32 0 31 0 38 0 36 0 35 Power Consumption Rated W 70 70 70 78 78 78 Power Factor 96 4 95 1 94 1 93 3 94 2 92 9 Temperature Control Microcomputer Control Microcomputer Control Dimensions H W D mm 490 1 050 200 490 1 050 200 Packaged Dimensions H W D mm 280 1 100 566 280 1 100 566 Weight Mass kg 16 16 Gross Wei...
Page 20: ...ew Proof Removable Washable Mildew Proof Running Current Rated A 0 33 0 32 0 31 0 38 0 36 0 35 Power Consumption Rated W 70 70 70 78 78 78 Power Factor 96 4 95 1 94 1 93 3 94 2 92 9 Temperature Control Microcomputer Control Microcomputer Control Dimensions H W D mm 490 1 050 200 490 1 050 200 Packaged Dimensions H W D mm 280 1 100 566 280 1 100 566 Weight Mass kg 16 16 Gross Weight Gross Mass kg 2...
Page 21: ...w Proof Removable Washable Mildew Proof Running Current Rated A 0 33 0 32 0 31 0 38 0 36 0 35 Power Consumption Rated W 70 70 70 78 78 78 Power Factor 96 4 95 1 94 1 93 3 94 2 92 9 Temperature Control Microcomputer Control Microcomputer Control Dimensions H W D mm 490 1 050 200 490 1 050 200 Packaged Dimensions H W D mm 280 1 100 566 280 1 100 566 Weight Mass kg 16 16 Gross Weight Gross Mass kg 22...
Page 22: ...e Washable Mildew Proof Removable Washable Mildew Proof Running Current Rated A 0 33 0 32 0 31 0 36 0 34 0 33 0 38 0 36 0 35 0 38 0 36 0 35 Power Consumption Rated W 70 70 70 74 74 74 78 78 78 78 78 78 Power Factor 96 4 95 1 94 1 93 4 94 6 93 4 93 3 94 2 92 9 93 3 94 2 92 9 Temperature Control Microcomputer Control Microcomputer Control Dimensions H W D mm 490 1 050 200 490 1 050 200 Packaged Dime...
Page 23: ...e Mildew Proof Removable Washable Mildew Proof Running Current Rated A 0 33 0 32 0 31 0 36 0 34 0 33 0 38 0 36 0 35 0 38 0 36 0 35 Power Consumption Rated W 70 70 70 74 74 74 78 78 78 78 78 78 Power Factor 96 4 95 1 94 1 93 4 94 6 93 4 93 3 94 2 92 9 93 3 94 2 92 9 Temperature Control Microcomputer Control Microcomputer Control Dimensions H W D mm 490 1 050 200 490 1 050 200 Packaged Dimensions H ...
Page 24: ...le Mildew Proof Removable Washable Mildew Proof Running Current Rated A 0 33 0 32 0 31 0 36 0 34 0 33 0 38 0 36 0 35 0 38 0 36 0 35 Power Consumption Rated W 70 70 70 74 74 74 78 78 78 78 78 78 Power Factor 96 4 95 1 94 1 93 4 94 6 93 4 93 3 94 2 92 9 93 3 94 2 92 9 Temperature Control Microcomputer Control Microcomputer Control Dimensions H W D mm 490 1 050 200 490 1 050 200 Packaged Dimensions H...
Page 25: ...ble Mildew Proof Removable Washable Mildew Proof Running Current Rated A 0 33 0 32 0 31 0 36 0 34 0 33 0 38 0 36 0 35 0 38 0 36 0 35 Power Consumption Rated W 70 70 70 74 74 74 78 78 78 78 78 78 Power Factor 96 4 95 1 94 1 93 4 94 6 93 4 93 3 94 2 92 9 93 3 94 2 92 9 Temperature Control Microcomputer Control Microcomputer Control Dimensions H W D mm 490 1 050 200 490 1 050 200 Packaged Dimensions ...
Page 26: ...ble Mildew Proof Removable Washable Mildew Proof Running Current Rated A 0 33 0 32 0 31 0 36 0 34 0 33 0 38 0 36 0 35 0 38 0 36 0 35 Power Consumption Rated W 70 70 70 74 74 74 78 78 78 78 78 78 Power Factor 96 4 95 1 94 1 93 4 94 6 93 4 93 3 94 2 92 9 93 3 94 2 92 9 Temperature Control Microcomputer Control Microcomputer Control Dimensions H W D mm 490 1 050 200 490 1 050 200 Packaged Dimensions ...
Page 27: ...ovable Washable Mildew Proof Running Current Rated A 0 38 0 36 0 35 0 38 0 36 0 35 Power Consumption Rated W 78 78 78 78 78 78 Power Factor 93 3 94 2 92 9 93 3 94 2 92 9 Temperature Control Microcomputer Control Dimensions H W D mm 490 1 050 200 Packaged Dimensions H W D mm 280 1 100 566 Weight Mass kg 16 Gross Weight Gross Mass kg 22 Sound Pressure Level H M L SL dB A 38 35 32 29 46 36 33 30 Soun...
Page 28: ...rd Connector Wiring Diagram Part 3 Printed Circuit Board Connector Wiring Diagram 1 Indoor Unit 18 2 Outdoor Unit 20 2 1 RK X S25 35E2V1B 20 2 2 RK X S25 35G2V1B 22 2 3 RK X S25 35G2V1B9 RXS25 35J2V1B RXS25K3V1B RXS35K2V1B RXS35L2V1B 24 ...
Page 29: ...3 S21 Connector for centralized control HA 4 S24 Connector for display PCB 5 S26 Connector for signal receiver PCB 6 S32 Connector for indoor heat exchanger thermistor 7 S37 Connector for power supply PCB 8 JA Address setting jumper Refer to page 115 for detail 9 JB Fan speed setting when compressor stops for thermostat OFF JC Power failure recovery function Refer to page 117 for detail 10 SW2 Sel...
Page 30: ...U1 Fuse 3 15 A 250 V S36 FU1 H2 H3 H4 H5 H6 H1 V1 2P084361 1 1 S25 Connector for control PCB 2 LED1 H1P LED for operation green 3 LED2 H2P LED for timer yellow 4 LED3 H3P LED for HOME LEAVE operation red LED3 LED2 LED1 S25 2P084377 5 1 S27 Connector for control PCB 2 S31 RTH Connector for room temperature thermistor 3 SW1 S1W Forced cooling operation ON OFF button Refer to page 113 for detail SW1 ...
Page 31: ... overload protector 5 S70 Connector for fan motor 6 S80 Connector for four way valve coil 7 S90 Connector for thermistors outdoor temperature outdoor heat exchanger discharge pipe 8 HC3 HC4 HL3 HN3 Connector for filter PCB 9 HR2 Connector for reactor 10 FU1 FU2 Fuse 3 15 A 250 V 11 LED A LED for service monitor green 12 V1 Varistor 13 J5 Jumper for improvement of defrost performance Refer to page ...
Page 32: ...Filter PCB PCB1 1 S11 Connector for main PCB 2 HL1 HN1 S Connector for terminal board 3 E Terminal for earth wire 4 HC1 HC2 HL2 HN2 Connector for main PCB 5 HR1 Connector for reactor 6 FU3 Fuse 20 A 250 V 7 V2 V3 Varistor HC2 V3 V2 FU3 3P143310 1 E HL1 HN1 S HR1 HN2 HC1 S11 HL2 ...
Page 33: ... 5 S50 Connector for magnetic relay 6 S70 Connector for fan motor 7 S80 Connector for four way valve coil 8 S90 Connector for thermistors outdoor temperature outdoor heat exchanger discharge pipe 9 HL3 HN3 Connector for filter PCB 10 HR2 Connector for reactor 11 FU1 FU2 Fuse 3 15 A 250 V 12 LED A LED for service monitor green 13 V1 Varistor 14 J5 Jumper for improvement of defrost performance Refer...
Page 34: ...nnector for main PCB 2 HL1 HN1 S Connector for terminal board 3 E1 Terminal for earth wire 4 E2 Connector for terminal board earth 5 HL2 HN2 Connector for main PCB 6 HR1 Connector for reactor 7 FU3 Fuse 20 A 250 V 8 V2 V3 Varistor E1 E2 V2 FU3 HL1 HN1 S to S50 on main PCB HL2 S11 HN2 HR1 3P203203 1 V3 ...
Page 35: ...50 Connector for magnetic relay 5 S70 Connector for fan motor 6 S80 Connector for four way valve coil 7 S90 Connector for thermistors outdoor temperature outdoor heat exchanger discharge pipe 8 S100 Connector for forced operation button PCB 9 HL3 HN3 Connector for filter PCB 10 HR2 Connector for reactor 11 U V W Connector for compressor 12 FU2 Fuse 3 15 A 250 V 13 LED A LED for service monitor gre...
Page 36: ...or for terminal board 3 E1 E2 Terminal for earth wire 4 HL2 HN2 Connector for main PCB 5 HR1 Connector for reactor 6 FU1 Fuse 3 15 A 250 V 7 FU3 Fuse 20 A 250 V 8 V2 V3 Varistor HR1 HL2 3P254234 1 FU1 HN2 S FU3 AC2 E1 E2 AC1 S11 V3 V2 S50 on main PCB 1 S110 Connector for main PCB 2 SW1 Forced cooling operation ON OFF button Refer to page 113 for detail SW1 S110 3P255755 1 ...
Page 37: ...eration 34 1 10 Inverter POWERFUL Operation 35 1 11 Clock Setting 36 1 12 Other Functions 37 2 Function of Thermistor 38 3 Control Specification 39 3 1 Mode Hierarchy 39 3 2 Frequency Control 40 3 3 Controls at Mode Changing Start up 42 3 4 Discharge Pipe Temperature Control 44 3 5 Input Current Control 45 3 6 Freeze up Protection Control 46 3 7 Heating Peak cut Control 46 3 8 Outdoor Fan Control ...
Page 38: ...of the compressor is controlled by the following 2 parameters The load condition of the operating indoor unit The difference between the room thermistor temperature and the target temperature Additional Control Parameters The target frequency is adapted by additional parameters in the following cases Frequency restrictions Initial settings Forced cooling operation Inverter Principle To regulate th...
Page 39: ...d cooling Once the set temperature is reached the energy saving operation enables to maintain the room temperature at low power Frequency Limits The following functions regulate the minimum and maximum frequency Forced Cooling Operation Refer to page 113 for detail Refrigerant circulation rate high high f low f freq variable Refrigerant circulation rate low high speed low speed R2812 Amount of hea...
Page 40: ...n speed operation the step SL is not available The airflow rate is automatically controlled within this range when the FAN setting button is set to automatic Cooling The following drawing explains the principle of fan speed control for cooling Heating In heating operation the fan speed is regulated according to the indoor heat exchanger temperature and the difference between the room thermistor te...
Page 41: ...temperature at start up and the target temperature is divided into two zones Then the unit operates in an appropriate capacity for each zone to maintain the temperature and humidity at a comfortable level Room thermistor temperature at start up Target temperature X Thermostat OFF point Y Thermostat ON point Z 24ºC or more Room thermistor temperature at start up X 2 5ºC X 0 5ºC or Y 0 5ºC zone B co...
Page 42: ... temperature Ts determines the target temperature Tt Ts 18 30 C 2 The target temperature Tt is calculated as Tt Ts C where C is the correction value C 0 C 3 Thermostat ON OFF point and operation mode switching point are as follows Tr means the room thermistor temperature 1 Heating Cooling switching point Tr Tt 2 5 C 2 Cooling Heating switching point Tr Tt 2 5 C 3 Thermostat ON OFF point is the sam...
Page 43: ...zone C after being in the zone A The system resumes from defrost control in any zones except A The operation turns on in any zones except A The monitoring time has passed while the temperature difference is in the zone B Cooling Dry 10 minutes Heating 10 seconds Cooling Dry Heating Refer to Temperature Control on page 27 for detail B A OFF ON C Room thermistor temperature target temperature 1 5 C ...
Page 44: ...cally raises the target temperature slightly in the case of cooling or lowers it slightly in the case of heating This prevents excessive cooling in summer and excessive heating in winter to ensure comfortable sleeping conditions and also conserves electricity Cooling Heating R18917 TIMER operation NIGHT SET Mode ON Target temperature 0 5 C temperature shift Operation stops at the set hours 0 5 C 1...
Page 45: ...out when the operation is stopped If the HOME LEAVE button is pressed in POWERFUL operation the POWERFUL operation is canceled and the HOME LEAVE function becomes effective The HOME LEAVE button is ineffective in dry operation and fan operation Details of Function A mark representing HOME LEAVE is indicated on the display of the remote controller The indoor unit is operated according to the set te...
Page 46: ...ter POWERFUL Operation Outline In order to exploit the cooling and heating capacity to full extent the air conditioner can be operated by increasing the indoor fan rotating speed and the compressor frequency Detail When the POWERFUL button is pressed the fan speed and target temperature are converted to the following states for 20 minutes A 50 rpm Ex POWERFUL operation in cooling Initial setting S...
Page 47: ... the following steps 1 Press the CLOCK button is displayed and blinks 2 Press the TIMER or button to set the clock to the present time Holding down the TIMER or button increases or decreases the time display rapidly 3 Press the CLOCK button again blinks and clock setting is completed CLOCK button R19657 TIMER button ...
Page 48: ...on for 5 to 9 seconds while the unit is not operating Refer to page 113 for detail Note When the ON OFF button is pressed for 10 seconds or more the forced cooling operation is stopped 1 12 4 Photocatalytic Deodorizing Filter The photocatalytic deodorizing filter powerfully decomposes odor of tobacco pet etc The deodorizing power is regenerated simply by being exposed to the sunshine It is recomme...
Page 49: ...ature used in place of the inner temperature of the compressor rises abnormally the operating frequency becomes lower or the operation halts 2 The discharge pipe thermistor is used for detecting disconnection of the discharge pipe thermistor 3 Indoor Heat Exchanger Thermistor 1 The indoor heat exchanger thermistor is used for controlling the target discharge pipe temperature The system sets the ta...
Page 50: ... cooling operation R19505 Stop Discharging from capacitor Preheating operation Stop indoor unit OFF Cooling includes drying Fan Normal operation mode Power transistor test mode Forced cooling operation for pump down operstion Forced operstion mode Air conditioner control mode Air conditioner control mode Forced operation mode Forced cooling operation for pump down operation Power transistor test m...
Page 51: ...ibited frequency There is a certain prohibited frequency such as a power supply frequency For Heat Pump Model 1 Determine command frequency Command frequency is determined in the following order of priority 1 Limiting defrost control time 2 Forced cooling 3 Indoor frequency command 2 Determine upper limit frequency The minimum value is set as an upper limit frequency among the frequency upper limi...
Page 52: ...ampling time 15 20 seconds and the frequency is adjusted according to its difference from the frequency previously calculated 2 I control If the operating frequency does not change for more than a certain fixed time the frequency is adjusted according to the D value When the D value is low the frequency is lowered When the D value is high the frequency is increased 3 Frequency management when othe...
Page 53: ...utdoor temperature A C Control II Control I ON condition Discharge pipe temperature B C OFF condition Discharge pipe temperature C C Radiation fin temperature 90 C Control II ON condition Discharge pipe temperature D C OFF condition Discharge pipe temperature E C Radiation fin temperature 90 C 3 3 2 Four Way Valve Switching Outline In heating operation current is conducted and in cooling operation...
Page 54: ...uring operation 3 When the compressor starts after resetting 4 When the compressor starts after the fault of four way valve switching The lower limit of frequency keeps A Hz for B seconds with any conditions 1 through 4 above 3 3 4 3 minute Standby Turning on the compressor is prohibited for 3 minutes after turning it off The function is not activated when defrosting 3 3 5 Compressor Protection Fu...
Page 55: ...ep the discharge pipe temperature from rising further Detail Zone Control Stop zone When the temperature reaches the stop zone the compressor stops Dropping zone The upper limit of frequency decreases Keep zone The upper limit of frequency is kept Up zone The upper limit of frequency increases Reset zone The upper limit of frequency is canceled A ºC 110 B ºC 105 C ºC 101 D ºC 99 E ºC 97 R14642 Dis...
Page 56: ...put frequency is lowered by 2 Hz every second until it reaches the keep zone Keep zone The present maximum frequency goes on Reset zone Limit of the frequency is canceled Limitation of current dropping and stop value according to the outdoor temperature The current drops when outdoor temperature becomes higher than a certain level depending on the model RK X S25E2V1B RK X S25G2V1B RK X S25G2V1B9 R...
Page 57: ...imit to prevent abnormal high pressure The operating frequency limitation is judged with the indoor heat exchanger temperature A C B C C C 7 5 3 R14718 Reset zone Indoor heat exchanger thermistor temperature Up zone Keep zone Dropping zone Stop zone 0 C C C B C A C 13 C Zone Control Stop zone When the temperature reaches the stop zone the compressor stops Dropping zone The upper limit of frequency...
Page 58: ...operation 5 Fan speed control during forced cooling operation The outdoor fan is controlled as well as normal operation during forced cooling operation 6 Fan speed control during POWERFUL operation The rotation speed of the outdoor fan is increased during POWERFUL operation 7 Fan speed control during indoor outdoor unit quiet operation The rotation speed of the outdoor fan is reduced by the comman...
Page 59: ...the operation or ending the previous defrosting Conditions for Canceling Defrost The judgment is made with the outdoor heat exchanger temperature B C The same value continues RXS25 35E2V1B RXS25 35G2V1B RXS25 35G2V1B9 RXS25 35J2V1B RXS25K3V1B RXS35K2V1B RXS35L2V1B A minutes 28 28 28 28 B C 4 18 4 18 4 18 4 18 C Hz 74 76 68 76 D Hz 86 86 86 86 E seconds 50 50 50 50 F seconds 60 60 60 60 G seconds 4...
Page 60: ... discharge pipe thermistor is disconnected Feedback Control Target discharge pipe temperature control Detail The followings are the examples of electronic expansion valve control which function in each operation mode Available Not available Control Status Starting operation control Control when the frequency changes Target discharge pipe temperature control Discharge pipe thermistor disconnection ...
Page 61: ...osting 3 11 4 Starting Operation Control The electronic expansion valve opening is controlled when the operation starts thus preventing superheating or liquid compression 3 11 5 Control when the Frequency Changes When the target discharge pipe temperature control is active if the target frequency changes to a specified value in a certain time period the target discharge pipe temperature control is...
Page 62: ... disconnection is ascertained Discharge pipe temperature 6 C outdoor heat exchanger temperature 2 When the operation mode is heating When the following condition is fulfilled the discharge pipe thermistor disconnection is ascertained Discharge pipe temperature 6 C indoor heat exchanger temperature When the thermistor is disconnected When the disconnection is ascertained the compressor continues op...
Page 63: ...ower consumption is below the specified value and the frequency is higher than the specified frequency it is regarded as refrigerant shortage The power consumption is low comparing with that in the normal operation when refrigerant is insufficient and refrigerant shortage is detected by checking power consumption II Detecting by discharge pipe temperature If the discharge pipe temperature is highe...
Page 64: ...SiBE05 722ED 53 Remote Controller Part 5 Remote Controller 1 Remote Controller 54 ...
Page 65: ... unit and the remote controller such as a curtain the unit will not operate The maximum distance for communication is approximately 7 m HOME LEAVE 1 button Press this button to start HOME LEAVE operation The HOME LEAVE lamp lights up POWERFUL 2 button Starts POWERFUL operation ON OFF button Press this button once to start operation Press once again to stop it AUTO DRY COOL HEAT FAN 18 30 C Not ava...
Page 66: ...sed last ON TIMER button Press this button and adjust the day and time with the TIMER setting button Press this button again to complete TIMER setting OFF TIMER button Press this button and adjust the day and time with the TIMER setting button Press this button again to complete TIMER setting TIMER Setting button Changes the ON OFF TIMER settings CLOCK 4 button TIMER CANCEL button Cancels the time...
Page 67: ...ock 78 4 13 DC Fan Lock 79 4 14 Input Overcurrent Detection 80 4 15 Four Way Valve Abnormality 81 4 16 Discharge Pipe Temperature Control 83 4 17 High Pressure Control in Cooling 84 4 18 Compressor System Sensor Abnormality 85 4 19 Position Sensor Abnormality 86 4 20 DC Voltage Current Sensor Abnormality 88 4 21 Thermistor or Related Abnormality Outdoor Unit 89 4 22 Electrical Box Temperature Rise...
Page 68: ...on lamp OFF Check the outdoor temperature Heating operation cannot be used when the outdoor temperature is 18 CWB or higher and cooling operation cannot be used when the outdoor temperature is below 10 CDB Diagnose with remote controller indication 62 The unit operates but does not cool or does not heat Check for wiring and piping errors in the connection between the indoor unit and outdoor unit C...
Page 69: ...thermistor malfunctions 2 When a signal transmission error occurs between the indoor and outdoor units In either case conduct the diagnostic procedure described in the following pages Service Monitor The indoor unit has one green LED LED A on the control PCB When the microcomputer works in order the LED A blinks 2 2 Outdoor Unit The outdoor unit has one green LED LED A on the PCB When the microcom...
Page 70: ...icate non corresponding codes 2 To return to the normal mode hold the timer cancel button down for 5 seconds When the remote controller is left untouched for 60 seconds it also returns to the normal mode 3 Not all the error codes are displayed When you cannot find the error code try method 2 Refer to page 60 No Code No Code No Code 1 00 12 C7 23 H0 2 U4 13 H8 24 E1 3 F3 14 J3 25 P4 4 E6 15 A3 26 L...
Page 71: ...e long beep 3 Diagnose by the sound beep The left side number does not correspond with the error code two consecutive beeps The left side number corresponds with the error code but the right side number does not long beep Both the left side and right side numbers correspond with the error code The numbers indicated when you hear the long beep are the error code Error codes and description Refer to...
Page 72: ...ng beep Both the left side and right side numbers correspond with the error code 7 Determine the error code The numbers indicated when you hear the long beep are the error code Error codes and description Refer to page 62 8 Press the MODE button to exit from the diagnosis mode The display means the trial operation mode Refer to page 114 for trial operation 9 Press the ON OFF button twice to return...
Page 73: ... abnormality 67 C9 Room temperature thermistor or related abnormality 67 Outdoor Unit E1 Outdoor unit PCB abnormality 75 E5 OL activation compressor overload 76 E6 Compressor lock 78 E7 DC fan lock 79 E8 Input overcurrent detection 80 EA Four way valve abnormality 81 F3 Discharge pipe temperature control 83 F6 High pressure control in cooling 84 H0 Compressor system sensor abnormality 85 H6 Positi...
Page 74: ...t OK Check the connection of connectors See Note Correct the connection OK Check the power supply voltage Start operation Voltage as rated Error repeats Check the power supply voltage Start operation Voltage as rated Error repeats Error repeats YES NO NO YES NO NO YES R15310 Caution To secure the connection once disconnect the connector and then reconnect it YES NO YES NO YES NO YES Match the comp...
Page 75: ... Heating peak cut control During heating operation the indoor heat exchanger temperature is above 65 C Supposed Causes Short circuited air Clogged air filter of the indoor unit Dust accumulation on the indoor heat exchanger Defective indoor heat exchanger thermistor Defective indoor unit PCB Troubleshooting Check No 01 Refer to P 99 NO NO NO Check No 01 Check the indoor heat exchanger thermistor Y...
Page 76: ...mal fan motor operation Error Decision Conditions The detected rotation speed does not reach the demanded rotation speed of the target tap and is less than 50 of the maximum fan motor rotation speed Supposed Causes Power supply voltage is not as specified Layer short inside the fan motor winding Breaking of wire inside the fan motor Breaking of the fan motor lead wires Defective capacitor of the f...
Page 77: ...ge as rated Does the fan rotate smoothly Voltage as rated Is there continuity Start operation Turn off the power supply and rotate the fan by hand Check the fan motor voltage Turn the power on and check the fan motor voltage immediately after restart Check the capacitor s continuity Be sure to turn off the power switch before connecting or disconnecting connectors or parts may be damaged NO YES Ch...
Page 78: ...r operation Supposed Causes Disconnection of connector Defective thermistor Defective indoor unit PCB Troubleshooting Check No 01 Refer to P 99 C4 Indoor heat exchanger thermistor C9 Room temperature thermistor YES R15717 NO Check No 01 Check the thermistor resistance value YES NO Caution Correct the connection Replace the thermistor Replace the indoor unit PCB Normal Normal Check the connection o...
Page 79: ... for 80 seconds Opening of the electronic expansion valve D Discharge pipe temperature E target discharge pipe temperature F Refrigerant shortage detection III When the difference of the temperature is smaller than G C it is regarded as refrigerant shortage If the error repeats the system is shut down Reset condition Continuous run for about 60 minutes without any other error Supposed Causes Disco...
Page 80: ...the pipe flare or replace the union Check the power transistor harness for loosening Correct it as required Also replace the cracked pipe Check the pipes for improper contact and correct them as required Replace the cracked pipe Replace the electronic expansion valve Replace the defective thermistor s Completed Refrigerant shortage error again Oil oozing at internal piping Stop valve closed Compre...
Page 81: ...it is below 180 V The compressor stops if the error occurs and restarts automatically after 3 minute standby Over voltage detection An over voltage signal is fed from the over voltage detection circuit to the microcomputer The compressor stops if the error occurs and restarts automatically after 3 minute standby Supposed Causes Power supply voltage is not as specified Defective DC voltage detectio...
Page 82: ...ction of the compressor harness Turn on the power Loose or disconnected NO Precaution before turning on the power again Make sure the power has been off for at least 30 seconds Replace the outdoor unit PCB R19544 YES Disturbance factors Noise Power supply distortion Check for such factors for a long term System restarted Repeat a few times NO Replace the outdoor fan motor and the outdoor unit PCB ...
Page 83: ...ecked whether it is normal Error Decision Conditions The data sent from the outdoor unit cannot be received normally or the content of the data is abnormal Supposed Causes Reduction of power supply voltage Wiring error Breaking of the connection wires between the indoor and outdoor units wire No 3 Defective outdoor unit PCB Short circuit inside the fan motor winding Defective indoor unit PCB Distu...
Page 84: ...it outdoor unit connection wires Replace the connection wires between the indoor unit and outdoor unit Properly insulated Is there any wiring error Check No 11 Check the power supply waveform YES Replace the indoor unit PCB Locate the cause of the disturbance of the power supply waveform and correct it R19525 NO YES NO Diagnose the outdoor unit PCB Is LED A blinking Is there any disturbance Check ...
Page 85: ...cting wires Wrong indoor unit PCB or outdoor unit PCB mounted Defective indoor unit PCB Defective outdoor unit PCB Troubleshooting R19661 Caution NO YES YES YES NO NO Check the code numbers 2P012345 for example of the indoor and outdoor unit PCBs with the Parts List Match the compatible models Change for the correct PCB Replace the indoor unit PCB or the outdoor unit PCB OK Matched compatibly Corr...
Page 86: ...is not detected Supposed Causes Defective outdoor unit PCB Broken harness between PCBs Noise Momentary drop of voltage Momentary power failure Troubleshooting Caution Be sure to turn off the power switch before connecting or disconnecting connectors or parts may be damaged NO YES YES R19527 NO YES NO Replace the outdoor unit PCB 2 Ground the system Zero cross signal abnormality Replace the outdoor...
Page 87: ...own Reset condition Continuous run for about 60 minutes without any other error Supposed Causes Disconnection of discharge pipe thermistor Defective discharge pipe thermistor Disconnection of connector S40 Disconnection of 2 terminals of OL Q1L Defective OL Q1L Broken OL harness Defective electronic expansion valve or coil Defective four way valve or coil Defective outdoor unit PCB Refrigerant sho...
Page 88: ...Replace the discharge pipe thermistor Replace the electronic expansion valve or the coil Refer to the refrigerant line check procedure Replace the outdoor unit PCB Replace the four way valve or the coil Replace the outdoor unit PCB Discharge pipe thermistor disconnected Check No 01 Check the thermistors Check No 13 Check the four way valve Check No 14 Check the refrigerant line Check No 12 Check t...
Page 89: ...Check No 15 Refer to P 103 Turn off the power Disconnect the harnesses U V and W R18317 Caution NO YES YES NO NO YES Check No 15 Check with the inverter analyzer Turn off the power and reconnect the harnesses Turn on the power again and restart the system Precaution before turning on the power again Make sure the power has been off for at least 30 seconds Correct the power supply or replace the ou...
Page 90: ... the fan motor Foreign matter stuck in the fan Defective fan motor Defective outdoor unit PCB Troubleshooting Check No 16 Refer to P 104 R15675 Caution YES YES NO YES NO NO YES NO Turn on the power Rotate the fan Check No 16 Check the rotation pulse input on the outdoor unit PCB Turn off the power and reconnect the connector Remove the foreign matters Replace the outdoor fan motor Replace the outd...
Page 91: ...r to P 106 Caution Be sure to turn off the power switch before connecting or disconnecting connectors or parts may be damaged An input overcurrent may result from wrong internal wiring If the system is interrupted by an input overcurrent after the wires have been disconnected and reconnected for part replacement check the wiring again R18318 NO YES YES NO Start operation and measure the input curr...
Page 92: ...lowing condition continues over 10 minutes after operating for 5 minutes Cooling Dry A B 5 C Heating B A 5 C A Room thermistor temperature B Indoor heat exchanger temperature If the error repeats the system is shut down Reset condition Continuous run for about 60 minutes without any other error Supposed Causes Disconnection of four way valve coil Defective four way valve coil or harness Defective ...
Page 93: ...or s Caution Be sure to turn off the power switch before connecting or disconnecting connectors or parts may be damaged R19662 Refrigerant shortage Water mixed Stop valve Indoor heat exchanger thermistor Room temperature thermistor Four way valve coil disconnected loose Harness disconnected Any thermistor disconnected Check No 01 Check the thermistors Check No 14 Check the refrigerant line Check N...
Page 94: ...t shortage Defective four way valve Water mixed in refrigerant Defective stop valve Defective outdoor unit PCB Troubleshooting Check No 01 Refer to P 99 Check No 12 Refer to P 101 Check No 14 Refer to P 102 A C B C 1 above 45 Hz rising above 40 Hz dropping 110 97 2 30 45 Hz rising 25 40 Hz dropping 105 92 3 below 30 Hz rising below 25 Hz dropping 99 86 R15825 Caution NG OK OK OK NG NG Discharge pi...
Page 95: ...ective outdoor unit PCB Troubleshooting Check No 01 Refer to P 99 Check No 12 Refer to P 101 Check No 17 Refer to P 105 Check No 18 Refer to P 106 Check No 19 Refer to P 106 R15667 Caution Replace the outdoor fan motor Reconnect the connector or fan motor lead wires Replace the stop valve Replace the outdoor heat exchanger thermistor Replace the outdoor unit PCB Replace the electronic expansion va...
Page 96: ...voltage value The DC voltage before compressor start up is below 50 V Supposed Causes Broken or disconnected harness Defective outdoor unit PCB Troubleshooting Caution Be sure to turn off the power switch before connecting or disconnecting connectors or parts may be damaged NO R11712 YES Turn off the power and turn it on again YES NO Replace the harness Replace the outdoor unit PCB Is the harness ...
Page 97: ...g condition through the position detection circuit Error Decision Conditions If the error repeats the system is shut down Reset condition Continuous run for about 11 minutes without any other error Supposed Causes Disconnection of the compressor relay cable Defective compressor Defective outdoor unit PCB Start up failure caused by the closed stop valve Input voltage is outside the specified range ...
Page 98: ...ck No 20 Check the short circuit of the diode bridge Check No 15 Check with the inverter analyzer Turn off the power Disconnect the harnesses U V and W Turn on the power Check the electrolytic capacitor voltage Electrical components or compressor harnesses connected as specified Replace the outdoor unit PCB Replace the compressor Correct the power supply or replace the outdoor unit PCB Reconnect t...
Page 99: ...he compressor running frequency and the input current Error Decision Conditions If the error repeats the system is shut down Reset condition Continuous run for about 60 minutes without any other error Supposed Causes Defective outdoor unit PCB Troubleshooting Replace the outdoor unit PCB Caution Be sure to turn off the power switch before connecting or disconnecting connectors or parts may be dama...
Page 100: ...pipe temperature is lower than the heat exchanger temperature Supposed Causes Disconnection of the connector for the thermistor Defective thermistor corresponding to the error code Defective heat exchanger thermistor in the case of J3 error outdoor heat exchanger thermistor in cooling operation or indoor heat exchanger thermistor in heating operation Defective outdoor unit PCB Troubleshooting In c...
Page 101: ...an the heat exchanger temperature Replace the defective thermistor s of the following thermistors Outdoor temperature thermistor Discharge pipe thermistor Outdoor heat exchanger thermistor Radiation fin thermistor Cooling Outdoor heat exchanger temperature Heating Indoor heat exchanger temperature Replace the indoor heat exchanger thermistor Replace the outdoor unit PCB Error displayed again on re...
Page 102: ...perature is above A C The error is cleared when the radiation fin temperature drops below B C To cool the electrical components the outdoor fan starts when the radiation fin temperature rises above C C and stops when it drops below B C Supposed Causes Defective outdoor fan motor Short circuit Defective radiation fin thermistor Disconnection of connector Defective outdoor unit PCB A C B C C C RK X ...
Page 103: ...below B C R19760 YES NO NO YES NO YES Turn off the power and turn it on again Check the radiation fin temperature Above A C As described in the characteristic chart Check No 01 Check the radiation fin thermistor resistance value Error again or outdoor fan activated Replace the radiation fin thermistor Replace the outdoor unit PCB YES NG NO OK Radiation fin dirty Check No 19 Check the outdoor fan C...
Page 104: ...ff the power and turn it on again Check the radiation fin temperature Radiation fin dirty Check No 19 Check the outdoor fan Error again or outdoor fan activated Replace the outdoor unit PCB Check the installation condition Go to Check No 17 Clean up the radiation fin Be sure to turn off the power switch before connecting or disconnecting connectors or parts may be damaged Replace the outdoor fan m...
Page 105: ... cleared when the radiation fin temperature drops below B C If the error repeats the system is shut down Reset condition Continuous run for about 60 minutes without any other error Supposed Causes Defective outdoor fan motor Short circuit Defective radiation fin thermistor Disconnection of connector Defective outdoor unit PCB Silicon grease is not applied properly on the radiation fin after replac...
Page 106: ...escribed in the characteristic chart Check No 01 Check the radiation fin thermistor resistance value Error displayed again Has the PCB been replaced Replace the radiation fin thermistor Check if silicon grease is applied properly on the radiation fin If not apply the silicon grease Check the power transistor and the radiation fin for looseness If they are found to be fit tightly replace the outdoo...
Page 107: ...ing connectors or parts may be damaged R19529 NO NG OK NO YES Check the radiation fin temperature NO YES YES Above A C Check No 19 Check the outdoor fan Error displayed again Has the PCB been replaced Check if silicon grease is applied properly on the radiation fin If not apply the silicon grease Replace the outdoor unit PCB Replace the outdoor fan motor Correct the connectors and fan motor leads ...
Page 108: ...mpressor is running A rotation speed error occurs while the compressor is running An output overcurrent signal is fed from the output overcurrent detection circuit to the microcomputer If the error repeats the system is shut down Reset condition Continuous run for about 11 minutes without any other error Supposed Causes Poor installation condition Closed stop valve Defective power module Wrong int...
Page 109: ...the system See if the same error occurs Check the power supply voltage Monitor the power supply voltage discharge and suction pressures and other factors for a long term Possible causes Momentary drop of power supply voltage Compressor overload Short circuit Check the installation condition Check with the inverter analyzer Check the power module Keep on using Check the connectors and other compone...
Page 110: ...n a PCB remove the PCB from the control PCB to measure the resistance When the connector of indoor heat exchanger thermistor is soldered on a PCB remove the thermistor and measure the resistance Thermistor temperature C Resistance kΩ 20 197 8 15 148 2 10 112 1 5 85 60 0 65 93 5 51 14 10 39 99 15 31 52 20 25 02 25 20 00 30 16 10 35 13 04 40 10 62 45 8 707 50 7 176 R25 C 20 kΩ B 3950 K kΩ 150 100 50...
Page 111: ... Æ Defective PCB Æ Replace the PCB If NG in step 2 Æ Defective Hall IC Æ Replace the fan motor If OK in both steps 1 and 2 Æ Replace the PCB 5 3 Power Supply Waveforms Check Check No 11 Measure the power supply waveform between No 1 and No 2 on the terminal board and check the waveform disturbance Check if the power supply waveform is a sine wave Fig 1 Check if there is waveform disturbance near t...
Page 112: ...es not generate a latching sound in the above step 2 disconnect the connector and check the continuity using a multimeter 4 Check the continuity between the pins 1 6 3 6 2 5 4 5 between the pins 1 6 2 6 3 6 4 6 for the harness 5P models If there is no continuity between the pins the EV coil is faulty 5 If the continuity is confirmed in step 3 the outdoor unit PCB is faulty Harness 6P 6P Connector ...
Page 113: ...il Cooling Dry No continuity Heating Continuity Replace the outdoor unit PCB Replace the four way valve coil Replace the four way valve Four way valve coil resistance at 1000 2000 Ω S80 voltage at 220 240 VAC with compressor on Fig 1 R11904 Fig 1 Voltage at S80 220 240 VAC Time Compressor ON Refrigerant system check Check for refrigerant leakage See the service diagnosis on refrigerant shortage U0...
Page 114: ...the charged voltage of the built in smoothing electrolytic capacitor drops to 10 VDC or below before carrying out the service work Reference If the terminals of the compressor are not FASTON terminals difficult to remove the wire on the terminals it is possible to connect wires available on site to the outdoor unit from output side of PCB Do not connect them to the compressor at the same time othe...
Page 115: ... burned due to loosening 5 8 Rotation Pulse Check on the Outdoor Unit PCB Check No 16 RK X S25 35E2V1B RK X S25 35G2V1B Make sure that the voltage of 320 30 V is applied 1 Set operation off and power off Disconnect the connector S70 2 Check that the voltage between the pins 4 7 is 320 VDC 3 Check that the control voltage between the pins 3 4 is 15 VDC 4 Check that the rotation command voltage betw...
Page 116: ...HU Hall IC HV Hall IC Free pin Free pin Free pin Free pin Free pin Free pin R19663 Installation condition check OK Check the allowable dimensions of the air suction and discharge area Is the airflow blocked by obstacles or winds blowing in the opposite direction R19401 NG YES YES NO Is the discharged air short circuited NO NO YES Is the outdoor heat exchanger very dirty Change the installation loc...
Page 117: ...e connection pipe deformed Is the stop valve open High Replace the compressor Open the stop valve Replace the pipe installed at the site Clean the dirty air filter or indoor outdoor heat exchanger Replace the compressor Discharge pressure check R19395 YES NO NO YES Outdoor fan system is functioning Check the outdoor fan system Reconnect the connector Outdoor fan running Fan motor lead wire connect...
Page 118: ...pins of the DB1 referring to the table below If the resistance is or less than 1 kΩ short circuit occurs on the main circuit RK X S25 35E2V1B Negative terminal of multimeter positive terminal for digital multimeter 2 3 4 2 3 1 Positive terminal of multimeter negative terminal for digital multimeter 4 2 3 1 2 3 Resistance is OK several kΩ several MΩ several kΩ several MΩ Resistance is NG 0 Ω or 0 0...
Page 119: ...SiBE05 722ED Check Service Diagnosis 108 RK X S25 35G2V1B RK X S25 35G2V1B9 RXS25 35J2V1B RXS25K3V1B RXS35K2V1B RXS35L2V1B R19665 4 3 2 1 Multimeter R19666 Multimeter 1 2 3 4 ...
Page 120: ... resistance between the or terminal of the power module or the diode bridge and the U V or W terminal of the compressor with a multimeter Evaluate the measurement results referring to the following table RK X S25 35E2V1B Negative terminal of multimeter positive terminal for digital multimeter Power module or Diode bridge UVW Power module or Diode bridge UVW Positive terminal of multimeter negative...
Page 121: ...SiBE05 722ED Check Service Diagnosis 110 RK X S25 35G2V1B RK X S25 35G2V1B9 RXS25 35J2V1B RXS25K3V1B RXS35K2V1B RXS35L2V1B R19946 Diode bridge R19947 Diode bridge ...
Page 122: ...Pump Down Operation 112 2 Forced Cooling Operation 113 3 Trial Operation 114 4 Field Settings 115 4 1 When 2 Units are Installed in 1 Room 115 4 2 Facility Setting Jumper cooling at low outdoor temperature 116 4 3 Jumper and Switch Settings 117 5 Silicon Grease on Power Transistor Diode Bridge 118 ...
Page 123: ...nit Detail 1 Remove the valve caps from the liquid stop valve and the gas stop valve 2 Carry out forced cooling operation 3 After 5 to 10 minutes close the liquid stop valve with a hexagonal wrench 4 After 2 to 3 minutes close the gas stop valve and stop the forced cooling operation Refer to page 113 for forced cooling operation Gas stop valve Valve cap Close Liquid stop valve Service port R13628 ...
Page 124: ...s is fulfilled 1 Press the forced cooling operation ON OFF button SW1 on the indoor unit for 5 seconds 2 Press the forced cooling operation ON OFF button SW1 on the outdoor unit Command frequency RK X S25 35E2V1B RK X S25 35G2V1B 68 Hz RK X S25 35G2V1B9 RXS25 35J2V1B RXS25K3V1B RXS35K2V1B RXS35L2V1B 58 Hz End The forced cooling operation ends when any of the following conditions is fulfilled 1 The...
Page 125: ...ture 30 C Trial operation may be disabled in either operation mode depending on the room temperature After trial operation is complete set the temperature to a normal level 26 C 28 C in cooling 20 C 24 C in heating operation For protection the system does not start for 3 minutes after it is turned off Detail ARC433 Series 1 Press the ON OFF button to turn on the system 2 Press the center of the TE...
Page 126: ...set for different addresses Both the indoor unit PCB and the wireless remote controller need alteration Indoor Unit PCB Cut the address setting jumper JA on the control PCB Caution Replace the PCB if you accidentally cut a wrong jumper Jumpers are necessary for electronic circuit Improper operation may occur if you cut any of them Wireless Remote Controller Cut the address setting jumper ADDRESS J...
Page 127: ...he outdoor heat exchanger of the unit is exposed to direct wind provide a windbreak wall 2 Intermittent noises may be produced by the indoor unit due to the outdoor fan turning on and off when using facility settings 3 Do not place humidifiers or other items which might raise the humidity in rooms where facility settings are being used A humidifier might cause dew condensation from the indoor unit...
Page 128: ...an speed setting when compressor stops for thermostat OFF effective only in cooling operation JB on indoor unit PCB Fan speed setting Remote controller setting The fan stops Power failure recovery function JC on indoor unit PCB Auto restart The unit does not resume operation after recovering from a power failure Timer settings are cleared Improvement of defrost performance J5 on outdoor unit PCB S...
Page 129: ... bridge Detail 1 Wipe off the old silicon grease completely 2 Apply the silicon grease evenly See the illustrations below for examples of application 3 Tighten the screws of the power transistor diode bridge 4 Make sure that the heat radiation parts are firmly contacted to the radiation fin Note Smoke emission may be caused by bad heat radiation when the silicon grease is not appropriately applied...
Page 130: ...SiBE05 722ED 119 Appendix Part 8 Appendix 1 Piping Diagrams 120 1 1 Indoor Unit 120 1 2 Outdoor Unit 121 2 Wiring Diagrams 123 2 1 Indoor Unit 123 2 2 Outdoor Unit 123 ...
Page 131: ...RANT FLOW COOLING INDOOR UNIT 6 4CuT SIROCCO FAN 9 5CuT FAN MOTOR M HEAT EXCHANGER THERMISTOR ON HEAT EXCH FIELD PIPING 6 4CuT FIELD PIPING 9 5CuT 4D034012E FIELD PIPING 6 4CuT FIELD PIPING 9 5CuT INDOOR UNIT 6 4CuT SIROCCO FAN 9 5CuT FAN MOTOR M HEAT EXCHANGER REFRIGERANT FLOW COOLING HEATING 4D048722C THERMISTOR ON HEAT EXCH ...
Page 132: ...ER WITH FILTER MOTOR OPERATED VALVE MUFFLER WITH FILTER LIQUID STOP VALVE GAS STOP VALVE FOUR WAY VALVE NORMALLY OFF DISCHARGE PIPE THERMISTOR 3D047318G OUTDOOR UNIT HEAT EXCHANGER 7 0CuT 7 0CuT 9 5CuT 4 8CuT 6 4CuT 6 4CuT 4 8CuT M PROPELLER FAN φ 4 0 ID 2 0CuT 9 5CuT 9 5CuT 6 4CuT 7 9CuT 9 5CuT MUFFLER 9 5CuT 9 5CuT COMPRESSOR MUFFLER MUFFLER 7 9CuT ACCUMULATOR REFRIGERANT FLOW COOLING OUTDOOR TE...
Page 133: ...R MUFFLER WITH FILTER LIQUID STOP VALVE FIELD PIPING 6 4CuT FIELD PIPING 9 5CuT GAS STOP VALVE DISCHARGE PIPE THERMISTOR FOURWAY VALVE ON HEATING 3D047316S OUTDOOR UNIT HEAT EXCHANGER 7 0 CuT 7 0 CuT 9 5 CuT EV 4 8 CuT 6 4 CuT 6 4 CuT 4 8 CuT M φ 4 0 x ID 2 0 CuT PROPELLER FAN 9 5 CuT 9 5 CuT 6 4 CuT 7 9 CuT 9 5 CuT MUFFLER 9 5 CuT 9 5 CuT COMPRESSOR MUFFLER MUFFLER 7 9 CuT ACCUMULATOR REFRIGERANT...
Page 134: ...HR1 BLK ORG 1 L 1 HL2 MRM10 HN1 C94 GRY WHT 2 DB2 2 N V2 HN2 HN3 BLU S RED 3 3 C74 FU2 HL3 S11 3 15A SA1 L 1 WHT 1 FU1 IC11 C95 BLK N C75 3 15A V3 BLK V1 E S10 BLK W V U BLK GRN YLW BLK PCB2 7 7 BLK MRCW S70 S40 S90 S30 S20 2 3 1 1 4 7 6 GRN YLW 3 1 1 6 S80 1 2 1 5 3 OUTDOOR BLK BLK BLK BLK BLK BLK ORG RED BRN BLU GRY BLK BLU WHT RED RED BLU BRN YLW ORG WHT YLW 3 1 t t t S80 Y1R Z1C M V 1 M N 2 Y1...
Page 135: ...PRESSOR MOTOR M1F FAN MOTOR MRCW MR30 MRM10 MRM20 MAGNETIC RELAY N NEUTRAL Q1L OVERLOAD PROTECTOR 3D058684B FIELD WIRING INDOOR MRM20 WHT IPM1 X1M DB1 L1R HR1 HR2 AC1 L1 BRN L 1 BLK 1 MRM10 AC2 HN3 V2 WHT 2 N 2 DB2 HN2 C5 HA2 HA1 S BLU GRY 3 RED 3 HL3 C119 HL2 V3 ORG C6 L Q1 MR30 1 WHT 1 V1 BLK N PCB2 DB3 BLK GRN YLW BLK SA1 S11 S10 BLK BLK E1 W V U BLK IPM2 BLK 9 9 BLK MR30_B MR30_A E2 MRCW GRN B...
Page 136: ...SiBE05 722 First edition 05 2010 SiBE05 722_A Model addition RK X S25 35G2V1B RK X S25 35G2V1B9 01 2011 SiBE05 722_B Model addition RXS25 35J2V1B 12 2012 SiBE05 722_C Model addition RXS25K3V1B RXS35K2V1B 01 2014 SiBE05 722ED Model addition FLXS35BAVMB9 RXS35L2V1B ...
Page 137: ...pplied or specified by Daikin Ask a qualified installer or contractor to install those parts and accessories Use of unauthorised parts and accessories or improper installation of parts and accessories can result in water or refrigerant leakage electrical shock fire or explosion z Read the User s Manual carefully before using this product The User s Manual provides important safety instructions and...