


7 Configuration
Installation manual
22
ETV23E
Daikin Altherma 3 H HT F
4P644729-1E – 2023.10
3
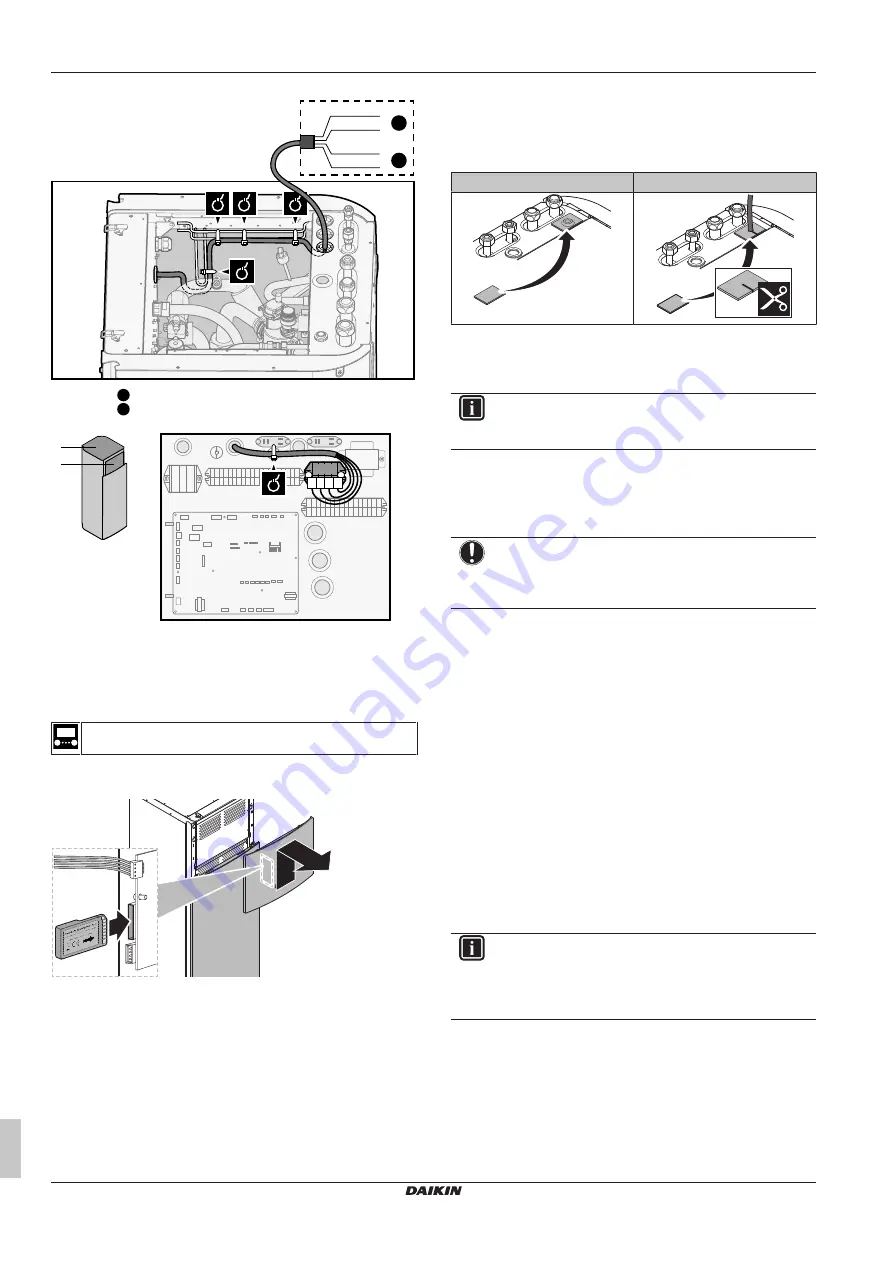
Connect the high voltage wiring as follows:
A
X10M.1
X10M.2
X10M.3
X10M.4
L
N
L
N
2
1
1
High voltage Smart Grid contact 1
2
High voltage Smart Grid contact 2
B
A
B
X5M
1 2 3 4
X10M
4
Fix the cables with cable ties to the cable tie mountings. If
necessary, bundle excessive cable length with a cable tie.
6.3.12
To connect the WLAN cartridge (delivered
as accessory)
[D]
Wireless gateway
1
Insert the WLAN cartridge into the cartridge slot on the user
interface of the indoor unit.
1
2
6.4
After connecting the electrical
wiring to the indoor unit
To prevent water ingress to the switch box, seal the low voltage
wiring intake using the sealing tape (delivered as accessory).
Without low voltage cables
With low voltage cables
7
Configuration
INFORMATION
This unit is a heating only model. Therefore, all references
to cooling in this document are NOT applicable.
7.1
Overview: Configuration
This chapter describes what you have to do and know to configure
the system after it is installed.
NOTICE
This chapter explains only the basic configuration. For
more detailed explanation and background information,
see the installer reference guide.
Why
If you do NOT configure the system correctly, it might NOT work as
expected. The configuration influences the following:
▪ The calculations of the software
▪ What you can see on and do with the user interface
How
You can configure the system via the user interface.
▪
First time – Configuration wizard.
When you turn ON the user
interface for the first time (via the unit), the configuration wizard
starts to help you configure the system.
▪
Restart the configuration wizard.
If the system is already
configured, you can restart the configuration wizard. To restart the
configuration
wizard,
go
to
Installer
settings
>
Configuration wizard
. To access
Installer settings
, see
"7.1.1 To access the most used commands"
▪
Afterwards.
If necessary, you can make changes to the
configuration in the menu structure or the overview settings.
INFORMATION
When the configuration wizard is finished, the user
interface will show an overview screen and request to
confirm. When confirmed, the system will restart and the
home screen will be displayed.


