o
peratIon
www .DaikinApplied .com
3
OM 1039-1 • VAV ACTUATOR ROOM SENSOR
o
peratIon
Operation Modes
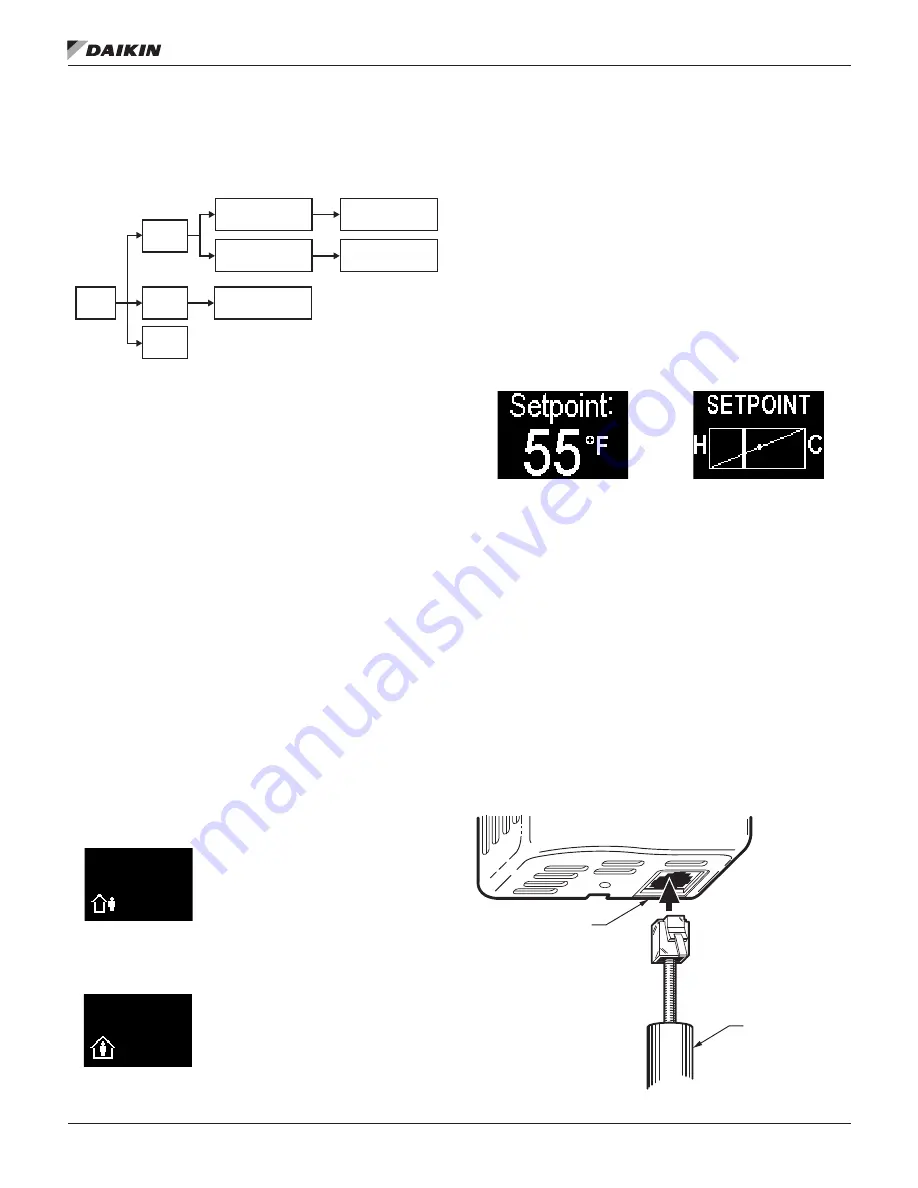
Figure 1: Operation Mode Diagram
Normal Mode
In Normal Mode, the display is updated with temperature,
humidity and occupied status (all where applicable) on a set
time cycle .
The display shows temperature in the desired units (as set by
the jumper on the PCA). Depending on the model, the humidity
will be displayed as well . When both of these variables need
to be displayed (temperature, relative humidity) the display will
cycle through the required values at a rate of one change every
three to five seconds.
Occupied Mode
If the BACnet VAV Actuator is currently in Unoccupied Mode
(
Figure 2
), pressing the override button (
Figure 3
) results in
the display showing the word OCCUPIED and the request is
sent to the actuator to override the unoccupied mode . If the
BACnet VAV Actuator does not get overridden and stays in the
unoccupied mode, the display on the sensor reverts back to
the unoccupied symbol as soon as possible .
If the BACnet VAV Actuator is currently in occupied mode,
pressing the override button flashes the word OCCUPIED and
does nothing else . This functionality is intended solely to let the
user know that the button press was recognized .
Figure 2: Unoccupied Icon
Figure 3: Occupied Icon
Setpoint Adjustment Mode
The temperature setpoint is adjusted by using the plus and
minus buttons . The resulting changes in setpoint are shown on
the display in 1 .0°F or 0 .5°C increments .
The setpoint adjustment will be displayed, and will stay on the
screen for three seconds. If, during those three seconds, a
setpoint button is pressed again, the setpoint will be adjusted
accordingly and be displayed, and the three-second countdown
will restart . If there is no user input for more than three
seconds, the room unit will return to the Normal Mode.
Figure 4: Setpoint Icons
Passkey Mode
Insert the passkey into the sensor HMI (Human-Machine
Interface) port to set up all of the user functionality identified in
Settings. For each parameter, use the following sequence:
• Press the occupancy override button to edit the
parameter
• Press the plus/minus buttons to scroll through the various
options available for each parameter to display the
desired option
• Press the occupancy override button again to move to the
next user adjustable parameter
•
When finished, remove the passkey from the HMI port
carefully . User setting changes will be saved when the
passkey is removed
Figure 5: Inserting the Passkey
Mode
Passkey
Normal
Laptop
Unoccupied Mode
Occupied Mode
User Settings
View/Change
Set Point
Occupancy
Override
Occupied Mode Unoccupied Mode
Occupied Mode Unoccupied Mode
HMI PORT
PASSKEY


