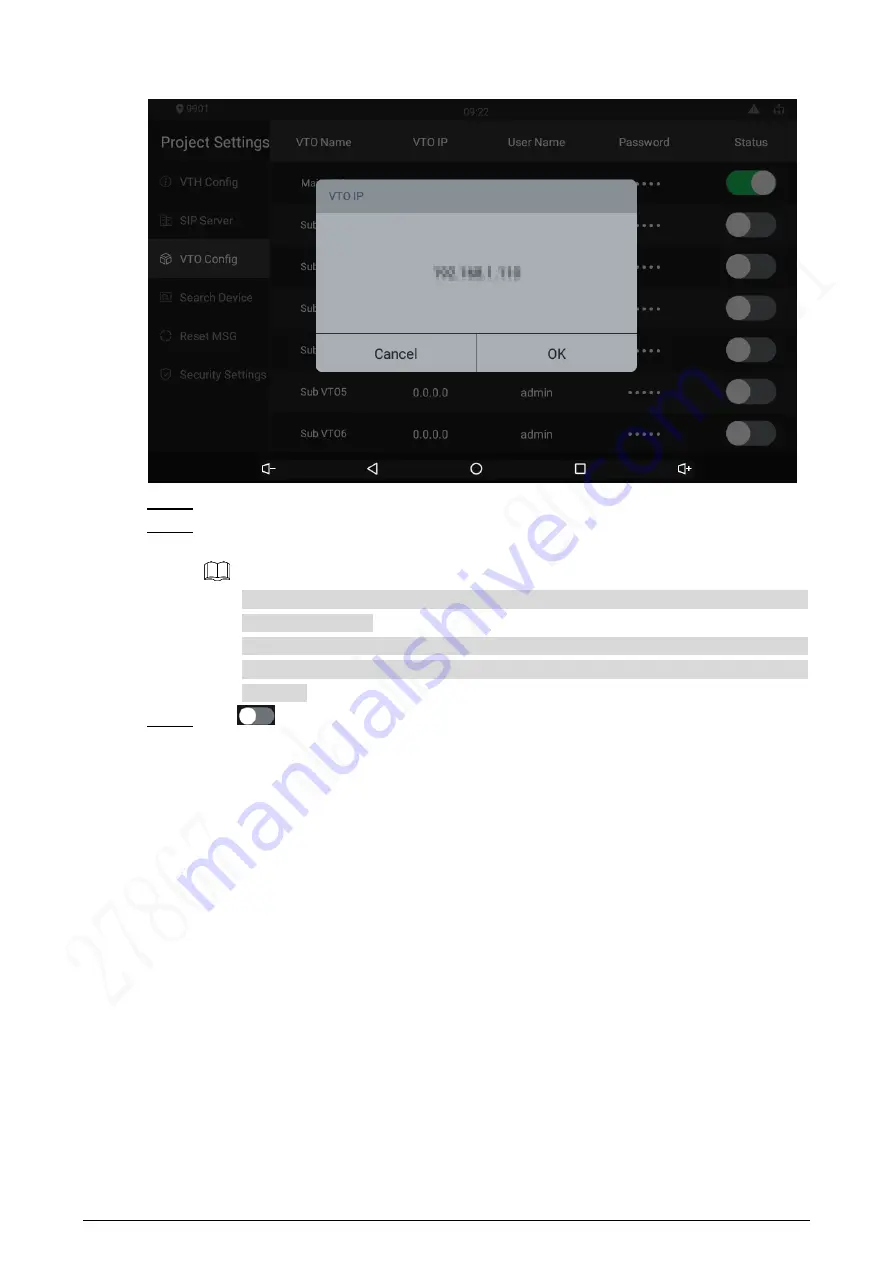
Dahua VTH5321GW-W User Manual Download Page 34


28 

 VTO IP 

Figure 4-27


  Tap the default IP, and then the on-screen keyboard appears. 

Step 3

  Enter the door station (VTO) IP, user name, and password (used to log in to the door 

Step 4

station web interface). 


You can add 20 door stations (one main door station and 19 sub door stations) to 

the indoor monitor. 


Make sure that user name and password that you entered here are the same as 

the  user  name  and  password  used  when  logging  in  to  the  door  station  web 

interface. 

  Tap 

  to enable the door station. 

Step 5

4.4.3.5 Searching Device 

Tap the 

Search Device

 icon, and then the system starts to search devices automatically. You 

can add the device found to the indoor monitor. 

Summary of Contents for VTH5321GW-W

Page 1: ...IP Indoor Monitor User s Manual V1 0 0...

Page 2: ...aws and regulations of related regions For detailed information see the paper manual CD ROM QR code or our official website If there is inconsistency between paper manual and the electronic version th...

Page 3: ...e device anything filled with liquids to prevent liquids from flowing into the device Install the device at well ventilated places do not block its ventilation opening Use the device only within rated...

Page 4: ...iguring Network Parameters 10 4 3 4 Selecting SIP Servers 11 4 3 5 Adding VTO Devices 13 4 3 6 Adding Room Number 14 Configuring Indoor Monitor 16 4 4 4 4 1 Initialization 16 4 4 2 Network Settings 22...

Page 5: ...come to your floor through the indoor monitor Emergency call Emergency calls can be made on the indoor monitor Auto snapshot During calls or during monitoring images can be captured and the images ca...

Page 6: ...3 Front Panel 1 3 10 Inch Front panel mm inch Figure 1 1 7 Inch Front panel mm inch Figure 1 2...

Page 7: ...No Name 1 On off button Press the button and then you can turn on off the screen press and hold the button you can turn on off or restart the indoor monitor 2 MIC inputs audio Rear Panel 1 4 10 Inch...

Page 8: ...1 USB port used by project personnel 2 SD card slot 3 Alarm ports power cables RS 485 port and network ports are under the cover 4 On off button Press the button and then you can turn on off the scre...

Page 9: ...3 Cable Connections 1 5 Cable connection Figure 1 5...

Page 10: ...No Name No Name 1 Indoor monitor 4 Anchor bolt 2 ST3 self tapping screws 5 Wall 3 Bracket Screw hole distances and diameters mm Figure 2 2 Table 2 2 Description of screw hole distances and diameters N...

Page 11: ...hor bolts into the screw holes Step 2 Fix the bracket on the wall with screws Step 3 Connect cables power cable network cables and more Step 4 Hang the indoor monitor on the bracket Step 5 The install...

Page 12: ...the wall according to holes on the bracket Step 1 Put anchor bolts into the screw holes Step 2 Fix the bracket on the wall with screws Step 3 Connect cables power cable network cables and more Step 4...

Page 13: ...7 3 Network Diagram Network diagram Figure 3 1...

Page 14: ...to the SIP server See 4 3 5 Adding VTO Devices 6 Add room number to the SIP server See 4 3 6 Adding Room Number Configure indoor monitor VTH See the VTH users manual Step 3 Commissioning See 4 5 Comm...

Page 15: ...3 The email setting interface is displayed Select the email check box and then enter your email address This email address can Step 4 be used to reset the password Click Next Step 5 The initializatio...

Page 16: ...mber can contain 5 numbers at most and it cannot be the same as any room number Log in to the web interface of the VTO Step 1 Main interface Figure 4 3 Select Local Setting Basic Step 2 Device propert...

Page 17: ...es to a scenario where there is only one building When the platform Express DSS works as SIP server select Express DSS from the Server Type drop down list It applies to a scenario where there are mult...

Page 18: ...ep 3 Table 4 2 SIP server parameter description Parameter Description IP Address IP address of SIP server Port It is 5060 by default when another VTO works as SIP server It is 5080 by default when the...

Page 19: ...t is necessary to set Building No and Building Unit No enable Support Building and Support Unit first 4 3 5 Adding VTO Devices You need to add VTO to the SIP server and all intercoms connected to the...

Page 20: ...me and password for the web interface of the target VTO Password Click Save Step 4 4 3 6 Adding Room Number You can add the planned room number to the SIP server and then configure the room number on...

Page 21: ...iption First Name Enter the information you need to differentiate each room Last Name Nick Name Room No The room number you planned If you use multiple VTH devices the room number of the master VTH sh...

Page 22: ...r 4 4 When the indoor monitor is used for the first time you need to select a language that you prefer initialize the indoor monitor to get a password to enter project setting interface and an email t...

Page 23: ...able when you select apartment Villa Select Villa when the door stations and indoor monitors are installed in villas Quick configuration is available when you select villa Select Villa Step 4 Tap OK S...

Page 24: ...Step 8 The Networking configuration interface is displayed Networking configuration Figure 4 15 Tap Edit behind each device to do configurations Step 9 Configure indoor monitor VTH 1 Select an indoor...

Page 25: ...ions VTO then you do not need to do sub door station VTO configurations 1 Select a door station VTO VTO config 1 Figure 4 17 VTO config 2 Figure 4 18 2 Select Main or Sub Enter local IP Network gatewa...

Page 26: ...displayed Connect the indoor monitor to power source Step 1 WELCOME is displayed and then the initialization interface is displayed Enter the password confirm password and email Step 2 Password The pa...

Page 27: ...de away from home mode sleep mode and customizable mode Select Arm Mode or Disarm Mode first and then tap the icons to arm or disarm 4 Status bar The wired network is not connected The wired network i...

Page 28: ...other indoor monitors and the management center and you can also view call logs and your contacts on this interface Tap the icon and then you can view alarm logs do alarm settings for 6 areas as neede...

Page 29: ...lect Ethernet IP mode There are two options Static and DHCP Apps notifications You can view the recently opened apps apps opened by default app permissions apps using location microphone and camera ap...

Page 30: ...ersion Kernel version build number and more about the indoor monitor Tap Network Internet Step 4 The Network Internet interface is displayed Tap Ethernet Step 5 The Ethernet interface is displayed Net...

Page 31: ...5 Enter the password Step 6 Tap CONNECT Step 7 The network is connected 4 4 3 Project Settings Tap and hold enter the password the password set during initialization and then the Project Settings inte...

Page 32: ...s System Version You can view system version of the indoor monitor Security Baseline Version You can view security baseline version of the indoor monitor 4 4 3 3 SIP Server You need to enter SIP serve...

Page 33: ...VDP Login Name Username and password to log in to web of the SIP server Login Pwd Status Enable the SIP server status and then the SIP server can start to work 4 4 3 4 VTO Config You need to add door...

Page 34: ...one main door station and 19 sub door stations to the indoor monitor Make sure that user name and password that you entered here are the same as the user name and password used when logging in to the...

Page 35: ...ange the email address that you use to reset your password You need to enable the Resst Password first if you want to reset the password Tap and hold Step 1 The password verification interface is disp...

Page 36: ...fe number will be sent to your email address Tap Next and then enter the new password confirm password and safe number Step 6 The password is reset Reset password Figure 4 30 4 4 3 7 Security Settings...

Page 37: ...he enable trusted list interface and then the Add Network Trusted List will be displayed 4 4 4 General Settings Tap enter the password 123456 by default and this password can be changed in 4 4 4 4 Gen...

Page 38: ...ions Always Busy and No Answer and other settings 4 4 4 1 Ring On this interface you can select ringtones for different door stations indoor monitors and alarm devices Ring Figure 4 33 4 4 4 2 DND Ena...

Page 39: ...No Answer Forward Figure 4 35 Always Whenever calls come in they will always be forwarded Busy If calls come in when you are talking to others over the indoor monitor the calls will be forwarded No An...

Page 40: ...ment enter the number of the room where the indoor monitor is installed 4 4 4 4 General On the General interface you can set new passwords for arming and disarming registering new users and downloadin...

Page 41: ...me Internal Call Time s You can talk to other indoor monitors for at most 60 minutes a time Internal Call After the Internal Call is enabled you can call other indoor monitors from the indoor monitor...

Page 42: ...ral alarm modules can be connected to the indoor monitor You can view alarm logs do alarm settings for 8 areas as needed There are 7 types of alarms Infrared gas sensor smoke sensor urgency button doo...

Page 43: ...37 Viewing alarm prompt Figure 4 40 Viewing alarm record Figure 4 41...

Page 44: ...pes according to detector types NO NC Select NO normally open or NC normally closed according to detector types It shall be the same as detector type Status There are 5 statuses Instant delay bypass r...

Page 45: ...period you set after that period has passed in the Arm Mode voice prompt will be given out This function is only available when you have selected Delay status for an area Exit Sec In the Arm Mode aft...

Page 46: ...be pushed to the indoor monitor Tap on the main menu Step 1 Select Enable 433 Step 2 Enable 433 Step 3 Tap WirelessZone Step 4 Tap Add Step 5 The indoor monitor enters the paring mode Press the parin...

Page 47: ...ter you have enabled the alarm output function when there are people making calls to the indoor monitor from other devices alarm devices will send alarms Alarm out Figure 4 45 4 5 3 Alarm Mode There a...

Page 48: ...the people at the door station over the indoor monitor Arm Disarm 4 7 After areas are armed when alarms are triggered alarm messages will be pushed to the indoor monitor Make sure that areas you want...

Page 49: ...tion has passed 4 7 2 Disarm Make sure that areas you want to disarm are armed otherwise you cannot disarm the area If you are forced to enter arm disarm password to disarm you can enter the hijacking...

Page 50: ...eos captured by door stations and IP cameras You can also put door stations and IP cameras that you like into the Favorite folder by tapping at the lower right corner of each device During the call wi...

Page 51: ...erface and slide it to the left or right to close the interface Tap the icon to turn up the volume 4 9 2 Checking Messages Tap on the main menu and then you can watch videos left by visitors view snap...

Page 52: ...46 Guest message Figure 4 51 4 9 2 2 Publish Info Public notices released by the management center are stored in the indoor monitor Viewing publish information Figure 4 52 4 9 2 3 Video Pic...

Page 53: ...47 This function will be available when SD card is inserted in the indoor monitor and all videos and snapshots will be stored in the SD card Viewing video pictures Figure 4 53...

Page 54: ...s and your contacts on this interface You can also call the indoor monitor from door stations Making calls Figure 4 54 Calling Figure 4 55 If SD card is not inserted the video recording icon and snaps...

Page 55: ...SIP server Call residents in your apartment or your building enter a room number Call residents in other apartments and buildings enter 1 1 101 for apartment 1 building 1 room 101 If you call the exte...

Page 56: ...firmware updates released by the manufacturer We suggest that you download and use the latest version of client software Nice to have recommendations to improve your equipment network security 1 Physi...

Page 57: ...Choose WPA2 PSK encryption mode and set up strong passwords 11 Audio and Video Encrypted Transmission If your audio and video data contents are very important or sensitive we recommend that you use en...

Page 58: ...blish the 802 1x access authentication system to reduce the risk of unauthorized access to private networks It is recommended that you enable your device s firewall or blacklist and whitelist feature...

Reviews: