background image


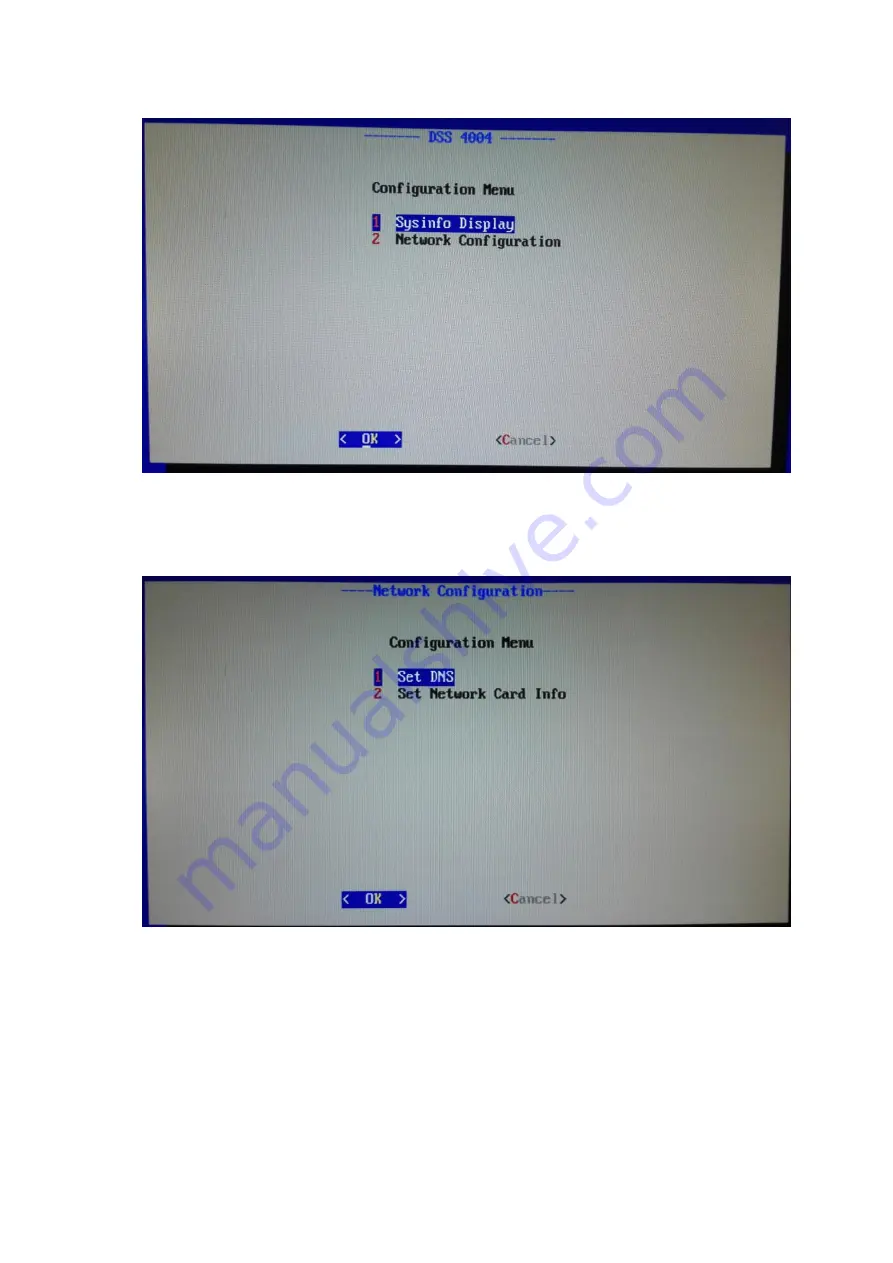
Figure 2- 2 

Step 3.  Press 


button, move cursor to 2 “Set Network Card Info”, and press Enter. See 

Figure 2- 3. 


Figure 2- 3 


Step 4.  Press 

, you shall select port to configure.   

Eth0  corresponds  to  port  1;  eth1  corresponds  to  port  2  and  so  on.  Select  port,  and 

press Enter. See Figure 2- 4. 

Summary of Contents for DSS4004

Page 1: ...DSS4004 Platform Initialization User s Manual V1 0 2...

Page 2: ...GE INSPECTION 1 1 1 Steps of Inspection 1 1 2 Front Panel 1 1 3 Rear Panel 1 2 INITIALIZATION SETUP 2 2 1 System IP Address 2 2 1 1 Local Setting 2 2 1 2 Web Setting 4 2 2 Other Basic Config 5 3 WEB M...

Page 3: ...is initialization user s manual is designed to be a reference tool for the installation and operation of your system Before installation and operation please read the following safeguards and warnings...

Page 4: ...e examination and repair work should be done by the qualified service engineers We are not liable for any problems caused by unauthorized modifications or attempted repair 5 Environment The device sho...

Page 5: ...n as below See Figure 1 1 Figure 1 1 Please refer to the following sheet for front panel button information SN Name Function 1 Power button Press it to turn off the device 2 USB port 3 USB port 4 HDD4...

Page 6: ...low the steps listed below to set the initialization information 2 1 System IP Address Before you use the platform please set system IP address DSS4004 default IP address port 1 192 168 1 108 port 2 1...

Page 7: ...ove cursor to 2 Set Network Card Info and press Enter See Figure 2 3 Figure 2 3 Step 4 Press you shall select port to configure Eth0 corresponds to port 1 eth1 corresponds to port 2 and so on Select p...

Page 8: ...move cursor to OK and press Enter A pop up window shows Save network configuration select OK to save The IP configuration is now complete 2 1 2 Web Setting Step 1 Please input http ip config on the I...

Page 9: ...ure 2 7 2 2 Other Basic Config After you set platform IP address please access the platform via a PC to config system basic infomation Please refer to Ch 2 1 2 Please follow the steps listed below Ste...

Page 10: ...sh disk and perform other operations Step 3 Link config Select Link Config Mail Link interface See Figure 2 8 When you configure alarm scheme at Master end select main link and set main receiver If al...

Page 11: ...hnical Support If you have any question please contact technical support Note This user s manual is for reference only Slight difference may be found in the user interface All the designs and software...

Reviews: