


14
5
Main Interface
Main interface
Table 5-1
Main interface introduction
No.
Function
Description
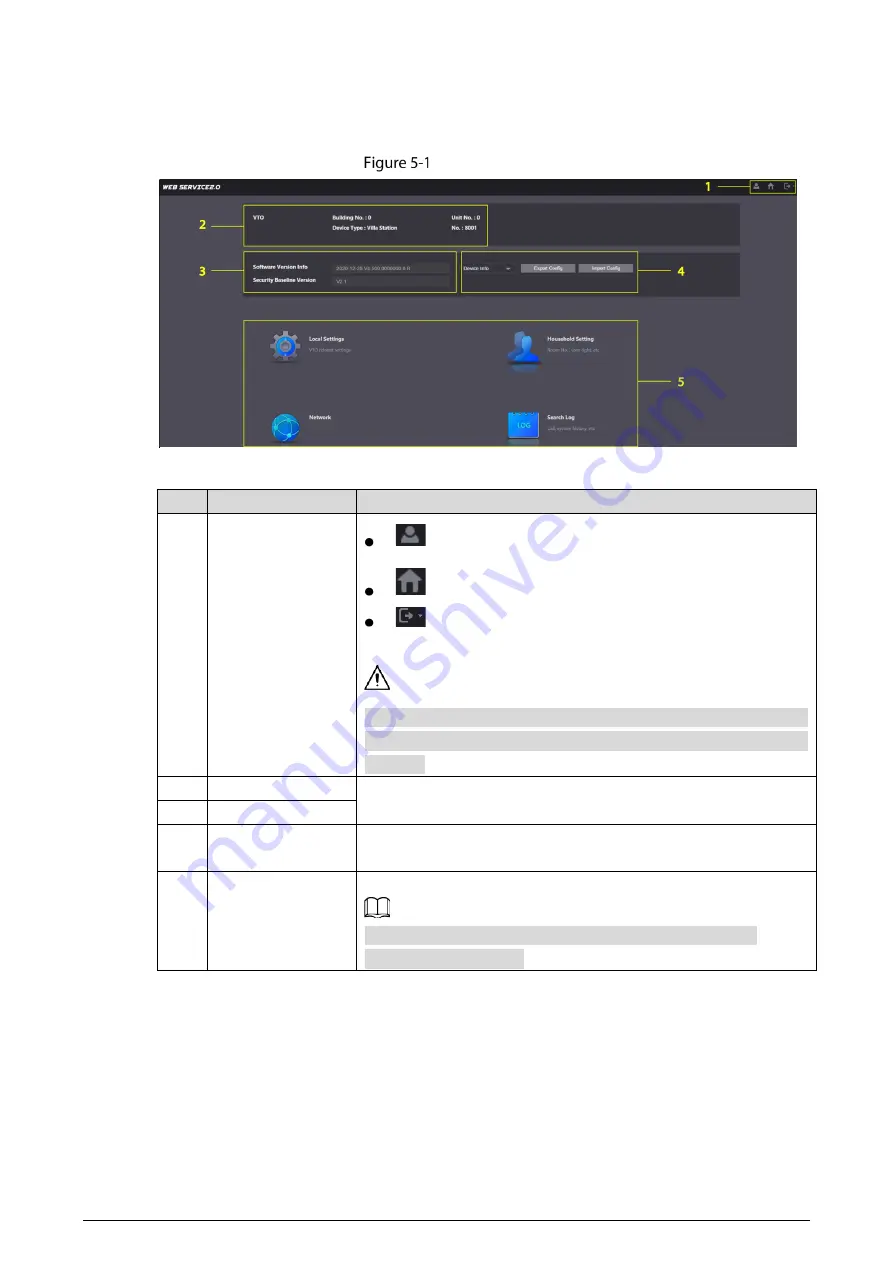
1
General function
: Change the password and your email address.
: Return to the main interface.
: Log out, restart the VTO or restore the VTO to factory
settings.
If you restore the VTO to factory settings, the unit deletes all data
except the external storage. You can format the SD card to delete the
data in it.
2
VTO information
View the VTO and system information.
3
System information
4
Configuration
manager
Export or import VTO configuration or user information.
5
Function
Configure parameters for different functions.
Interface and function might vary with the device type you
configured for the VTO.


