Dahua DHI-NVR608R-64-4KS2 Quick Start Manual Download Page 19


14 

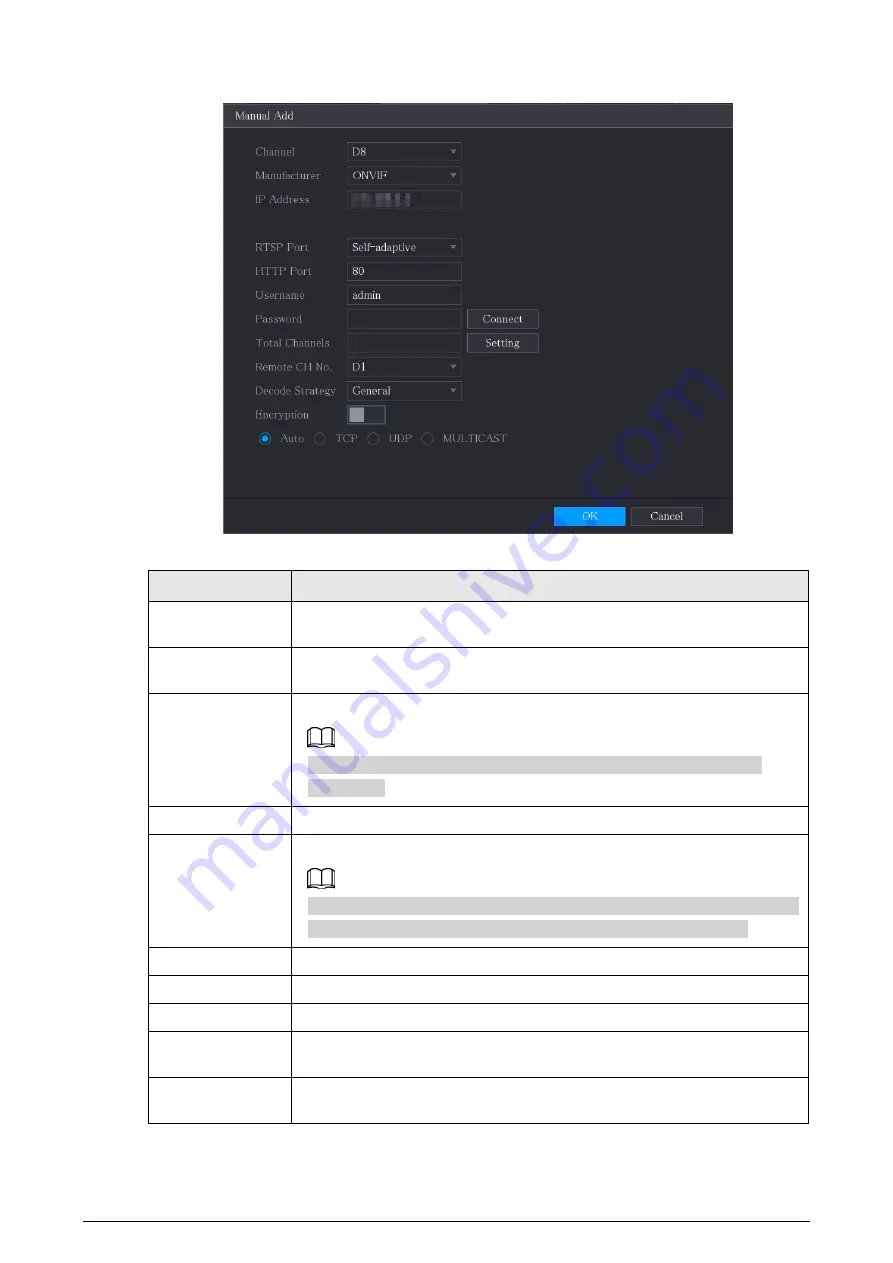
Figure 1-16 Configure manual add parameters 


Table 1-4 Manual add parameters 

Parameter 

Description 

Channel 

From the 

Channel

 drop-down list, select the channel that you want use 

on the NVR to connect the remote device. 

Manufacturer 

From the 

Manufacturer

 drop-down list, select the manufacturer of the 

remote device. 

IP Address 

In the 

IP Address

 field, enter the IP address of the IP camera. 


Change the default value (192.168.0.0) which the system cannot 

connect to. 

RTSP Port 

The default value is 554. You can change the value as needed. 

HTTP Port 

The default value is 80. You can change the value as needed. 


If you enter another value, for example, 70, and then you should enter 

70 after the IP address when logging in to the NVR by browser. 

TCP Port 

The default value is 37777. You can change the value as needed. 

Username 

Enter the username of the remote device. 

Password 

Enter the password of the user for the remote device. 

Remote CH No. 

Enter the remote channel number of the remote device that you want 
to add. 

Decoder 
Strategy 

In the 

Decoder Strategy

 list, select 

Default

Realtime

, or 

Fluent

 as 

needed. 

Summary of Contents for DHI-NVR608R-64-4KS2

Page 1: ...Network Video Recorder Quick Start Guide V1 0 0...

Page 2: ...t personal data of others such as face fingerprints car plate number Email address phone number GPS You need to be in compliance with the local privacy protection laws and regulations to protect the l...

Page 3: ...r final explanation Upgrade the reader software or try other mainstream reader software if the Manual in PDF format cannot be opened All trademarks registered trademarks and the company names in the M...

Page 4: ...utput range Do not dismantle the NVR arbitrarily Transport use and store the NVR within allowed humidity and temperature range Power Requirements Use batteries according to requirements Otherwise it m...

Page 5: ...tializing IP Camera 6 1 4 2 Adding IP Camera by Search Result 10 1 4 3 Manually Adding IP Camera 12 1 5 Configuring Recorded Video Storage Schedule 15 1 6 Configuring P2P Settings 17 1 6 1 Enabling P2...

Page 6: ...n connect it to the power socket Always use stable current It is recommended to use UPS as the power source 1 2 Initializing the NVR This topic shows how to initialize the NVR before use Background In...

Page 7: ...Step 3 Click Next Step 4 Read the Software License Agreement and select I have read and agree to all terms and then click Next Step 5 Select time zone and configure system time and then click Next Fi...

Page 8: ...he next field The new password can be set from 8 characters to 32 characters and contains at least two types from numbers letters and special characters excluding and Confirm Password Password Hint En...

Page 9: ...al Apply reserved email and security questions to the NVR Enable Reserved Email and enter the email address Enable Security Question and select questions from the drop down lists for Question 1 Questi...

Page 10: ...nfiguration once DHCP is enabled If DHCP is effective the obtained information will be displayed in the IP Address Subnet Mask and Default Gateway If not all values show 0 0 0 0 If PPPoE connection is...

Page 11: ...amera You can add an IP camera by search result or by manually entering IP information Cameras you want to add must be in the same network with the NVR 1 4 1 Initializing IP Camera The topic shows how...

Page 12: ...Search uninitialized device Step 3 Select the camera to be initialized and then click Initialize Figure 1 8 Initialize the camera Step 4 Apply password and email information to the IP camera Use the N...

Page 13: ...d and email info This check box is selected by default Figure 1 9 Apply device settings 2 Click Next Manually set password and email information 1 Cancel Using current device password and email info F...

Page 14: ...h bar indication Confirm Password 3 Click Next 4 Enter an email address and click Next Figure 1 11 Set email information Step 5 Configure camera IP address Select DHCP if there is a DHCP server deploy...

Page 15: ...ion to complete Step 7 Click Finished 1 4 2 Adding IP Camera by Search Result Prerequisites Make sure that the cameras you want to add have already been initialized and connected to the right network...

Page 16: ...s Add by double click Double click the target camera to add it to Added Device list You can add only one camera by search result at one time Add by check box Select the check box of the target camera...

Page 17: ...icates connection failure between the camera and the NVR Check the parameters of the camera such as password protocol and channel number and then try adding it again 1 4 3 Manually Adding IP Camera Yo...

Page 18: ...13 Figure 1 15 Manual add Step 3 In the Manual Add dialog box configure parameters...

Page 19: ...not connect to RTSP Port The default value is 554 You can change the value as needed HTTP Port The default value is 80 You can change the value as needed If you enter another value for example 70 and...

Page 20: ...abling the Encryption check box will provide encryption protection to the data being transmitted To use this function the HTTPS function must be enabled for the remote IP camera Step 4 Click OK 1 5 Co...

Page 21: ...the new schedule This function is available on select models The redundant HDD only backs up the recorded videos but not snapshots Event type Select the check box of the event types General General re...

Page 22: ...ck Apply The configured record schedule can come into effect only when the auto record function is enabled For details to enable auto record see User s Manual 1 6 Configuring P2P Settings You can use...

Page 23: ...ne Client This topic takes adding the NVR to smart phone client as an example for smart phone management Step 1 Open the application and tap Step 2 Select SN Scan Figure 1 19 Add device Step 3 Select...

Page 24: ...rt Motion Detection SMD Background Information The Smart Motion Detection SMD is an ideal monitoring feature for low populated areas where you want an alert for human or vehicles anywhere in the scene...

Page 25: ...om the end of motion detection to the end of alarm linkage action The range is 0 to 600 seconds Alarm out Port The alarm device such as lights sirens etc is connected to the alarm output port When an...

Page 26: ...the preset point X Tripwire alarm supports to activate PTZ preset point only You need to set the corresponding PTZ actions first Tour Select the check box and select the channel for tour When an alarm...

Page 27: ...number are displayed on each channel window This setting can be configured by selecting Main Menu CAMERA Overlay Overlay The figure at the lower right corner represents channel number If the channel...

Page 28: ...f the recorded video By clicking the instant playback interface is displayed The instant playback has the following features Move the slider to choose the time you want to start playing Play pause and...

Page 29: ...there was any motion detection event occurred The system will display the images with motion events of the recorded video This function is for some series product only To use the Smart Search functio...

Page 30: ...he actual product shall govern Procedure Step 1 Open the browser and enter the IP address of the NVR and then press Enter key Step 2 Enter the username and password Figure 2 1 Login The default admini...

Page 31: ...er We suggest that you download and use the latest version of client software Nice to have recommendations to improve your equipment network security 1 Physical Protection We suggest that you perform...

Page 32: ...dio and Video Encrypted Transmission If your audio and video data contents are very important or sensitive we recommend that you use encrypted transmission function to reduce the risk of audio and vid...

Page 33: ...uthentication system to reduce the risk of unauthorized access to private networks 15 It is recommended that you enable your device s firewall or blocklist and allowlist feature to reduce the risk tha...

Reviews: