


1
1
Introduction
Cable type might vary with different devices, and the actual product shall prevail.
Waterproof all the cable joints with insulating tape and waterproof tape to avoid short circuit
and water damage. For the detailed operation, see the
FAQ manual
.
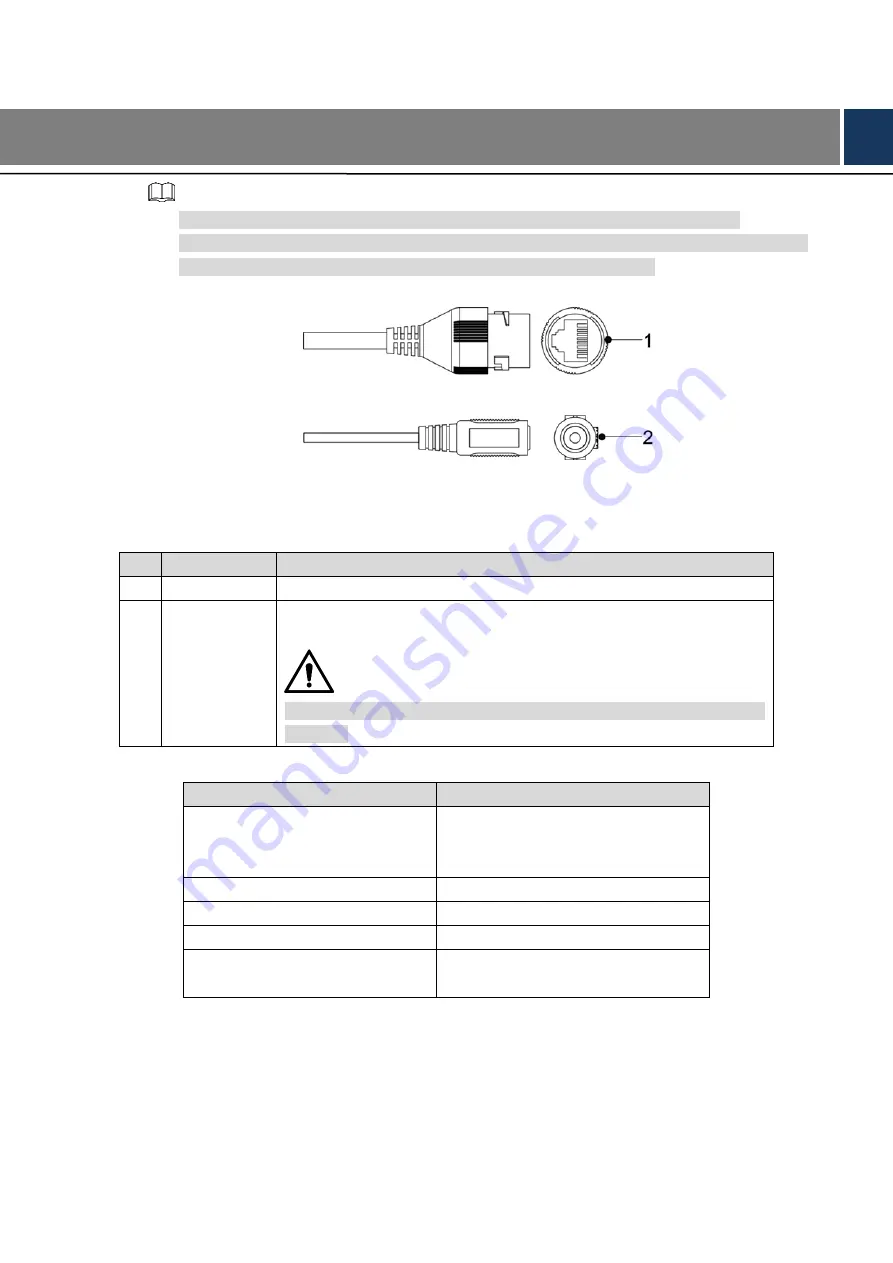
Cable list
Figure 1-1
For more information about cable ports, see Table 1-1, and for the pattern of the LED Indicator,
Table 1-1 Cable information
No. Port Name
Function
1
Ethernet port
Connects to network with network cable.
2
12V DC
power input
Inputs 12V DC power. Please be sure to supply power as instructed
in the Guide.
Device abnormity or damage could occur if power is not supplied
correctly.
Table 1-2 LED indicator description
LED Indicator Status
Device Status
Red light on
Booting
Device malfunction
Failed to boot up
Green light flashing
Waiting for Wi-Fi network
Green light on
Operating properly
Green light quick flashing
WPS mode
Green and Red light
flashing alternately
Firmware updating
Summary of Contents for DH-IPC-D1BX0-B
Page 1: ...EZ IP HD Indoor Wi Fi Dome Network Camera Quick Start Guide V1 0 0 ...
Page 13: ...6 Live preview Figure 2 6 ...
Page 15: ...8 Installing Device 3 3 3 3 1 Installation Type ...
Page 18: ...11 Cable going through the mounting surface ...
Page 19: ...12 Cable going through the side cable tray 3 3 6 Adjusting Lens Angle ...