background image


6  DVR Setup 

6.1  Making Connections 

1.  Determine where you will install your system.  
2.  Connect the mouse to the USB port on the rear panel.  
3.  (Optional) Connect a network cable to the DVR and to a router or a modem. 
4.  Connect a VGA or HDMI cable to the rear panel and to the display. 
5.  Connect the power cable to your system and surge protector. The DVR enters the boot mood 

after power is applied and the DVR defaults to the multiple-window video mode. 

6.2  Logging In 

The DVR has three built-in accounts for different user levels: 

Account 

Username 

Password 

Administrator, local and network 

admin 

admin 

Administrator, local only 

888888 

888888 

Hidden User 

default 

default 

Note: For security reason, modify the password after the initial login.  

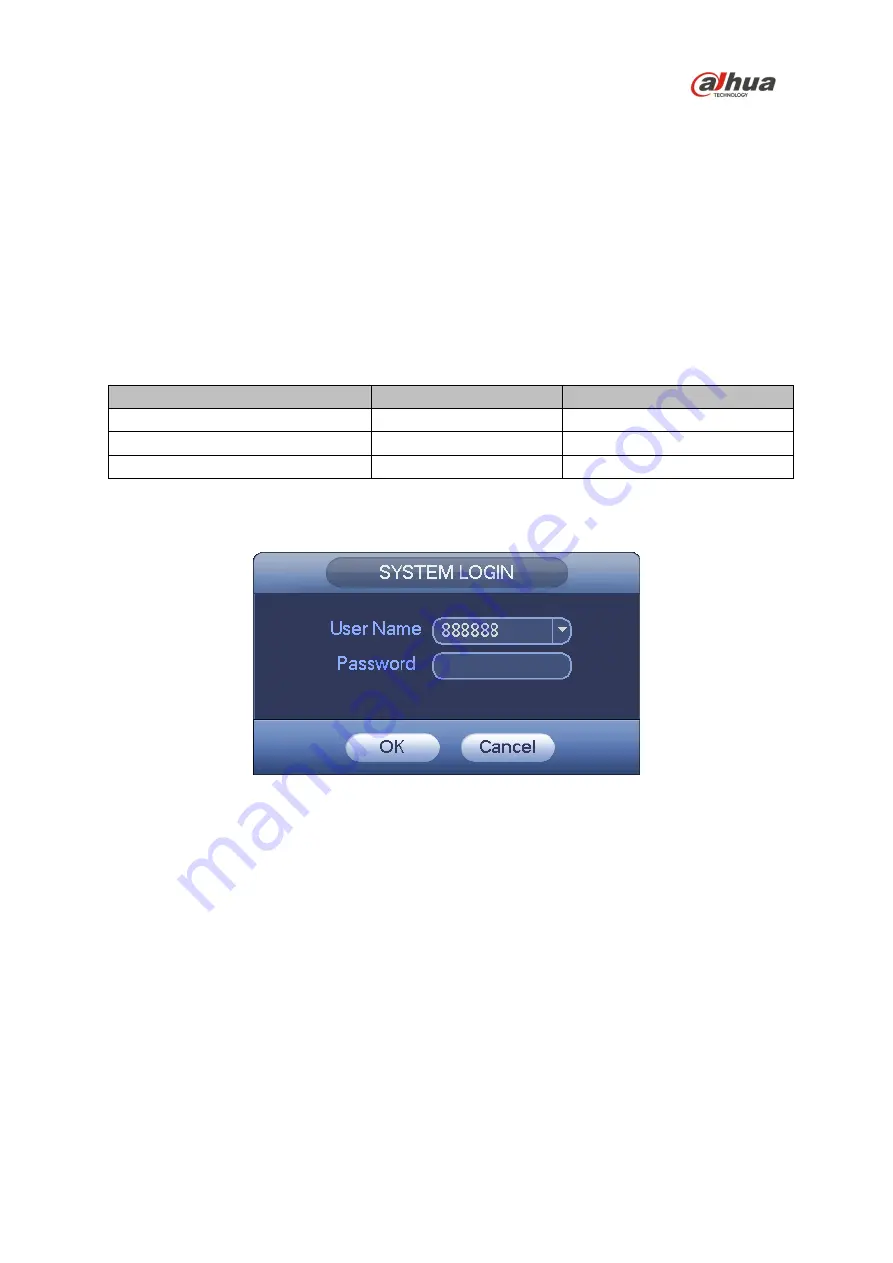
Click Enter or left mouse click to access the System Login interface. Type a default Username and 
Password to access the system. 


Figure 5-1 

Note:  


Three login failures within 30 minutes causes the system to issue an alarm. 


Five login failures within 30 minutes causes the system to lock the account. 

Summary of Contents for X28A5S Series

Page 1: ...32 Channel 1080p 2U HDCVI Digital Video Recorder X28A5S Quick Start Guide Version 1 0 1 Dahua Technology USA Inc...

Page 2: ...n and Daily Maintenance 2 Warnings 2 1 2 FCC Information 3 FCC compliance 3 1 3 Legal Notices 3 Copyright 3 Trademarks 3 1 4 Disclaimer 3 2 Unpacking 4 3 DVR Components 5 3 1 Front Panel 5 3 2 Rear Pa...

Page 3: ...te the unit only from the type of power source indicated on the label Before proceeding disconnect the power from the cable to be installed into the unit For external power supplied units use only the...

Page 4: ...proper amount of air flow required for safe operation or install the unit elsewhere A rack mount is capable of supporting a maximum weight Ensure the rack mount can support the additional weight of t...

Page 5: ...guide is 2017 Dahua Technology Company LTD This user guide is the intellectual property of Dahua Technology Company LTD and is protected by copyright All rights reserved Trademarks All hardware and s...

Page 6: ...are included If an item is missing contact customer support or your local representative The original packing carton is the safest container to transport the unit in the event the unit must be returne...

Page 7: ...rking normally HDD HDD status indicator Blue light indicates the HDD is malfunctioning NET Network status indicator Blue light indicates the network connection is abnormal POWER Power status indicator...

Page 8: ...osen the two top screws and the two side screws from the rear of the unit Remove the cover and reserve the screws 3 Align the HDD with the four holes on the HDD bracket Use four screws to affix the HD...

Page 9: ...5 C 95 F where the DVR is installed Ensure there is at least 150 0 mm 5 90 in of space around the DVR to guarantee adequate air flow and ventilation Install devices from the bottom of the rack to the...

Page 10: ...to the multiple window video mode 6 2 Logging In The DVR has three built in accounts for different user levels Account Username Password Administrator local and network admin admin Administrator loca...

Page 11: ...Web Interface for your device 1 Launch Internet Explorer and type the DVR s IP address in the address bar Internet Explorer opens the Login page 2 Click Yes to install webrec cab when the system displ...

Page 12: ...logy USA Inc 23 Hubble Irvine CA 92618 Tel 949 679 7777 Fax 949 679 5760 Email sales usa global dahuatech com Rev 001 001 2017 Dahua All rights reserved Design and specifications are subject to change...

Reviews: