background image

|


23  

|  


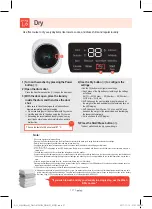
Use this course for quick washing of small amounts of laundry.

Quick Wash

1) Turn on the washer by pressing the Power button (

).

2) Open the drum door. 

  Press the Door Release button (

) to open the drum door.

3) With the door open, place the laundry inside the washer, add detergent and fabric 

softener to their respective drawers, and then close the drum door shut.    

  Make sure to close the detergent and fabric-softener drawers completely before proceeding.     
  Limit the size of the laundry load to 1kg when using the Quick Wash course.
 

 Exceeding the recommended laundry-load size may result in abnormal noise, abnormal vibration, and/or a malfunction.

4) Press the Course button (

) to select Quick Wash.

  • Water temperature is set to cold, rinse cycles is set to 1, and spin strength is set to high automatically.

5) Press the Start/Pause button (

).

  The door will lock, and the washer will start filling with water.  

Note:

-  To change the settings while the washer is in operation, first pause it by pressing the Start/Pause button 

and then make the changes.

-  Pressing the Power button and then the Start/Pause button starts the wash cycle using the initial auto-

selection settings.  

Caution:

- If using a detergent that generates a large amount of suds, program in additional rinse cycles.    

To change the number of rinse cycles after selecting a course, press the Rinse+ button (

). 

Each press of the button adds 1 rinse cycle.

 The maximum number of rinse cycles allowed for Quick Wash course is 5.  

Tip

"When you have a small laundry load and are pressed for time

use Quick Wash to wash it clean in just 15 minutes." 

3

5

4

1

2

미니_사용자매뉴얼_DWC-M25CW_영어버젼_호주향.indd   23

2017-11-13   오후 2:23:01

Summary of Contents for MINI DWC-M25CW

Page 1: ...ion where it will be easily accessible for all users of the product Read the Safety Precautions before use and follow all safety related instructions when using the product This is the world s first w...

Page 2: ...Wall mounted Drum Washer and Dryer A compact and adorable Washer and Dryer that combines the inherent strength and stability of a cube with colors that can complement any interior Ultra Compact Desig...

Page 3: ...for Washing 15 Adding Detergent and Fabric Softener 16 Course Selection Guide 17 Getting Ready Troubleshooting 29 Before Contacting Customer Service 30 Specifications Wiring Diagram 31 Checking Butto...

Page 4: ...silk and wool individually without worrying about discoloration shrinking or any other type of damage Delicate Touch With Cold Delicate Spin Baby Care Quick Wash Wash Dry Air Refresh and Intensive cou...

Page 5: ...all spaces May result in an electric shock and or fire If the product suddenly stops generates smoke produces a strange smell or does anything else that appears strange unplug the power cord for safet...

Page 6: ...ches open the windows to ventilate May result in a malfunction electrical leak and or electric shock Refer to the user manual or contact the service center for instructions on grounding the product If...

Page 7: ...y using the product without the supervision and or guidance of another Proper supervision may be required for the safe use of the product Do not place your hand or a metallic object underneath the was...

Page 8: ...May cause abnormal vibration while the drum spins which may in turn damage the wall and or cause an injury May result in an injury Open the tap and ensure a flow before use Do not operate the washer...

Page 9: ...cause the washer to malfunction After a water outage or when disconnecting and reconnecting the water hose close the tap press the Start button and then gradually reopen the tap Also applies after an...

Page 10: ...uct malfunction and or injury Unsupervised or uninstructed individuals individuals with a physical sensory or mental disability inexperienced or unknowing individuals and children under the age of 3 m...

Page 11: ...asher make sure to wash them with detergent and hot water first Above information is intended to reduce the risk of a fire and or injury While washing such items before placing them in the washer does...

Page 12: ...s not represent a malfunction or defect of the product Recommended length of the drainage hose is 2 5m 1 Connect the water hose and open the tap Make sure there is no leak anywhere along the water hos...

Page 13: ...earest service center Included accessories may vary depending on the model and specifications Body Screw X4 Cushion Pad X4 User Manual Power Cord Elbow X1 Water Hose Anchor Bolt X4 Hose Adapter Draina...

Page 14: ...attempt to dry already dry or unwashed clothes using the Dry course Drying already dry clothes is a fire hazard Only dry clothes and items that have been washed using the washer The Dry course may no...

Page 15: ...Check the care labels of the clothes you intend to wash Follow the instructions found on the care labels In particular remember to separate whites and colors Flip clothes with loose threads or fluff i...

Page 16: ...bric softener drawers towards you Close Push the drawers straight in until fully closed Adding Fabric Softener Add an appropriate amount of fabric softener to the fabric softener drawer The softener i...

Page 17: ...nerwear Cotton approx 130g Baby Towel Cotton approx 10g Detergent and Fabric Softener Precautions Highly concentrated detergents gel detergents and other types of liquid detergents that are prone to h...

Page 18: ...me the power is restored the washer will automatically lock the door Note 1 7 6 2 5 4 3 Power Turns the washer on or off Course Used to select the desired course The selected course s indicator lights...

Page 19: ...ash everyday items like towels socks and dress shirts and regular laundry Note To change the settings while the washer is in operation first pause it by pressing the Start Pause button and then make t...

Page 20: ...function 4 Repeatedly press the Course button until Delicate is selected Water temperature is set to cold rinse cycles is set to 2 and spin strength is set to low automatically 5 Press the Start Pause...

Page 21: ...inse cycles is set to 0 and spin strength is set to high automatically 5 Press the Start Pause button The door will lock and the drum will start to spin Note The drum may sometimes fill with water dur...

Page 22: ...suds form during the Baby Care course drain fill Start Pause and repeat to eliminate the suds Do not wash items that are vulnerable to heat To change the settings while the washer is in operation firs...

Page 23: ...to cold rinse cycles is set to 1 and spin strength is set to high automatically 5 Press the Start Pause button The door will lock and the washer will start filling with water Note To change the settin...

Page 24: ...d drained for improved drying performance is displayed on the LED display once the dry cycle is completed and the door is unlocked once the temperature drops to a certain level The dried items may be...

Page 25: ...nd air This course is ideal for beddings and clothes that cannot be washed in water Once the course is selected it will not be possible to select other cycles The maximum size of the load for Air Refr...

Page 26: ...eration first pause it by pressing the Start Pause button and then make the changes Pressing the Power button and then the Start Pause button starts the wash cycle using the initial auto selection set...

Page 27: ...oftener Pressing the Power button and then the Start Pause button starts the wash cycle using the initial auto selection settings Refer to the drying capacity and limit the load size to less than 1kg...

Page 28: ...he drum Detergent Residue Prolonged use of the washer without cleaning and use of excessive amounts of detergent cause dark and patchy detergent residue to form inside the drum This residue can affect...

Page 29: ...d noise at the end of the spin cycle 12 One of the traits of a drum washer is its ability to do laundry using only a small amount of water You may not able to see the water level but this is not a mal...

Page 30: ...gain Restarting the washer clears the error message from the display Not working Is the drainage hose pointing down Could you have inserted the drainage hose too deeply inside the drain and ended up b...

Page 31: ...el DWC M25CW External Dimensions 550 W X 650 H X 325 D Weight 23kg Standard Water Use Cold Course 25 Power 240V 50Hz Standard Load Capacity Wash 2 5kg Dry 1kg Operational Water Pressure 98 1kPa 784kPa...

Reviews: