background image

3

Although your oven is provided with safety
features, it is important to observe the
following:
a) It is important not to defeat or tamper
with safety interlocks.
b) Do not place any object between the front
face and the door or allow residue to
accymulate ob sealing surfaces.
Wipe the sealing area frequently with a mild
detergent, rinse and wipe dry. Never use
abasive powders or pads.
c) When opened, the door must not be
subjected to stain, for example, a child hanging
on an opened door or any load could cause the
oven to fall forward to cause injury and also
damage the door. Do not operate the oven if it
is damaged, until it has been repaired by a
qualified service engineer. It is particularly
important that the oven door closes properly
and that there is no damage to the:
i) Door (bent)
ii) Hinges and Latches (broken or loosened)
iii) Door seals and Sealing surfaces
d) The oven should not be adjusted or
repaired by anyone except properly
qualified service personnel.

NOTE:

It is quite normal for steam to be emitted
around the door during the cooking cycle. The
door is not intended to seal the oven cavity
completely, but its special design contributes
to the complete safety of the appliance.

CAUTION:

1. Do not attempt to operate the oven while
empty as this will cause damage.
2. As an exhaust is located in the rear of the
oven, install the oven so as not to block the
outlet.

This section includes useful information
about oven operation.
1. Plug power supply cord into a standard 3-
pronged 10 Amp, 230V AC 50Hz power
outlet.
2. After placing the food in a suitable
container, open the oven door and put it on
the glass tray.
The glass tray and roller guide must always
be in place during cooking.
3. Shut the door. Make sure that it is firmly
closed. When the oven door is closed, the
light turns off.
The oven door can be opened at any time
during operation by pressing the door release
button on the control panel. The oven will
automatically shut off. To restart the oven,
close the door and then touch START.
The oven automatically cooks on full power
unless set to a lower power level.
The display will show “ : 0” when the oven
is plugged in.
Time clock returns to the present time when
the cooking time ends.
When the STOP/CLEAR is touched during
the oven operation, the oven stops cooking
and all information retained. To erase all
information(except the present time), touch
the STOP/CLEAR once more. If the oven
door is opened during the oven operation, all
information is retained.
If the START is touched and the oven does
not operate, check the area between the door
and door seal for obstructions and make sure
the door is closed securely. The oven will
not start cooking until the door is completely
closed or the program has been reset.
Make sure the oven is properly installed and
plugged into the electrical outlet.

HOW TO USE YOUR
MICROWAVE OVEN SAFELY

OPERATION PROCEDURE

Summary of Contents for KOR-63DB9S

Page 1: ...ating this oven please read these instructions completely POWER BEVERAGE 1 BREAD 2 SOUP 3 BAKED POTATO 4 FRESH VEGETABLE 5 FROZEN VEGETABLE KOR 63DB9S AUTO COOK DEFROST CLOCK 10MIN 1MIN 10SEC 1HOUR 10...

Page 2: ...ing surfaces d The oven should not be adjusted or repaired by any one except properly qualified service personnel TABLE OF CONTENTS PRECAUTIONS TO AVOID POSSIBLE EXPOSURE TO EXCESSIVE MICROWAVE ENERGY...

Page 3: ...ce may result if the oven is located close to a TV Radio antenna feeder and so on Position the oven as far from them as possible 4 Away from heating appliance and water taps Keep the oven away from ho...

Page 4: ...ll the oven so as not to block the outlet This section includes useful information about oven operation 1 Plug power supply cord into a standard 3 pronged 10 Amp 230V AC 50Hz power outlet 2 After plac...

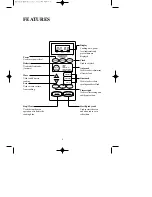
Page 5: ...ing Display Cooking time power level indicators and present time are displayed One touch Used to cook or reheat specific quantities of food Time set pad Used to set the cooking time and the present ti...

Page 6: ...efrosting time The display will show what you touched 3 Touch START pad Note Your oven can be programmed for 59 minutes 99 seconds 59 99 When you touch START pad the DEFROST indicator starts blinking...

Page 7: ...in M W cook When M W cook ends END indicator will blink SPEEDY COOK allows you to reheat for 30 seconds at 100 full power by simply touching the SPEEDY COOK pad By repeatedly touching the SPEEDY COOK...

Page 8: ...es 50 seconds Press LESS MORE to decrease increase the cooking time in multiples of 1 minute The overall cooking time can be increased to a maximum of 59 minutes AUTO COOK allows you to cook or reheat...

Page 9: ...ll be activated automatically To cancel press and hold LESS for 5 seconds and display will turn on 1 Press STOP CLEAR pad You can restart the oven by touching START pad Touch STOP CLEAR once more to e...

Page 10: ...ge and food containers Containers such as margarine tubs can melt in the microwave Metal utensils These can damage your oven Remove all metal before cooking Stirring Stir foods such as casseroles and...

Page 11: ...l to protect thinner or unevenly shaped part from beginning to cook Microwave energy will not penetrate the foil Some rules apply to the use of foil Do not let the foil pieces touch each other or the...

Page 12: ...ver Press START to continue defrosting Let stand 5 minutes then finish with cold running water about 5 minutes Place pork strips on a microwave rack cover with paper towel At beeps separate and turn o...

Page 13: ...ken Whole P 80 12 14 min Breast boned P 80 10 12 min portions P 80 11 13 min Turkey Whole P 80 13 15 min NOTE The above times should be regarded only as a guide Allow for difference in individual tast...

Page 14: ...kg 8 10 min 5 min onions fresh whole peeled 8 10 small 13 17 min 5 min pea pods snow peas frozen whole 6 oz pkg 7 8 min 3 min peas and carrots 10 oz pkg 9 11 min 3 min parsnips fresh cubed 1 lb 9 10 m...

Page 15: ...50 5 6 min Frozen vegetables 6 oz P 50 8 12 min 10 oz P 50 10 14 min Cheese cake 17 oz P 50 4 5 min Brownies 13 oz P 50 2 4 min Pound cake 103 4 oz P 50 11 2 3 min Coffee cake 11 12 oz P 50 3 5 min A...

Page 16: ...dance with the following code Green and yellow Earth Blue Neutral Brown Live As the colours of the wires in the mains lead of this appliance may not correspond with the coloured markings identifying t...

Page 17: ...y cause the wood to dry out and crack 5 Aluminum foil may be used in very small pieces for shielding only Any aluminum foil used should never be closer than 2 5 cm from side walls of oven 6 Plastic mo...

Reviews: