SETUP
21
OSD Language
Select a language for the DVD RVCR Setup menu and on-screen displays.
1
Press [SETUP]. The Setup menu appears.
2
Use [
œ
] and [
√
] to select ‘Language‘.
3
While ‘Language‘ is selected, press [
†
] to select ‘OSD
Language‘.
4
Press [ENTER] to move to the second level.
5
Use [
…
/
†
] to select the desired language.
6
Press [ENTER] to confirm your selection, then press [SETUP]
to exit the menu.
Menu/Subtitle/Audio Language
Select your preferred language for Disc Menus, Subtitles, and
Audio soundtracks.
Default :
The disc’s default language is selected.
Follow the same procedure as the OSD Language.
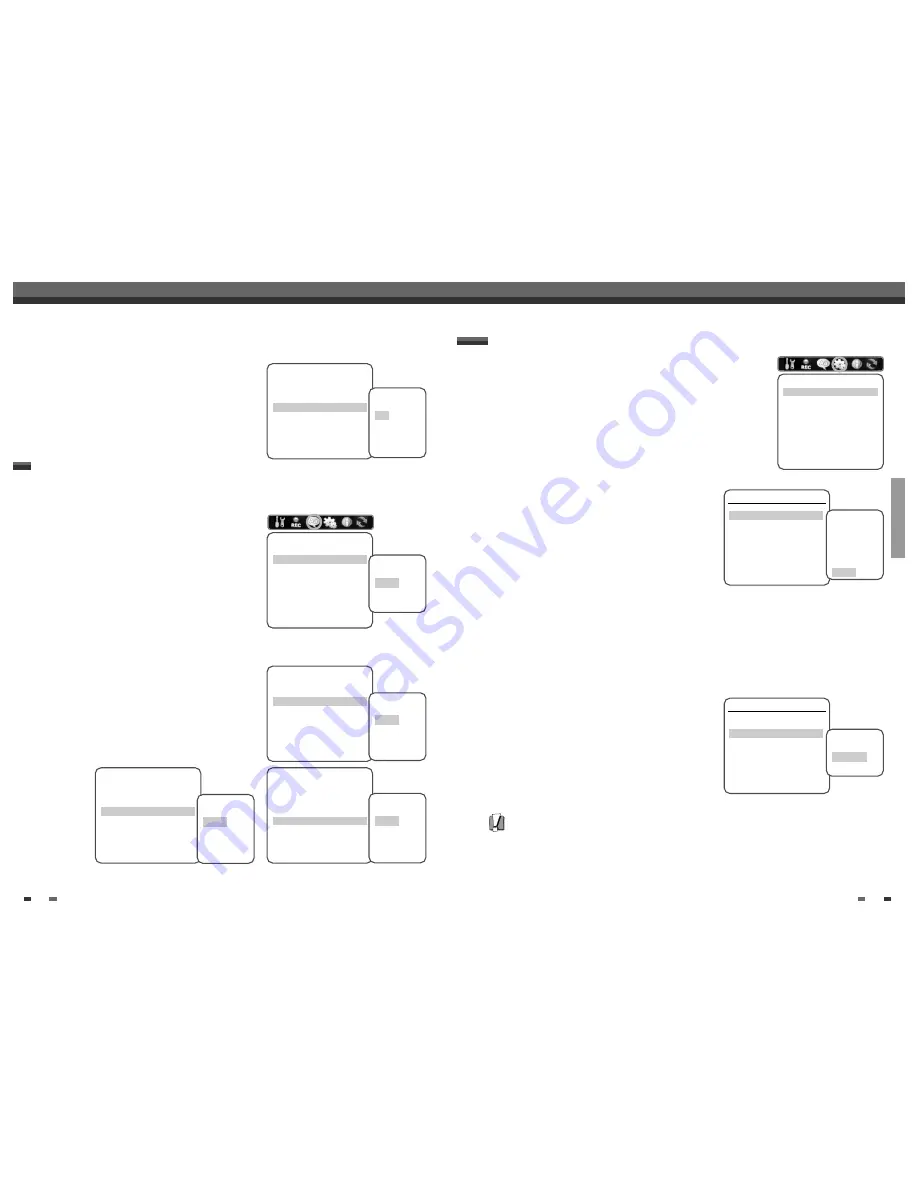
LANGUAGE Settings
Language
OSD Language
English
Menu Language
Default
Subtitle Language
Default
Audio Language
Default
Instructions
Enter-Confirm Setup-Exit
Move
…†
Select OSD
Language
English
Spanish
French
Language
OSD Language
English
Menu Language
Default
Subtitle Language
Default
Audio Language
Default
Instructions
Enter-Confirm Setup-Exit
Move
…†
Select Menu
Language
Default
English
Spanish
French
Language
OSD Language
English
Menu Language
Default
Subtitle Language
Default
Audio Language
Default
Instructions
Enter-Confirm Setup-Exit
Move
…†
Select Subtitle
Language
Default
English
Spanish
French
Language
OSD Language
English
Menu Language
Default
Subtitle Language
Default
Audio Language
Default
Instructions
Enter-Confirm Setup-Exit
Move
…†
Select Audio
Language
Default
English
Spanish
French
20
Initial Setup
Auto Chapter
During recording, chapter markers are added automatically at
fixed intervals. You can set this interval to 5 minutes, 10 minutes
or 15 minutes. To turn off automatic chapter marking, select ‘Off‘.
Follow the same procedure as the DVD Record Quality.
Recording Options
DVD Record Quality
HQ
VCR Record Quality
SLP
Auto Chapter
Off
Instructions
Enter-Confirm Setup-Exit
Move
…†
Select Auto
Chapter
Off
5min
10min
15min
1
Press [SETUP].
2
Use [
œ
/
√
] to select ‘Preference‘.
3
While ‘Preference‘ is selected, press [
†
] to select ‘Video‘.
4
Press [ENTER]. The ‘Video‘ submenu is displayed.
TV Aspect Ratio
1
Use [
…
/
†
] to select ‘TV Aspect‘ while the ‘Video‘ submenu
is displayed.
2
Press [ENTER] or [
√
] to go to the second level.
3
Use [
…
/
†
] to select the desired TV Aspect.
4
Press [ENTER] to confirm your selection.
5
Press [SETUP] to exit the menu.
4:3 LB :
Select when a standard 4:3 TV is connected. Displays
theatrical images with masking bars above and below the picture.
4:3 PS :
Select when a standard 4:3 TV is connected. Displays pictures cropped to fill your TV screen. Both
sides of the picture are cut off.
16:9 :
Select when a 16:9 wide screen TV is connected.
Auto :
Convert to the appropriate aspect ratio automatically.
Scan Mode
Progressive Scan Video provides the highest picture quality with
reduced flickering.
• If you are using the COMPONENT/PROGRESSIVE VIDEO OUT
jacks, but are connecting the DVD RVCR to a
standard (analog) television, set Scan Mode to Interlace.
• If you are using the COMPONENT/PROGRESSIVE VIDEO OUT
jacks for connection to a TV or monitor that is compatible
with a Progressive Scan signal, set Scan Mode to
Progressive.
Follow the same procedure as TV Aspect Ratio to change the Scan Mode.
Caution
• Once the Progressive Scan setting is entered, an image will only be visible on a Progressive Scan compatible TV
or monitor. Press and hold [P.SCAN] for 3 seconds to return to Interlace Scan mode.
PREFERENCE / Video Settings
Preference
Video
Audio
Parental Controls
Auto Play
Auto Clock
VCR
Instructions
Enter-Confirm Setup-Exit
Move
…†
Video
TV Aspect
Auto
Scan Mode
Interlace
Instructions
Enter-Confirm Setup-Exit Move
…†
Select Picture
Format
4:3 LB
4:3 PS
16:9
Auto
Video
TV Aspect
Auto
Scan Mode
Interlace
Instructions
Enter-Confirm Setup-Exit Move
…†
Select Scan
Mode
Interlace
Progressive
Initial Setup