8
Time Lapse Video Cassette Recorder
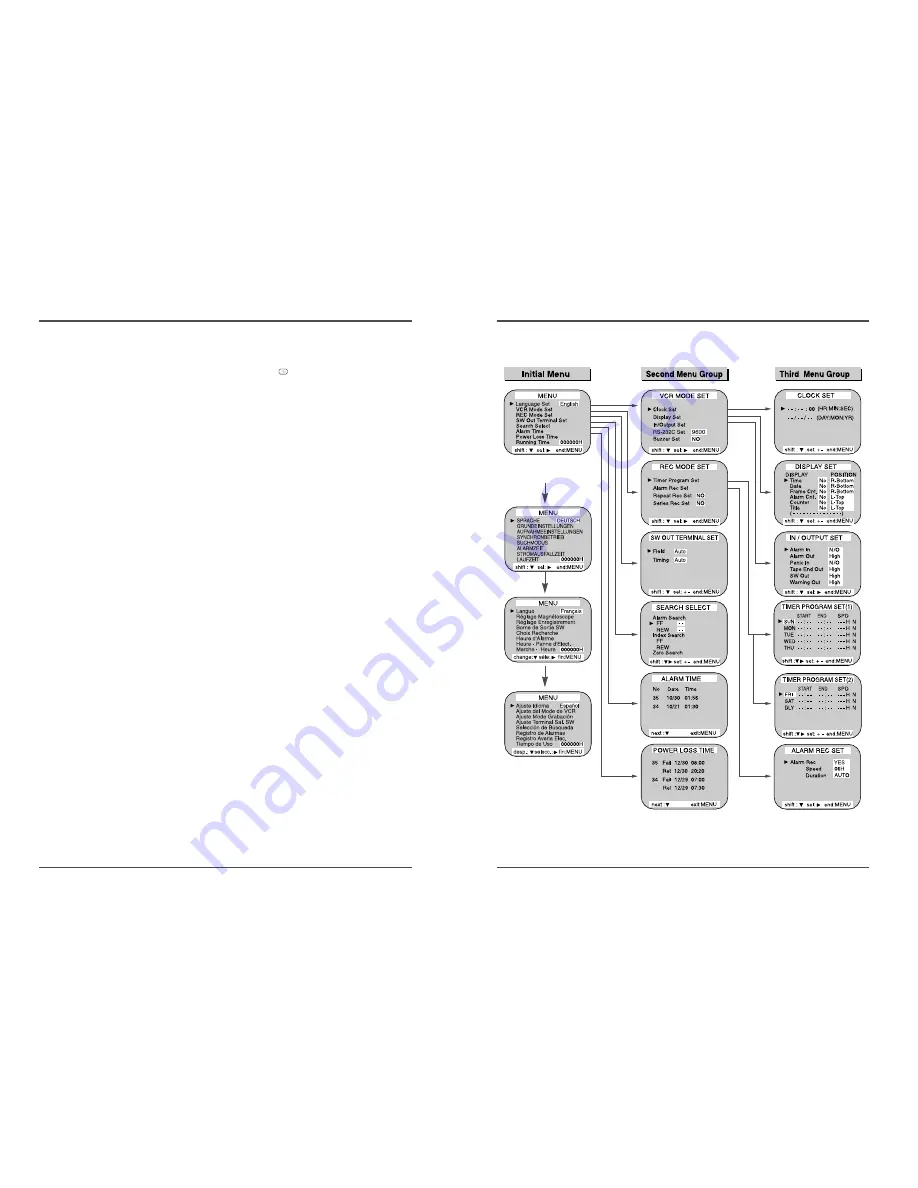
Types of On–screen displays and Display Sequence
• If the VCR is in timer recording stand–by mode (the “
” indicator is displayed on
the display panel), the on–screen displays will not be available. First press the
POWER(STANDBY/ON) button, to cancel the recording stand–by mode, then proceed
with the VCR programming. When finished, press the POWER(STANDBY/ON) button
again to return the VCR to timer recording stand–by mode.
• When a menu is displayed, recording will not be possible.
• Press the MENU button three times, the setting procedure is now completed and the
normal screen is displayed.
• During recording or playback the menus cannot be displayed.
• Press the MENU button. (First time)
• Press the SHIFT
†
button to move the arrow mark (
√
) downward for the
desired item.
• Press the SHIFT
√
button to select the desired item, then the desired menu is
displayed.
• Press the MENU button to return to the normal screen from the initial menu.
• Press the SHIFT
√
button to select the desired item.
• Press the SET – (or +) button to set or Press the SHIFT
√
button to select
“YES” or “NO”.
• Press the MENU button to return to the initial menu.
• Press the SHIFT
√
(or SHIFT
†
)button to select the desired item.
• Press the SET – (or +) button to set or Press the SHIFT
√
button to select.
• Press the MENU button to return to the previous menu.
A
B
C
9
Time Lapse Video Cassette Recorder
B
C
A


