background image

34

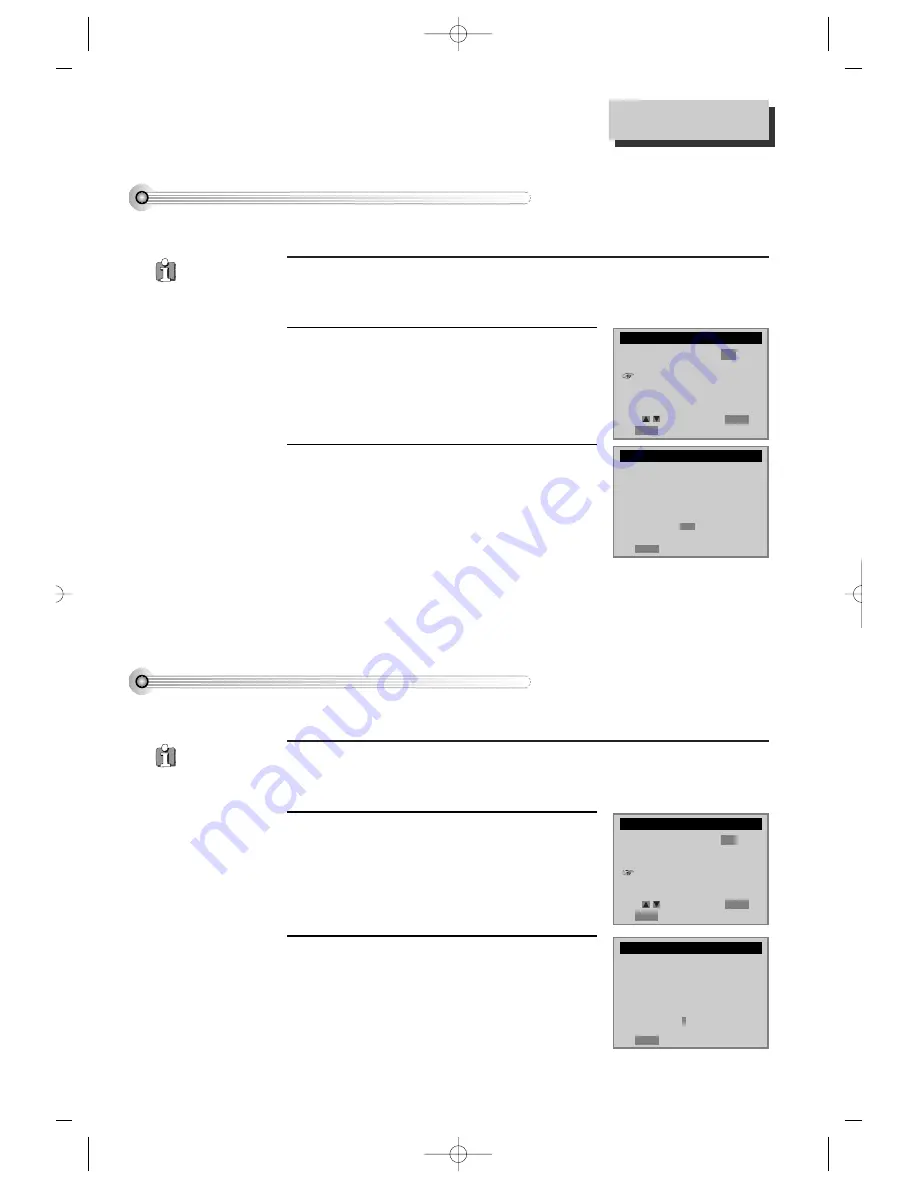
Press [SETUP] button and select “FUNCTIONS”.

1

1

Select “Index Search”.

2

2

When you record a programs, the VCR places an index mark at the start of the recording.
To search for an index mark: 

FUNCTIONS

Auto Play:

ON

Auto TV/VCR:

ON

Index Search
Go-To Search

Move:

Select:

End:

SETUP

ENTER

If you want to search through a certain number of
index marks, press two number buttons to enter
the number of marks you want to search. Press
CLEAR on the remote to correct an entry.
or
Press REW to search backward or FF to search
forward. The VCR will locate your index mark and
begin playback. If you did not enter a specific
index number, the VCR will locate the next index
mark and begin playback. Press STOP to stop
index searching. 

3

3

INDEX SEARCH

Press REW or FF
to begin searching

or

Enter a specific
index number

- -

End:

SETUP

• If two
recordings

overlap, the index
mark for the second
program will be
erased. Therefore,
when you use the
index feature to find
the second program,
the VCR will skip
over it. 

• If you record

multiple programs in
one recording
session, the VCR will
only find the index
mark that was placed
on the video cassette
tape when the
recording session
began.

Searching a cassette tape for programs (indexing)

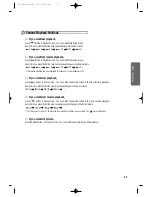
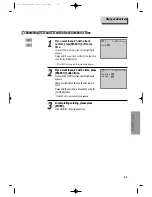
Press [SETUP] button and select “FUNCTIONS”.

1

1

Select “Go-To Search”.

2

2

You can mark a segment of the video cassette with the tape counter that will help you
easily locate the segment later.  

FUNCTIONS

Auto Play:

ON

Auto TV/VCR:

ON

Index Search

Go-To Search

Move:

Select:

End:

SETUP

ENTER

The tape counter is displayed on the screen. Input
the tape counter you want to go and press REW or
FF, the VCR will search for the time counter you
want.

3

3

GO-TO SEARCH

Current tape counter is

2 : 17 : 18

Press REW or FF
to go to - : - - : 00

End:

SETUP

Some index
marks  that may

be missed by the VCR :
• A mark too close to
your location on the
tape.
• The mark at the
beginning of a
recorded segment of
five minutes or less.
• The first index mark
on the tape when you
start at the beginning of
the tape.

Searching with the tape counter (go- to search)

Using advanced features

DV6T812N-LT(GB)  02.8.5 9:24 PM  ˘

`

34

Summary of Contents for DV-6T812N

Page 1: ... 1 or ALL In inserting a disc with other region code it does not operate Please only use a disc with region code 1 or ALL is a Prohibition mark If this mark is displayed in operating the product please wait for a while then use it If Prohibition mark continues to be displayed in pressing a button after that it means the button does not function in the currently played disc Press a product button o...

Page 2: ...ct exposure to beam CAUTION Do not open the top cover There are no user serviceable parts inside the Unit leave all servicing to qualified service personnel CLASS 1 LASER PRODUCT FCC NOTICE This equipment has been tested and found to comply with the limits for a Class B digital device pursuant to part 15 of the FCC Rule These limits are designed to provide reasonable protection against harmful int...

Page 3: ...le The unit may fall causing serious injury to a child or adult as well as serious damage to the unit Use this unit only with a cart stand tripod bracket or table recommended by the manufacturer 8A A unit and cart combination should be moved with care Quick stops excessive force and uneven surfaces may cause the unit and cart combination to overturn 9 VENTILATION Slots and openings in the case are...

Page 4: ...ts as contact with them might be fatal Installing an outdoor antenna can be hazardous and should be left to a professional antenna installer 15 LIGHTNING For added protection for this unit during a lightning storm or when it is left unattended and unused for long periods of time unplug it from the wall outlet and disconnect the antenna or cable system This will prevent damage to the unit due to li...

Page 5: ...ervice 23 REPLACEMENT PARTS When replacement parts are required have the service technician verify that the replacements he uses have the same safety characteristics as the original parts Use of replacements specified by the unit manufacturer can prevent fire electric shock or other hazards 24 SAFETY CHECK Upon completion of any service or repairs to this unit ask the service technician to perform...

Page 6: ...evel digital audio by connecting with amp embedded with Dolby Digital dts decoder Built in Dolby Digital decoder DVD Analog audio 2 channels output for DOWNMIX x1 Composite video out x1 S Video out x1 Slow Forward reverse DVD playback Fast Forward reverse playback Searchoftitle chapter andtimeinDVDdisc and searchoftrackandtimeinVCDandCD Various TV aspect DVD 4 3 for Pan and Scan 4 3 for Letter Box...

Page 7: ...yer occasionally Moving Repack the unit as it was originally packed at the factory Alternatively pack this product with towel not to be damaged Eject any videotape Cleaning Dust off dirt in cabinet or control panel part smoothly with a soft cloth For heavy dirt soak the cloth in a weak detergent solution wring it well and wipe Use a dry cloth to wipe it out Follow instructions in using chemical cl...

Page 8: ...er Read Carefully before Using Instructions in Using REMOTE STOP SELECT QUICK COPY POWER CHANNEL EJECT VIDEO AUDIO R L REC DVD VHS REW PLAY PAUSE FF OPEN CLOSE REPEAT OPEN CLOSE DISPLAY TITLE PBC MENU PR PR OUTPUT PREV REC PROGRAM CLK CNT SPEED ANGLE TRACKING TV VCR MARK SEARCH SYSTEM PLAY PAUSE NEXT ZOOM AUDIO SUBTITLE SET UP CLE AR 3D ENTER OK VCR DVD Operate REMOTE within 7m from the unit Do no...

Page 9: ...S Signals 43 Counter 0 Stop 44 Displaying Clock Counter 45 Changing the on screen menu language 46 Hi Fi Stereo Playback 47 Recording Stereo or Secondary Audio Programs SAP 47 Basic Operation Installation Skipping from a current scene to a desired scene 48 Confirming the current PLAY mode on screen 55 Selecting an AUDIO language SUBTITLE language and 3D AUDIO 56 Selecting ZOOM and Multi Angle 57 M...

Page 10: ...REWIND button Use to rewind currently being played videotape or disc or to playback back rapidly 6 Playback PAUSE button Playback videotape or disc Press this button to pause a screen 7 FAST FORWARD button Use to wind currently being played videotape or disc or to playback rapidly 8 OPEN CLOSE Tray button Operation Display Window REC DVD Time Counter and Current Operation Tray is opened Tray is cl...

Page 11: ...nection to ANTENNA Cable Connection to TV DV6T812N R ANT IN RF OUT L OUT IN AUDIO VIDEO R COAXIAL L Y Pr Pb AUDIO OUT DIGITAL AUDIO OUT COMPONENTOUT DV6T512N Identification of Controls Accessories RE PEA T OPE N C LOS E DIS PLA Y TIT LE PBC ME NU PR PR OU TPU T PR EV RE C PR OG RA M CLK CN T SPE ED A NGL E TRA CK ING TV VC R MA RK SEA RC H SYS TEM PLA Y P AU SE NE XT ZO OM AU DIO SU BTI TLE SET UP...

Page 12: ...R Record button 5 DVD VCR NUMBER button VCR TRACKING button 6 VCR SELECT button 7 DVD SELECT button 8 DVD VCR OSD DISPLAY button 9 OUTPUT Selection button 0 ENTER OK button CLEAR 3D button DVD SUBTITLE Select button DVD AUDIO LANGUAGE Select VCR AUDIO Select button DVD NEXT button Move into a next chapter or track VCR Frame Advance button in pause mode Q PLAY PAUSE button q FORWARD SEARCH button W...

Page 13: ...jack Select VCR mode by pressing TV INPUT button in TV you can view more clear screen and sound than connection with RF cable only In the initial SET exclusive channel for video is set to CH 3 To change this setting set again in CHANNEL SET screen in VCR operation In connecting RF cable to TV set TV channel to CH3 Connecting with TV VHF 2 13 channels of TV UHF 14 69 channels of TV CATV Broadcastin...

Page 14: ... to select channel to be recorded In this case if you want to watch CATV to be recorded press TV INPUT button of TV to select Out VCR 3 3 Press REC button in DVD Video 4 4 To watch general broadcasting press channel button in TV to select the desired channel the IN terminal on the converter box Connect another RF cable between the other OUT terminal on the splitter and the A IN terminal on an A B ...

Page 15: ...E R ANT IN RF OUT L OUT IN AUDIO VIDEO INPUT 1 OUT VIDEO L AUDIO R ANT IN INPUT 2 RearPanelofDVD VIDEO RearPanelof PlaybackVCR Camcorder RearPanelof TV AUDIO VIDEO CABLE RF CABLE 1 1 Connect AUDIO VIDEO OUT jack in Camcorder or playback video to AUDIO VIDEO IN jack in rear panel or front panel of DVD Video with connecting cable 2 2 Connect ANT IN jack in TV to RF OUT jack in DVD Video with RF cabl...

Page 16: ... camcorder or playback video 5 5 Press Pause button in DVD Video when unnecessary or undesired scene is displayed in recording Caution Recording is released automatically after 5 minutes since pressing PAUSE button Press REC button if you want to record again How to Playback Chapter Photographed by Camcorder 1 1 Turn DVD Video on 2 2 Press OUTPUT button of remote control and adjust DVD Video to di...

Page 17: ...UDIO OUT COMPONENTOUT L AUDIO R RearPanel of STEREO Unit AUDIO CABLE 1 1 Connect Audio jack Connect AUDIO OUT in rear panel of DVD Video to IN jack of stereo sound unit 2 2 For Input Select in stereo unit Select External Input connected with DVD Video 3 3 Playback DVD disc or Hi Fi videotape you can hear sound in speaker of stereo unit DV6T812N LT GB 02 8 5 9 23 PM 16 ...

Page 18: ...of Dolby Digital If you want to know about Dolby Digital please refer to About DVD in 68p 3 3 If screen is broken in connecting COMPONENT OUT to Pr Pb Y of TV COMPONENT IN jack connect to Cr Cb Y Use in S VIDEO or COMPONENT In jack attached in TV or amp supporting Dolby Digital Manufactured under license from Dolby Laboratories Dolby Pro Logic and the double D symbol are trademarks of Dolby Labora...

Page 19: ...SET follow the order of Month Day Year for TIME SET follow the order of Hour Minute in CLOCK SET screen If CLOCK SET is completed press ENTER OK button 1 1 2 2 3 3 SETUP CLOCK SET TIMER RECORDINGS CHANNEL SET FUNCTIONS LANGUAGE SELECT Move Select End SETUP ENTER CLOCK SET Time and Date Set Auto DST ON TIME AND DATE SET TIME AND DATE SET Move Select End SETUP ENTER Move Input End SETUP Move Input E...

Page 20: ...gram Setting Press PROGRAM button You can set the Timer Program Before timer program setting clock should be set correctly see page 24 and video mode should be selected See screen 3 in page 36 To Select DVD REPEAT OPEN CLOSE DISPLAY TITLE PBC MENU PR PR OUTPUT PREV REC PROGRAM CLK CNT SPEED ANGLE TRACKING TV VCR MARK SEARCH SYSTEM PLAY PAUSE NEXT ZOOM AUDIO SUBTITLE SETUP CLEAR 3D ENTER OK VCR DVD...

Page 21: ... the menus are displayed on TV screen and it is converted into PBC Playback Back Control mode In the case of CD VCD1 1 and MP3 the disc plays in order of its track numbers 4 4 To stop it press button For pause press PLAY PAUSE button in playback mode If you press this button once more it starts playback again 5 5 Press OPEN CLOSE button to remove the disc 6 6 REPEAT OPEN CLOSE DISPLAY TITLE PBC ME...

Page 22: ...leforMP3 If you want slow playback press button in Pause mode You can watch the desired screen in the slow forward playback Everytimeyoupressthebutton slowplayspeedchangesinthebeloworders 1 2 1 4 1 8 1 2 If you want slow reverse playback press button in Pause mode You can watch the desired screen in the slow reverse playback Everytimeyoupressthebutton slowreverse playspeedchangesinthebeloworders 1...

Page 23: ... in the front part or OPEN CLOSE button on remote control to remove the tape 6 6 REPEAT OPEN CLOSE DISPLAY TITLE PBC MENU PR PR OUTPUT PREV REC PROGRAM CLK CNT SPEED ANGLE TRACKING TV VCR MARK SEARCH SYSTEM PLAY PAUSE NEXT ZOOM AUDIO SUBTITLE SETUP CLEAR 3D ENTER OK VCR DVD REWIND PLAYBACK PAUSE FAST FORWARD STOP POWER STOP SELECT QUICK COPY POWER CHANNEL EJECT VIDEO AUDIO R L REC DVD VHS REW PLAY...

Page 24: ... Playback function If you want to watch a series of screens one by one FRAME ADVANCE press NEXT button in Pause mode Each time you press this button the picture advances one frame ThisproductincludesautomaticTrackingfunctionandenablesuserstoenjoyclearpicturewithoutanadditionaloperation Providedthatthefollowingproblemscanbesolvedbythemanualadjustment whichimprovesdisplayquality During automaticdisp...

Page 25: ... with SPEED button 4 4 Press REC button Then it starts recording 5 5 If you want to pause recording press PAUSE button After pressing PAUSE button if the pause status continues for five minutes the recording is released automatically 6 6 To exit recording press STOP button 7 7 REPEAT OPEN CLOSE DISPLAY TITLE PBC MENU PR PR OUTPUT PREV REC PROGRAM CLK CNT SPEED ANGLE TRACKING TV VCR MARK SEARCH SYS...

Page 26: ...Press Times Operational Status Once continuous recording until you press STOP button Twice recording for thirty minutes from current time 3 times recording for one hour 4 recording for one hour and thirty minutes 5 recording for two hours 6 recording for two hours and thirty minutes 7 recording for three hours 8 recording for three hours and thirty minutes 9 recording for four hours 10 returning t...

Page 27: ...nels are memorized automatically When memory process is completed the lowest number s one of memorized channels is displayed Please check the memorized channels To check the memorized channels press PR button on remote control 1 1 2 2 3 3 To Memorize Automatically Channels SETUP CLOCK SET TIMER RECORDINGS CHANNEL SET FUNCTIONS LANGUAGE SELECT AUTO CHANNEL SEARCH What type of signal are you using C...

Page 28: ...nnels Manually When the desired broadcasting finished or you want to add unmemorized channels owing to poor signals to the memory follow the procedures below Press SETUP button and select CHANNEL SET Select Add Remove Channels Move into Add Remove Channels with button and then select the desired item with ENTER button 1 1 2 2 Select the desired channel and memorize it Press NUMBER button of remote...

Page 29: ...pressing ENTER button set the exclusive channel for video on the desired one of CH3 or CH4 Press SETUP button and select CHANNEL SET Select Cable Box Setup Move into Cable box setup with button and then select the desired item with ENTER button 1 1 2 2 Select Cable Box Channel Press the channel number which matches to the output of the Cable Box to connect between Cable Box and this unit 3 3 CABLE...

Page 30: ...e to record Select the date start time and end time to record with NUMBER buttons 5 5 Power on TV Make sure that current time is set correctly Insert a recordable tape with recording tab Prior to the setting press VCR button to change to VCR mode When moves into Cable select one of Cable Antenna with or button SETUP CLOCK SET TIMER RECORDINGS CHANNEL SET FUNCTIONS LANGUAGE SELECT TIMER RECORDINGS ...

Page 31: ...te 06 04 Start Time 10 10 AM End Time 11 10 AM Tape Speed SP PROGRAM1 ONE TIME Channel 104 Cable Start Date 06 04 Start Time 10 10 AM End Time 11 10 AM Tape Speed SP PROGRAM 1 ONE TIME Channel 104 Cable Start Date 06 04 Start Time 10 10 AM End Time 11 10 AM Tape Speed SP PROGRAM 1 has been saved For program recording insert a cassette To leave your cable box on and tuned to preset channel TIMER RE...

Page 32: ...must not be recorded without authorization of the copyright owner If you insert a video cassette without a safety tab into the unit After setting the timer recording program will blink on the display panel in the power off mode and the unit will automatically eject the cassette In the power on mode the unit will playback automatically If you insert a video cassette with a safety tab into the unit ...

Page 33: ...ding to TIMER REC procedures select TIMER RECORDINGS SET window and complete the settings At this time the video channel should be input in CH3 or CH4 EXTERNAL INPUT of the converter connected channel Enter date and time of the cable program for TIMER RECORDINGS Adjust Converter Set converter to the cable TV channel to record e g To record CH48 Display CH48 with CONVERTER CHANNEL SELECT button If ...

Page 34: ...elect End SETUP ENTER Move Select End SETUP ENTER Switch the VCR to TV or VCR mode automatically ThisfeaturecontrolswhethertheTV VCRswitchchangesautomaticallytotheVCRmodewhentheVCRisturnedon Press SETUP button and select FUNCTIONS Move into FUNCTIONS with and then select the desired one with ENTER button Press ENTER to switch between ON and OFF Select ON if you want the VCR to switch to the VCR mo...

Page 35: ...ind the second program the VCR will skip over it If you record multiple programs in one recording session the VCR will only find the index mark that was placed on the video cassette tape when the recording session began Searching a cassette tape for programs indexing Press SETUP button and select FUNCTIONS 1 1 Select Go To Search 2 2 You can mark a segment of the video cassette with the tape count...

Page 36: ...to Auto DST with 1 1 Press ENTER to switch between ON and OFF Select ON if you want the VCR s clock to automatically adjust for daylight saving time Select OFF if you do not want the VCR s clock to adjust for daylight saving time 2 2 SPRING Forward Fall Backward In the Spring daylight saving time begins on the first Sunday in April Because the clock automatically changes from 2 00 AM to 3 00 AM fo...

Page 37: ... button 2 2 You may select the language in which you would like the VCR s menu to be displayed English Spanish or French LANGUAGE SELECT Select a language English Spanish French Move Select End SETUP ENTER SETUP CLOCK SET TIMER RECORDINGS CHANNEL SET FUNCTIONS LANGUAGE SELECT Move Select End SETUP ENTER Using advanced features DV6T812N LT GB 02 8 5 9 24 PM 36 ...

Page 38: ...eparates sounds into dual signals and transfers them in order to achieve presence in a broadcasting station Hi Fi LINEAR MIX STEREO MONO SAP Programs are broadcast in mono or stereo audio or with a SAP Pressing AUDIO button changes STEREO MONO SAP one by one While recording in stereo signal it is recorded in Hi Fi SAP is available only in its service areas from stations The following guidelines wi...

Page 39: ...etitlesonthediscisdisplayed Pressingthe TITLE buttonagaintoresumeplay fromthescenewhenthe TITLE buttonwas firstpressed 1 1 Pressthe ENTER buttonor PLAY button afterpressingthe buttonto selectthedesiredtitle The selected title now starts playing 2 2 Some movie discs may contain multiple titles If the disc has a movie title menu recorded on it the TITLE button can be used to select the movie title D...

Page 40: ...er ToexitfromProgrammode presstheSTOPbutton 2 2 Available only in STOP Mode1 DVD Program Title Chapter T C T C T C T C 1 4 7 10 2 5 8 11 3 6 9 12 Clear ALL Play Program Mode1 DVD Program Title Chapter T C T C T C T C 1 01 05 4 7 10 2 01 08 5 8 11 3 01 12 6 9 12 Clear ALL Play Program Random Playback While STOP press PROGRAM button twice Withtherightpictureappearing pleasepress ENTER button Regardl...

Page 41: ...mode press REPEAT button ItentersintoNormalPlaybackmode 3 3 REPEAT A B REPEAT OFF Searching DVD with a title number a chapter number or a time If you want to search with a title and chapter number press SEARCH button one time Itshowstotaltitlenumbers chapternumbersand times Pleaseenterthenewtitleandchapternumbertobe searchedusingthe NUMBER buttons 1 1 In completing entering please press ENTER butt...

Page 42: ...pear 1 1 In completing entering please press ENTER PLAYstartsfromtheselectedposition 3 3 TRACK If you want to search with a time press SEARCH button twice IncaseofPBCOFF thescreen liketherightfigure appears Itshowscurrenttrack stimeandthewholedisc s hours Pleaseenterthenewtimetobesearchedusingthe NUMBER button IfitisPBCOFF onlythetrack stimeappears 2 2 TRACK TIME DISK TIME LR OFF VCD 00 45 30 35 1...

Page 43: ...ted dolbydigitallogo repeatplaybackmode andcurrentangle 2 2 While in playing press DISPLAY button Itshowsthedisclogo currenttrack subtitleselected audioselected repeatplaybackmode timeelapsed andequalizerbar IncaseofCD subtitleandequalizerbarindicatorwillnot appear 1 1 To exit from Display mode press DISPLAY button again 2 2 To exit from Display mode press DISPLAY button again 3 3 DI ENG2CH 3 OFF ...

Page 44: ... To gotodesireddirectoryortoplaybackMP3File press ENTER key TheinformationofMP3Filemeans thedisctype current track theamountofMP3File repeatplaybackmode timeelapsedandequalizerbar 1 1 At the desired directory position press ENTER button Itshowsthetracklist 2 2 To exit from Display mode press DISPLAY button again 3 3 00 45 30 35 1 517 128K T T OFF DIR_1 DIR_3 DIR_4 DIR_5 DIR_2 00 45 30 35 1 517 128...

Page 45: ...appear one by one A certain disc may not support audio select or subtitle select DI ENG2CH 3 OFF ENG 3 1 1 DI FRE3CH 3 OFF ENG 3 1 1 DI SPA1CH 3 OFF ENG 3 1 1 DI ENG2CH 3 OFF ENG 3 1 1 DI ENG2CH 3 OFF FRE 3 1 1 DI ENG2CH 3 OFF SPA 3 1 1 Selecting 3D Audio Please press 3D button Iftherightfigureappears movethecursorwith buttons Theusermayselecta Soundfields amongStandard Theater Amphitheater Live C...

Page 46: ...hepointcanbe changedwiththeoperationof button Different Angle If a disc includes multi angle information the user can watch a screen in multi angles The function is limited to a DVD disc supporting multi angle information Keep pressing ANGLE button till the preferred angle appears Everytimetheuserpresses ANGLE button anangledegrees changesinaconsecutiveorder When TV ASPECT item is set to 4 3 PS in...

Page 47: ...Once memorising a scene the user may watch it anytime While playing press MARK button Therightfigureappears Thenpress ENTER buttonandthecurrentsceneis memorisedin A 1 1 If you want to memorise another preferred scene press button Therightfigureappears Thenpress ENTER buttonandthecurrentsceneis memorizedin B Theusermaymemorise C continuouslywiththesame method 2 2 To playback a memorised scene press...

Page 48: ...t and recorded in the DISC it is automatically played in the set language in every playing For example English is set and recorded as a DISC MENU language in the DISC it is played in English 5 5 A user can set OSD language Audio Subtitle and Disc Menu In case a disc does not include setting languages information the selected language does not appear MOVE SELECT ENTER EXIT SETUP VIDEO AUDIO OTHERS ...

Page 49: ... may select a type among NTSC PAL or AUTO For example NTSC type is used in North America 3 3 A user can set up a connected TV condition and screen Selecting VIDEO OUT A user may select a VIDEO OUT between COMPONENT and S VIDEO 4 4 MOVE SELECT ENTER EXIT SETUP AUDIO OTHERS TV ASPECT 4 3 LB TV TYPE NTSC VIDEO OUT S VIDEO LANGUAGE VIDEO MOVE SELECT ENTER EXIT SETUP V VI ID DE EO O AUDIO OTHERS TV ASP...

Page 50: ...L R Speaker Type Set 3 3 A user may select audio menu according to a user s speaker set While STOP or Resume STOP press SETUP button 1 1 MOVE SELECT ENTER EXIT SETUP OTHERS DIGITAL OUTPUT BITSTREAM SPEAKER SETUP FRONT L R TYPE SMALL LANGUAGE VIDEO MOVE SELECT ENTER EXIT SETUP VIDEO A AU UD DI IO O OTHERS DIGITAL OUTPUT BITSTREAM SPEAKER SETUP FRONT L R TYPE SMALL LANGUAGE BITSTREAM LPCM MOVE SELEC...

Page 51: ...hile STOP or RESUME STOP press SETUP button 1 1 Parental Lock activates only if you set a password and the unit goes into Lock status When the disc has no parental function even if the disc for adult only Parental Lock doesn t activate MOVE SELECT ENTER EXIT SETUP OSD ON SCREENSAVER ON DEFAULTS NO PARENTAL OFF LANGUAGE VIDEO MOVE SELECT ENTER EXIT SETUP VIDEO AUDIO O OT TH HE ER RS S OSD ON SCREEN...

Page 52: ...ewly input password you can use 3308 as a password MOVE SELECT ENTER EXIT SETUP VIDEO AUDIO O OT TH HE ER RS S OSD ON SCREENSAVER ON DEFAULTS NO PARENTAL 8 UNLOCK CHANGEPASSWORD LANGUAGE MOVE SELECT ENTER EXIT SETUP VIDEO AUDIO O OT TH HE ER RS S OSD ON SCREENSAVER ON DEFAULTS NO PARENTAL 8 UNLOCK CHANGEPASSWORD CONFIRMPASSWORD LANGUAGE Others Setup DV6T812N LT GB 02 8 5 9 24 PM 51 ...

Page 53: ...eo DVD ROM Impossible DVD RAM Impossible DVD RW Impossible Photo CD Impossible REGION MANAGEMENT INFORMATION This unit is designed and manufactured to respond to the Region Management information that is recorded on a DVD disc The region number of this player is 1 If the region number described on the DVD discs does not correspond to the Region number of this player the player will not play this d...

Page 54: ...1 channel surround sound system which is widely used in movie theatres around the world It enables the bit rate to be increased to provide good sound quality DTS and DTS Digital Out are trademarks of Digital Theater Systems Inc Multi Angle Some DVD discs contain the various scenes that have been simultaneously shot from a number of different angles PCM Linear PCM is a signal recording format used ...

Page 55: ...sing it please keep a disc in a case Cleaning Disc Before using it please rub it from center toward outside with clean clothes Do not use any type of solvent such as thinner benzol benzene commercial cleaning goods or antistatic sprays About DVD Region Code The product and all DVD disc have region codes So if both codes are not coincided each other it does not work Legion codes are like the below ...

Page 56: ...ically records an index each time recording begins It helps you locate a particular segment of the tape quickly and easily LP Long Play an intermediate tape recording speed that combines most of the picture audio quality obtainable at the standard recording speed with some of the tape economy of Extended Play EP OSD On screen display of information pertinent to the features of the VCR OTR One touc...

Page 57: ... may not be clean from the contamination of VCR heads Please remove contaminants using a head cleaner like below order 1 Insert a head cleaner into VCR 2 Press PLAY for 5 seconds and then press FF for about 10 seconds 3 Eject a head cleaner from VCR If the screen is not clean yet please repeat the above 2 or 3 times more A head cleaner is not for sale Please ask it for the nearest agent In case a ...

Page 58: ...eck AUDIO items Did you turn on your TV sets Did you connect the parts in right way The play may be in PAUSE A disc may have some contaminants or be damaged A disc may be bad one Please check the connection with Dolby Digital amplifier Please check the plugs are connected with one another tightly Some contaminants may be remained in connection terminal Please check the degree of remote control dis...

Page 59: ...is exhausted or not A DVD may not contain menu information The recorder may not coincide with your TV system Please press SYSTEM to match to NTSC system A disc may have some contaminants or be damaged If you playback a DVD disc of PAL system whose region code is ALL the playback screen may shake The file name of MP3 recognize only the Alphabet A Z a z numbers 0 9 and a special symbol on keyboard a...

Page 60: ...el Select TV by pressing TV VCR button on remote control A videotape is not inputted in On inputting a videotape the tape is re ejected A videotape is not ejected Input and ejection Pleasecheckwhetherapowerplugisinsertedinanelectricoutlet Please check whether a videotape is in Please check whether a videotape is inserted in a right direction a side of transparent window should be on the upside Hav...

Page 61: ...in playing To fix the problem please horizontal adjustment A screen is not clear A screen at pause is trembling or slow screen is not clear Play In case videotape is the one recorded by other products or old one stripe may appear on the screen Try to adjust the screen by TRACKING button Try to use a head cleaner Try to use a head cleaner Try to adjust the screen by TRACKING button Recording Record...

Page 62: ...r recording info is right Please check a tab on a tape whether it is broke or not If it was broken please scotch tape it Was a cable data output code connected correctly Were a converter manufacturer setup and output channel right Did you enter a password Please cancel it Did you turn off your player Please turn it on You may not memorize channels Please check your channel setting or press a numbe...

Page 63: ...you playing a tape that is not recorded in this recorder Try to record it with the recorder You may start recording it in REC PAUSE Please start recording it from stop condition Please select CABLE not NETWORK from the CHANNEL SETTING Before doubting about troubles VCR DV6T812N LT GB 02 8 5 9 25 PM 62 ...

Page 64: ...terminal 2 kinds 8 8dBm VCR 2 0Vrms DVD RCA JACK AUDIO output DVD only Analogue AUDIO output 2 CH 2 0Vrms Digital audio output OPTICAL COAXIAL Playable tape Very high dense tapes with VHS marks Playable disc DVD VIDEO CD CD 12mm CD 8mm MP3 CD R CD RW Tape speed Standard 33 35mm s 3 times 11 12mm s Playtime Standard 2hrs 3 times 6hrs use of T120tape Clock display 12 hrs AM PM Time Recording 8 progr...

Page 65: ...tion of instructions furnished by us nor units which have been repaired or altered outside of our factory nor to cases where the serial number thereof has been removed defaced or changed This warranty is in lieu of all warranties expressed or implied and no representative or person is authorized to assume for us any other liability in connection with the sale of our electronic products Over the co...

Reviews: