background image

29

PR

PR

PR

PR

PR

PR

AUTO TUNING 

MANUAL TUNING 


SETUP  

EDIT  

POSITION ACCESS 

EXIT

INSTALL

PROGRAM 

CHANNEL C 

2

NAME 

– – – –

SYSTEM PAL

SOUND BG

FINE TUNING 

0

POSITION ACCESS 

EXIT

INSTALL

PROGRAM 

CHANNEL C 

2

NAME 

– – – –

SYSTEM PAL

SOUND BG

FINE TUNING 

+2

POSITION ACCESS 

EXIT

INSTALL

Setting Up TV
Stations

Setup 

The Setup menu shows you information as follows:

- Picture information: PAL, SECAM, and SECAM-L
- Sound information: L, DK3, DK2, DK1, I, BG
- Station name, Program number and Real channel number.

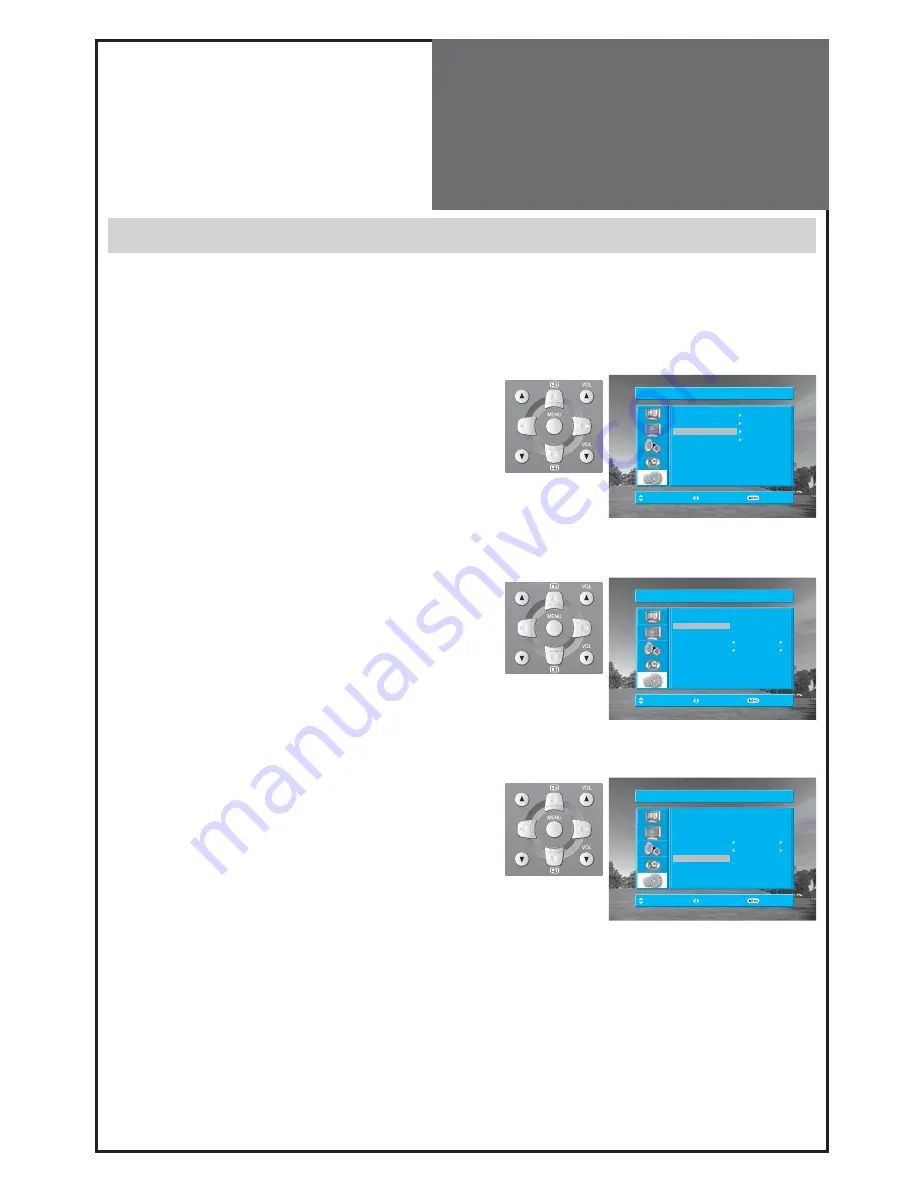
1. Searching for channels in the Setup menu

  •  Press the “

PR

“ buttons to select a program number you 

want.

  • Move to SETUP in the Install menu.
  • Select the colour and sound system which you want.
  •  Search a real channel with “

/

“ buttons.

2.  Enter a station name

  • Move to SETUP in the Install menu.
  •  Move the cursor to name by pressing “

/

” buttons.

 • 


You can enter a station name with the “

/

” and “

/

” but-

tons.

Note :

 Only English is supported in this station name.

3. Fine tuning

  • Move to SETUP in the Install menu.
  • Move the cursor to Fine Tuning by pressing “

/

” buttons.

  • Adjust the fine tuning with the “

/

” buttons.

Note :

•  If you are unable to get a good picture or Sound because of a 

poor broadcasting signal, adjustment of the fine tuning might 
improve it.

Summary of Contents for DLT-32C5

Page 1: ...LCD TELEVISION INSTRUCTION MANUAL Helpline Number 0870 100 2525 DLT 26C2 DLT 26C3 DLT 32C2 DLT 32C3 DLT 32C5 DLT 32C6 DLT 32C7 DLT 37C3 DLT 37C7 GB...

Page 2: ...Y INSERT DISPOSAL OF USED ELECTRICAL ELECTRONIC EQUIPMENT Europe only The meaning of the symbol on the product its accessory or packaging indi cates that this product shall not be treated as household...

Page 3: ...eating Do not cover the ventilations openings in the cabinet and never place the set in a confined space such as built in cabinet unless proper ventilation is provided Leave a minimum 10 cm gap all ar...

Page 4: ...ing electrodes and requirements for the grounding electrode 16 Servicing Do not attempt to service this TV yourself as opening or removing covers may expose you to dangerous voltage or other hazards R...

Page 5: ...cause of fire or hazardous electric shock To prevent fire and damages to the product unplug the unit from the outlet during lightning storm or when it is left unat tended and unused for a long period...

Page 6: ...thetelevisionset Venti lationwillbeprevented anditmaybeacauseof fire if the product is internally overheated Theproductshouldbesituatedawayfromany heat source such as radiators heat registers stoves o...

Page 7: ...nection 18 Connect with the Dolby Digital AMP 19 Name of Each Part 20 Basic Guide Parts of the Remote Controller 22 Method To Use Basic Menu 24 To Watch TV 25 Setting Up TV Stations 27 DVB Menu 31 Sel...

Page 8: ...of wire arrangement 1 Assemble the cable holder enclosed on the back of TV PICTURE1 ASSEMBLY METHOD After you push the A prominence part of cable holder in the hole rotate the cable holder clockwise...

Page 9: ...MAGE IS NOT CLEAR Unclear screen image and bad reception may be a cause of wrong antenna con nection Be sure to check its direction and place when installing 2 Connect the combining adapter to the ant...

Page 10: ...na socket and fix it firmly by turning it to the right Antenna socket at the left side of the TV set Antenna socket on the wall ANT CABLE When a feeder cable is used Plug the coaxial cable to the ante...

Page 11: ...Outdoor Antenna connection such as VHF or and UHF may be necessary for installation at private houses Single Antenna Connection VHF Antenna UHF Antenna Back of the tv set ANT CABLE Separate Antenna Co...

Page 12: ...ame time The TV set will only detect the S Video mode If your AV device has both Video OUT terminal and S Video OUT terminal the S Video connection is rec ommended for better picture quality Connectin...

Page 13: ...s shown in the picture below 3 Turn on the TV set and camcorder video game 4 Select AV3 S video mode using the AV button of the Remote controller or button of the TV set Back of the tv set Video game...

Page 14: ...cable Back of the tv set DVD Note When you connect with the component video please check the colour of the cable between the DVD and TV set When connecting with a S VHS cable and RCA cable Note If S v...

Page 15: ...OMPONENT Pr R L Pb Y HDMI INPUT AV1 AV2 PC INPUT PC AUDIO S VHS AV3 L AUDIO R OPTICAL COMPONENT Pr R L Pb Y STB Set Top Box Connection When connecting with a HDMI cable Back of the tv set Set Top Box...

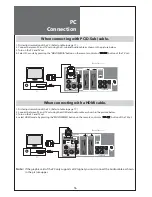
Page 16: ...PC and TV set 4 Select PC mode by pressing the MULTIMEDIA button on the remote control or button of the TV set Back of the tv set PC When connecting with a HDMI cable 1 First adjust resolution of the...

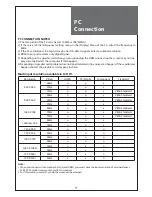
Page 17: ...If these problems happen contact the graphic card company for help Multi input resolution available in LCD TV Resolution V freq HDMI PC D Sub Component Standard 640 X 480 60Hz o o x 72Hz o o x 75Hz o...

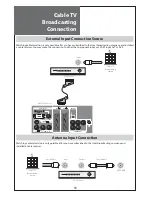
Page 18: ...ng company and installed a cable receiver You may make the connection to either the Component input or SCART input AV1 or AV2 Cable TV Broadcasting Station Input CATV Receiver Antenna Input Connection...

Page 19: ...V3 L AUDIO R OPTICAL COMPONENT Pr R L Pb Y Connect with the Dolby Digital AMP If you connect the optical output to a Dolby digital AMP you can listen to better sound Optical output Dolby Digital AMP L...

Page 20: ...or to move the cursor in the menu PR Buttons Use these buttons to change channels on your TV or to move the cursor in the menu POWER ON button Use this button to change from TV STAND by mode to TV ON...

Page 21: ...21 HDMI INPUT AV1 AV2 PC INPUT PC AUDIO S VHS AV3 L AUDIO R OPTICAL COMPONENT Pr R L Pb Y Name of Each Part Side and Rear Panel Side Panel Rear Panel...

Page 22: ...ectPRdirectly in TV mode Note When the current state is ST BY you can turn on the TV using a digit key Then a PROGRAMME is selected accord ing to digit number 7 S EFFECT Using this button you can list...

Page 23: ...and Signal information In TV mode the Programme number Sound and Clock 21 TEXT see page 49 22 MGDI Using this button you can see MGDI DEMO screen Inserting Batteries into the Remote Control Unit To l...

Page 24: ...t If the desired item is selected the relevant sub items are displayed upward 1 Press the MENU button The main menu appears if you press the MENU button 2 Press the button You may setup according to t...

Page 25: ...the number button for channel selection For example to watch channel No 9 Press the number button 0 and 9 If pressing only number 9 it takes a longer time to select the channel To suddenly turn sound...

Page 26: ...WER button on the remote control The Stand By LED lamp on the front panel begins to fliker in red and green colour and the TV turns on 2 Adjust program Select the desired program by pressing the PR bu...

Page 27: ...WAIT Setting Up TV Stations Auto Tuning All stations that can be received are stored by this method It is recommended that you use Auto tuning during in stallation of this set 1 Press the MENU button...

Page 28: ...ning First select PR number you want to store with buttons on the remote control A tuning screen will appear and cursor will move from left to right from right to left If you want to stop tuning press...

Page 29: ...hannels in the Setup menu Press the PR buttons to select a program number you want Move to SETUP in the Install menu Select the colour and sound system which you want Search a real channel with button...

Page 30: ...ve to EDIT in the Install menu Move the selection bar to the program number to delete with the or buttons Press the Delete Yellow button 2 Moving the program positions Move to EDIT in the Install menu...

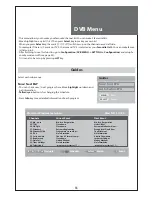
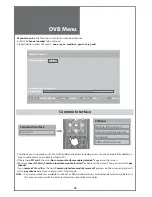
Page 31: ...henever you need more information during any DVB MENU directory press info button then you will see more detailed information on the screen And in some menus you can use blue yellow red green button T...

Page 32: ...ct and Delete function is to choose or delete the channel Select Edit Name function to change the channel name as you want Press key to change characters If you want to lock some channels for several...

Page 33: ...elevision X programmes start at 11 programmes start at 11 DVB Menu This menu allows you to make your favourite channel list You can make 5 favourite lists Move highlight on any list 1 5 Then press Sel...

Page 34: ...e EPG You can check program schedule here Navigate channel by pressing up down right left button Press Yellow cyan buttons to change date Red green buttons are for changing the time Press Info key to...

Page 35: ...nnel are shown Change Channels List Show all TV only RADIO only TEXT only Parental Setting enables you to make individual services DVB MENU and Installation are protected by password The default passw...

Page 36: ...t with additional features including access to extra channels if available us ing a conditional access module eg TopUp TV If there is no CI Card in the slot No common interface module detected appears...

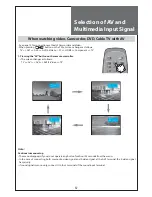
Page 37: ...hanges as follows TV AV1 AV2 AV3 S Video PC HDMI Component TV 1 Pressing the AV button on the remote controller The screen changes as follows TV AV1 AV2 AV3 S Video TV Note Cautions in menu setup The...

Page 38: ...rs on the screen adjust the PC output to a format listed in the Multimedia Input table Multimedia Input Format Resolution V freq HDMI PC D Sub Component Standard 640 x 480 60Hz o o x 72Hz o o x 75Hz o...

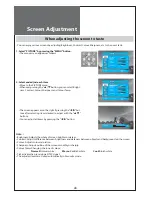
Page 39: ...g the PICTURE button The screen changes as follows Normal I Normal II Favourite Normal I The screen adjustment status changes as the following screens are displayed sequentially whenever pressing the...

Page 40: ...o the PICTURE menu Whenever pressing the button you can select Bright ness Contrast Colour Sharpness and Colour Temp The screen appears as on the right if pressing the but tons after selecting items d...

Page 41: ...ing on the signal information of a broadcasting station 16 9 16 9 will display a true 16 9 anamorphic picture with no aspect distortions 14 9 14 9 will display a 14 9 picture at its standard 14 9 size...

Page 42: ...he horizontal position of displayed image 2 Adjustment of the V Position Move to V Position in the Screen menu Press the buttons to adjust the vertical position of dis played image 3 Adjustment of the...

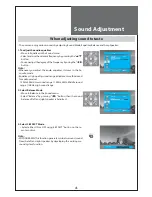
Page 43: ...e frequency by using the button Note Whenever you adjust the audio equalizer it stores in the Fa vourite mode Equalizer High quality sound range adjustment method used for audio product 120Hz 500Hz Lo...

Page 44: ...ak you can switch to MONO by pressing the button Then the colour of MONO character will change to Red In Mono reception the depth of sound is improved To switch back to stereo press the button again N...

Page 45: ...Selection of Language Selection of Language When you first turn on the TV set the window of language selection is displayed automatically 1 Press the MENU button and select Function 2 Select Language...

Page 46: ...inute with the buttons Place the cursor to Clock with buttons and then press the MENU button to complete Note Manually set clock is not memorized any more when TV is AC off 2 Setting the Wake up time...

Page 47: ...above for the Clock The set will turn off at the selected time Note This function is very convenient since the TV automati cally turns off at the fixed time 4 Sleep Mode By pressing the SLEEP button o...

Page 48: ...et without the remote control If TV set is set up Child Lock LED will cycle through red off for the ST BY mode If the Child Lock is On then the set can only be switched back on using the remote contro...

Page 49: ...LD symbol appears and the contents of the subpage shown are kept on the screen and no longer updated or switched to other subpages Pressing the HOLD button again the current subpage appears CALLING UP...

Page 50: ...d if not adjust the antenna toward the broadcasting station Picturehas snow noise Check the antenna or its connection is correct and if not correct the antenna fault or connection cable fault Check if...

Page 51: ...nd frequency on the table not listed then no picture will be displayed NO SIGNAL appears on the screen Ensure that the signal cable is firmly connected to PC and TV Image is not clear Adjust the PHASE...

Page 52: ...mm 0 600 mm Contrast Ratio 4000 1 5000 1 5000 1 Dimension W x H x D 676 x 530 x 230 mm 806 x 626 5 x 250 mm 940 x 720 x 328 5 mm Power Consumption Remarked in the back of product TV System PAL B G D...

Page 53: ...DMP39...

Reviews: