background image

T V

N O

Y E S

Y E S

Y E S

Y E S

Y E S

Y E S

A V

Y E S

N O

Y E S

Y E S

Y E S

Y E S

Y E S

S - v i d e o

Y E S

Y E S

N O

Y E S

Y E S

Y E S

Y E S

Component 1

Y E S

Y E S

Y E S

N O

N O

N O

Y E S

Component 2

Y E S

Y E S

Y E S

N O

N O

N O

Y E S

P C

Y E S

Y E S

Y E S

N O

N O

N O

Y E S

D V I

Y E S

Y E S

Y E S

Y E S

Y E S

Y E S

N O

3 6

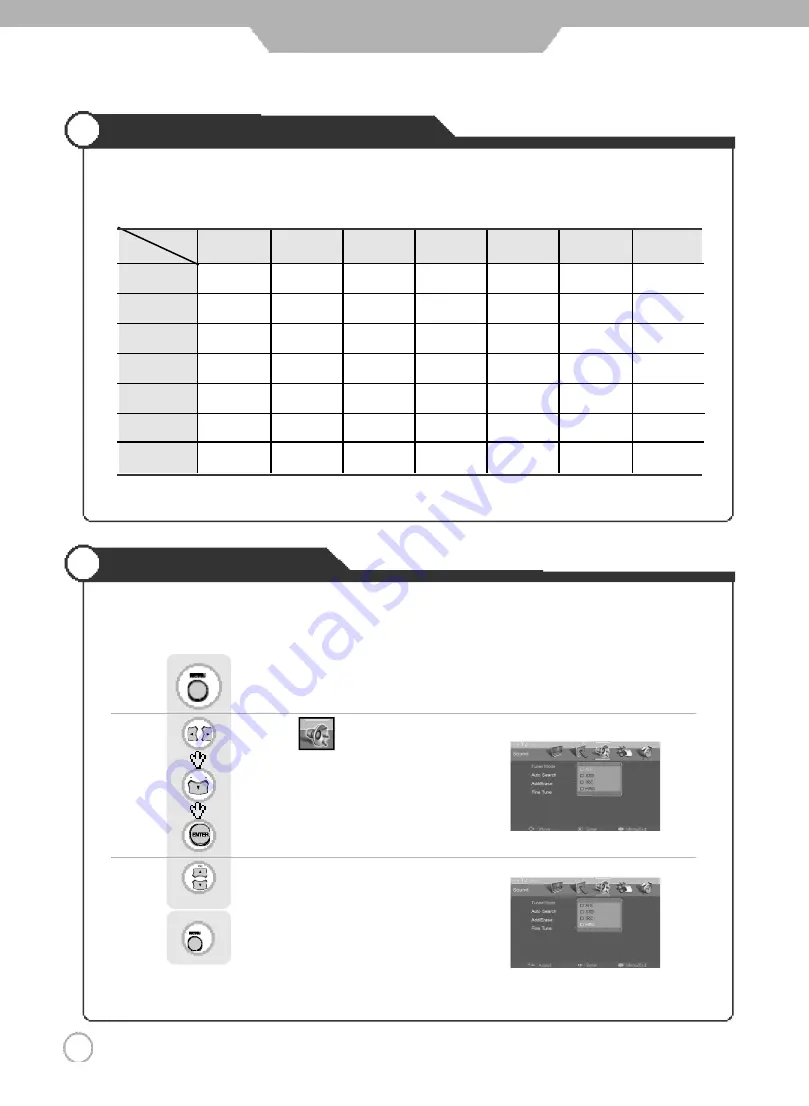
Picture in Picture Display Mode

Auto Volume Level

3 6

Application

This feature maintains an equal Volume level, even if you change channels.

According to the below table, you can select Picture in Picture supporting modes.

Use                              to move to               .                  

Press                           to move to  "AVL". 

Press                           to select.                 

Press                           .

Use                             to select the "On".

Press                           to go back to the previous menu.                     

S u b

T V

A V

S - v i d e o

Component 1 Component 2

P C

DVI 

m a i n

Summary of Contents for DLN-26D3

Page 1: ...LCD TV User s Manual Please observe all safety precautions when using this product Please read this manual carefully before using this product Model No DLN 26D3 DLN 30D3...

Page 2: ...TV 7 Name of each part 8 Controls and Functions 9 Mounting on a wall 10 Installation Precautions 10 Installing an Antenna 11 Remote controller 12 Precautions 13 Connection VCR Connections 14 Cable TV...

Page 3: ...V Chip 30 33 Viewing the Closed Captions 34 Viewing Picture in Picture 35 Picture in Picture Display Mode 36 Auto Volume Level 36 Listening to Stereo Sound MTS Multi Television Sound 37 Resetting LCD...

Page 4: ...unding prong The wide blade or the third prong is provided for your safety When the provided plug does not fit into your outlet consult an electrician for replacement of the obsolete outlet 10 Protect...

Page 5: ...CAUTION TOREDUCE THERISK OF ELE CTRIC SHOCK DO NOT REMOVE COVER OR BACK NO USER SERVICEABLE PARTS INSIDE REFER SERVICING TO QUALIFIED SERVICE PERSONNEL This symbol indicates high voltage is present i...

Page 6: ...particular installation If this equipment does cause harmful interference to radio or television reception which can be determined by turning the equipment off and on the user is encouraged to try to...

Page 7: ...Features Picture in Picture Enables you to simultaneously display two different image sources PC Compatible Monitor Enables you to connect PC D Sub DVI input for displaying high resolution SXGA 1280x1...

Page 8: ...utton PROGRAM Channel Button MENU Button OSD MENU Display Button Source select Button TV AV S Video Component 1 Component 2 DVI PC Select Button Standby Button Main Power Button Please turnoff the mai...

Page 9: ...from the following illustration DVI D Input Component1 Input Component2 Input PC D Sub Input Antenna RF Input Antenna Cable Remote Control User s Guide Battery 2 AAA 1 5V User s Guide User Guidance In...

Page 10: ...for safe use Please refer to A and B Installation of the LCD TV in an improperly ventilated location can cause a fire or damage to the LCD TV due to increased temperature Using the Stand B Mounting o...

Page 11: ...service center can explain the various outdoor antennas vailable to you Wall Jack with F Connector 300 to 75 ohm Adapter Coaxial Round Antenna Cable Connecting an Outdoor Antenna 300 Ohm Flat Wire Con...

Page 12: ...ge 24 CUSTOM DYNAMIC STANDARD MOVIE MILD 10 SSM SOUND STATUS MEMORY KEY page 25 CUSTOM STANDARD MUSIC MOVIE SPEECH 11 100 PRESS TO SELECT CHANNELS OVER 100 FOR EXAMPLE TO SELECT CHANNEL 107 PRESS 100...

Page 13: ...in the remote controller 2 Check that the batteries have power 3 Check that the LCD TV is powered and that it is properly plugged in 4 Check if any three wavelength lamp special fluorescent or neon si...

Page 14: ...Connect the LCD TV s AV In terminal to the VCR s AV Out terminal using the AV cable Make sure the color of the terminals and the color of cable are the same Use the S Video cable for higher picture q...

Page 15: ...er AV Out terminal using the AV cable Make sure the color of the terminals and the color of cable are the same Inorder towatch CableTV Subscribe toyour local CableTVcompany and install aseparate conve...

Page 16: ...nto Camcorder and press play button or insert disc into the Video game console Connection terminals of other appliances differ by manufacturer and model LCD TV Back view LCD TV Back view AV Cable S Vi...

Page 17: ...onent connectioncable Component Audio cable R L DVD S Video Cable 1 Connect LCD TV s Y PB PR terminal in Component 1 or 2 to DVD s Video Out terminal using the external cable 2 Connect LCD TV s Audio...

Page 18: ...an PC Connector D Sub 15pin DVI connector instead of Component output Connect Audio Cable from the Audio output terminal of receiver to the PC Audio input terminal of the LCD TV 1 Turn on the LCD TV...

Page 19: ...e connection 1 Turn on the LCD TV and press on the remote controller 2 Use to move to PC If DVI D has been connected select DVI 3 Set the PC video output mode to VGA 640 480 SVGA 800 600 XGA 1024 768...

Page 20: ...utton on the LCD TV main body is turned on The main power indicator will light up red if turned on CAUTION After turning off the main Power please wait at least more than 3 seconds to turn the main po...

Page 21: ...e memory channel decreases the memorychannel increasesby one channel decreases by one channel Press button again to hear the sound again Press button on the remote control Press button or wait 10 seco...

Page 22: ...ner modes AIR STD IRC HRC using Auto search Press to go back to the previous menu Use to move to Press to select Tuner Mode Press Use to move to the desired signal source Press to go back to the previ...

Page 23: ...you can connect AV S Video Component1 Component 2 PC and DVI to the TV set and enjoy these functions All input sources will be automatically detected and displayed on screen but you may select an act...

Page 24: ...st the settings Custom Dynamic Standard Movie Mild Press button on the remote control Use to move to Press to select Custom Adjust Press Use to move to the desired category Use to adjust the setting U...

Page 25: ...a movie Speech It is preset for hearing vocal audio clearly Use to move to Press to select Custom Adjust Press Use to move to the desired category Use to adjust the setting Press to go back to the pre...

Page 26: ...n be viewed in the language preferred by the user Use to move to Press to select Language Press Use to select the desired language Press to go back to the previousmenu Use to move to Press to move to...

Page 27: ...TV signal or signal from other connected appliances are being received If there is an incoming signal the blue screen will be replaced by the normal picture screen Use to move to Press to move to Blu...

Page 28: ...In PC DVI input mode you can only select either the Wide or the 4 3 normal mode Screen Size Wide It makes 16 9 format for input signal Panorama It makes 4 3 format fit into 16 9 format with minimal l...

Page 29: ...tune controls to adjust the screen when picture quality isunclear or lines appear Use to move to Press to move to Fine Tune Press to select Press Use to tune Press to go back to the previous menu To...

Page 30: ...password The V Chip Screen will appear First Set up a personal identification number password and enable the V Chip The Edit password screen will appear Press number button to select the Enter New Pa...

Page 31: ...automatically be checked How to set up Restrictions using the TV guidelines Use to move to TV Parental Guide Press to select Use or to move to desired categories Press to set the restriction ratings P...

Page 32: ...When the V Chip lock is on the TV will automatically block any programs that are coded with objectionable rating either MPAA or TV Rating First Set up a personal identification number password and en...

Page 33: ...ed viewing parental guidance is suggested for children under17 NC17 No children under age 17 X Adults only NR Not rated How to Reset the TV after the V Chip Blocks a Channel E Exempt es G General 8 an...

Page 34: ...move to Press to move to Caption Press to select Press Use to set the closed captions Press to go back to the previous menu You can select these options in the following order You can get the same re...

Page 35: ...ed input source Or press button on the remote control Sub screen position can be selected only from the Or press button on the remote control The main screen and the sub screen willswap Or press butto...

Page 36: ...ES YES YES YES NO 36 Picture in Picture Display Mode Auto Volume Level 36 Application This feature maintainsan equal Volume level even if you change channels According to the below table you can selec...

Page 37: ...on the remote control MultiTelevision Sound Use to move to Press to move to MTS Press to select Press Use to select the desired category Press to go back to the previous menu It resetsall of the param...

Page 38: ...Application 38 Setting Time Use to move to Press to select Clock Use to adjust the desired hour Press to move one step Use to adjust the desired minute Press to go back to the previous menu Press...

Page 39: ...to set Channel Volume Control Use to set volume press button on the remote control It automatically turns off the TV after a designated period of time Depending on the number of times the SLEEP button...

Page 40: ...remote control Use to move to Press to move to PC HDTV Press to select Use to move to desired category Use to adjust the setting Press to go backto the previous menu Press Auto in progress Phase It ad...

Page 41: ...Color Tone Press to select Use to select the desired category Press to go back to the previous menu Press Cool 1 This results in a blueish tone Cool 2 This results in a more blueish tone Normal This i...

Page 42: ...on The screen doesnot appear Is the power plug pulled out Insert the power plug Turn the main power button on and press the power button of the remote controller The screen appearstoo Thisproblemoccur...

Page 43: ...turn off as the main power is off Had forgotten Password of V Chip Press buttons on the Remotecontrol in V Chip function Can not select PC mode when D sub D sub cable must not meet VESA standard D su...

Page 44: ...ns MODEL DLN 26D3 DLN 30D3 Aspect Ratio 15 9 15 9 Screen Size H V 566 4mm 339 84mm 643 2mm 385 92mm Resolution 1280 768 Wide XGA 1280 768 Wide XGA Pixelpitch 0 4425mm 0 4425mm 0 1675mm RGB 0 5025mm Di...

Page 45: ...Memo Maintenance and Service...

Page 46: ...D I G I T A L A R T...

Reviews: