5. WARNING SYMBOLS ON THE MACHINE
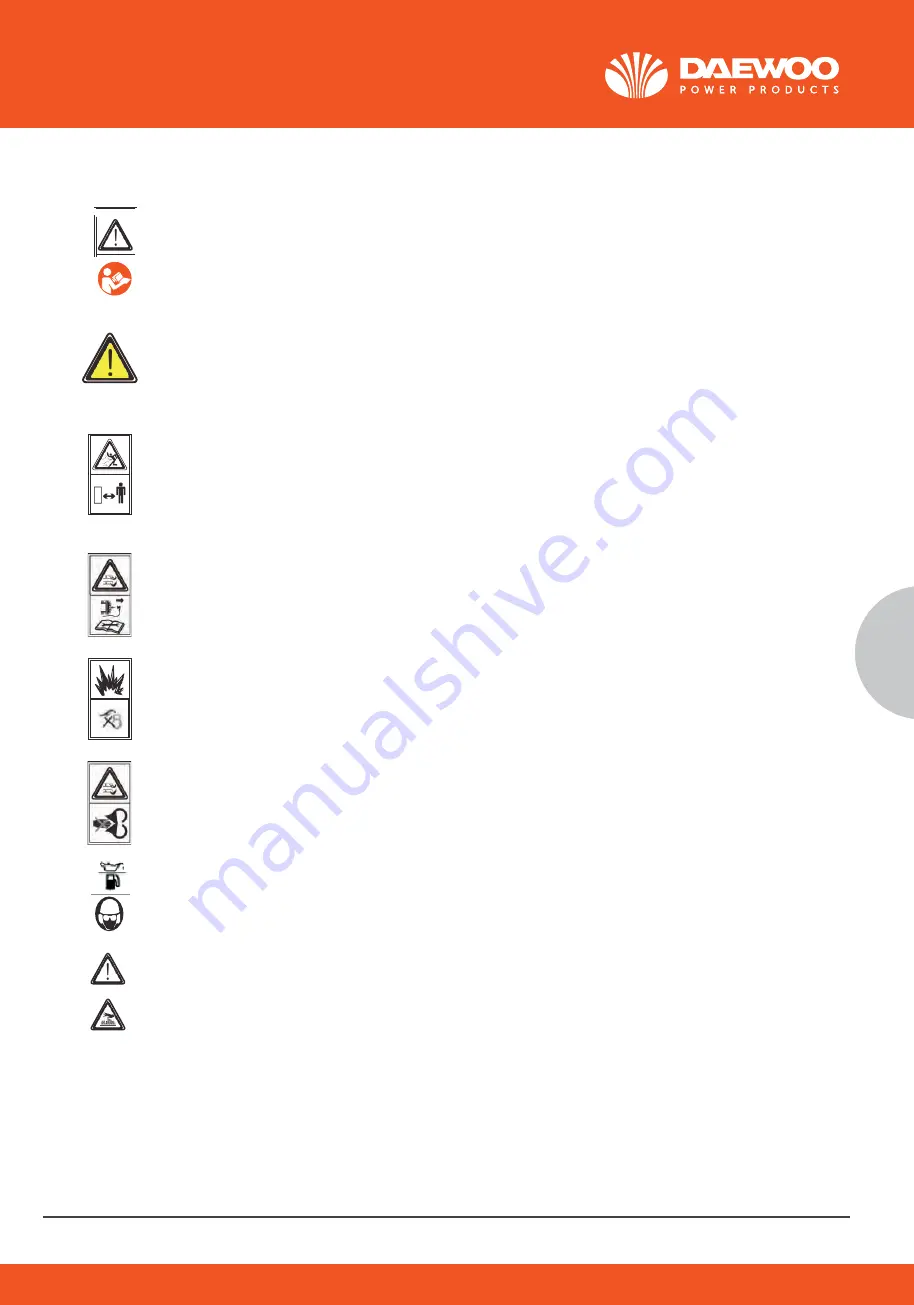
WARING- To reduce the risk of injury , user must read instruction manual.
This symbol, before a safety comment, indicates a precaution, a warning or a danger.
Ignoring this warning can lead to an accident for yourself or for others.
To limit the risk of injury, fire or electrocution always apply the recommendations
indicated.
Keep by standers away.
Beware of sharp blades –remove spark plug lead before maintenance.
Never refuel while the engine is running.
Risk of injury . do not open or remove safety shields while engine is running.
Wearing ear protection , eye protection when operating.
Hot surfaces will burn finger or palms.
www.daewoopower.bg
5
EN
21
5. WARNING SYMBOLS ON THE MACHINE
WARING- To reduce the risk of injury , user must read instruction manual.
This symbol, before a safety comment, indicates a precaution, a warning or a danger.
Ignoring this warning can lead to an accident for yourself or for others.
To limit the risk of injury, fire or electrocution always apply the recommendations
indicated.
Keep by standers away.
Beware of sharp blades –remove spark plug lead before maintenance.
Never refuel while the engine is running.
Risk of injury . do not open or remove safety shields while engine is running.
Wearing ear protection , eye protection when operating.
Hot surfaces will burn finger or palms.
www.daewoopower.bg
5
EN
www.daewoopower.bg
5
EN
21
5. WARNING SYMBOLS ON THE MACHINE
WARING- To reduce the risk of injury , user must read instruction manual.
This symbol, before a safety comment, indicates a precaution, a warning or a danger.
Ignoring this warning can lead to an accident for yourself or for others.
To limit the risk of injury, fire or electrocution always apply the recommendations
indicated.
Keep by standers away.
Beware of sharp blades –remove spark plug lead before maintenance.
Never refuel while the engine is running.
Risk of injury . do not open or remove safety shields while engine is running.
Wearing ear protection , eye protection when operating.
Hot surfaces will burn finger or palms.
4. To reduce the fire hazard, keep the engine, silencer, battery compartment andpetrol storage area
free of grass, leaves, or excessive grease;
5. Check the grass catcher frequently for wear or deterioration;6.Replace worn or damaged parts
for safety;
7. If the fuel tank has to be drained, this should be done outdoors.
8. ADJUSTMENT
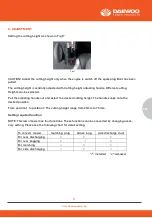
Setting the cutting height As shown in Fig 17
CAUTION! Adjust the cutting height only when the engine is switch off the spark plug Boot has been
pulled.
The cutting height is centrally adjusted with Cutting height adjusting handle. Different cutting
Heights can be selected.
Pull the adjusting handle out and select the desired cutting height. The handle snaps onto the
desired position.
From position 1 to position 7. The cutting height range from 25mm to 75 mm.
Setting required function
NOTE: This lawn mower has four functions. These functions can be converted by changing acces-
sory setting. Please see the following chart for detail setting.
Maintenance and storage
1. Keep all nuts, bolts and screws tight to be sure the equipment is in safeworking condition;
2. Never store the equipment with petrol in the tank inside a building wherefumes can reach an open
flame or spark;
3. Allow the engine to cool before storing in any enclosure;
4. To reduce the fire hazard, keep the engine, silencer, battery compartment andpetrol storage area
free of grass, leaves, or excessive grease;
5. Check the grass catcher frequently for wear or deterioration;6.Replace worn or damaged parts
for safety;
7. If the fuel tank has to be drained, this should be done outdoors.
8. ADJUSTMENT
Setting the cutting height As shown in Fig 17
CAUTION! Adjust the cutting height only when the engine is switch off the spark plug Boot has been
pulled.
The cutting height is centrally adjusted with Cutting height adjusting handle. Different cutting
Heights can be selected.
Pull the adjusting handle out and select the desired cutting height. The handle snaps onto the
desired position.
From position 1 to position 7. The cutting height range from 25mm to 75 mm.
Setting required function
NOTE: This lawn mower has four functions. These functions can be converted by changing acces-
sory setting. Please see the following chart for detail setting.
spilling fuel. There should be no fuel in thefiller neck.
4. Clean up any overflow or splashes of petrolbefore starting the engine.
5. Tighten the filler cap after filling, fingertight on.
Setting required function
NOTE: This lawn mower has four functions. These functions can be converted by changing acces-
sory setting. Please see the following chart for detail setting.
clean the blade and the deck.
9. Do not remove grass debris in the mower casing or on the blade by hand orwith your feet. Instead
use suitable tools such as a brush or broom.
Emptying the grass bag
As soon as grass clippings start to trail the lawn mower, it is time to empty the
grass bag.
NOTE: Before taking off the grass bag, switch off the engine and wait untilthe blade has come to a
stop.
1. To take off the grass bag, use one hand to lift up ejector flap and the other to grab onto the carry
handle. The ejector flap automatically falls down after removing the grass bag and closes off the
rear chute opening.
2. Empty the grass debris in the grass bag, and refit grass Bag.
NOTE: If any grass residue is caught in the discharge chute, clean it using a brush. Do not remove
grass debris in the mower casing or on the blade by hand or with your feet. Instead use suitable
tools such as a brush or broom. To ensure that the cut grass can be collected into grass Bag, the
discharge opening and inside the mower casing must be cleared of any blockage.
10. STORING AND MAINTENANCE
WARNING : Before performing any maintenance or cleaning work, switch Off the engine and wait
until the blade has come to a stop.
Cleaning
WARNING
1. Remove the air cleaner outside cover (A). Be carefulto prevent dirt and debris from falling into the
aircleaner assembly.
2. Separate the Air Filter (A) from the Air Filter Housing (B).
3.Inspect the air filter. Clean dirty air filter with warmwater and mild soap. Allow air filter to dry
thoroughly before re-installation4.Install the air filter assembly onto the carburetor and secure with
screw.
Note: Do not use pressurized air or solvents to clean the filter. Pressurized air can damage the filter
and solvents will dissolve the filter.
Changing the engine oil Tilt the lawnmower towards the oil filler, have a container ready to catch the
oil and remove the dipstick. Once the oil has been emptied, replace the dipstick and wipe clean any
spillages. Refill with 500ml SAE30 oil or equivalent, i. e. SAE 5W/30, SAE10W/30.
Refill with 500ml SAE30 oil or equivalent i. e SAE5W/30, SAE10W/30. When the dipstick is rested on
the filler pipe (i. e . not turn in pace ), the oil level must be between the min and max marks on the
flame or spark;
3. Allow the engine to cool before storing in any enclosure;
4. To reduce the fire hazard, keep the engine, silencer, battery compartment andpetrol storage area
free of grass, leaves, or excessive grease;
5. Check the grass catcher frequently for wear or deterioration;6.Replace worn or damaged parts
for safety;
7. If the fuel tank has to be drained, this should be done outdoors.
8. ADJUSTMENT
Setting the cutting height As shown in Fig 17
CAUTION! Adjust the cutting height only when the engine is switch off the spark plug Boot has been
The cutting height is centrally adjusted with Cutting height adjusting handle. Different cutting
Heights can be selected.
Pull the adjusting handle out and select the desired cutting height. The handle snaps onto the
desired position.
From position 1 to position 7. The cutting height range from 25mm to 75 mm.
Setting required function
NOTE: This lawn mower has four functions. These functions can be converted by changing acces-
sory setting. Please see the following chart for detail setting.
4. To reduce the fire hazard, keep the engine, silencer, battery compartment andpetrol storage area
free of grass, leaves, or excessive grease;
5. Check the grass catcher frequently for wear or deterioration;6.Replace worn or damaged parts
for safety;
7. If the fuel tank has to be drained, this should be done outdoors.
CAUTION! To prevent engine damage the engine is shipped without oil or petrol. The engine must be
WARNING! Refuel in a well-ventilated area with the engine stopped. Do not smoke or allow flame or
sparks in the area where the engine is refueled or where petrol is stored. Avoid repeated or prolon-
1. Clean the area around the petrol filler capbefore removing the cap. Remove thewarning tag, check
8. ADJUSTMENT
Setting the cutting height As shown in Fig 17
CAUTION! Adjust the cutting height only when the engine is switch off the spark plug Boot has been
pulled.
The cutting height is centrally adjusted with Cutting height adjusting handle. Different cutting
Heights can be selected.
Pull the adjusting handle out and select the desired cutting height. The handle snaps onto the
desired position.
From position 1 to position 7. The cutting height range from 25mm to 75 mm.
Setting required function
NOTE: This lawn mower has four functions. These functions can be converted by changing acces-
sory setting. Please see the following chart for detail setting.
Summary of Contents for DLM4600SPL
Page 19: ...www daewoopower bg 19 BG 1 20 2 21 3 22 4 22 5 22 6 23 7 25 8 27 9 28 10 30 11 33 12 34 13 41...
Page 40: ...www daewoopower bg 40 BG 10 6 M5x30 10 6 M5x30...
Page 43: ...www daewoopower bg 43 BG 24 6 6 12 6...
Page 44: ...www daewoopower bg 44 BG 1 1 2022 6 6...
Page 45: ...www daewoopower bg 45 BG...
Page 46: ...www daewoopower bg 1784 1 51 359 2 81 77 600 359 2 81 77 601...

