background image

°

Ø

¡

á

Click 

°

Æ

s t a r t

°

Ø

button, select settings, and select control panel.

¡

á

Double click 

°

Æ

S y s t e m

°

Ø

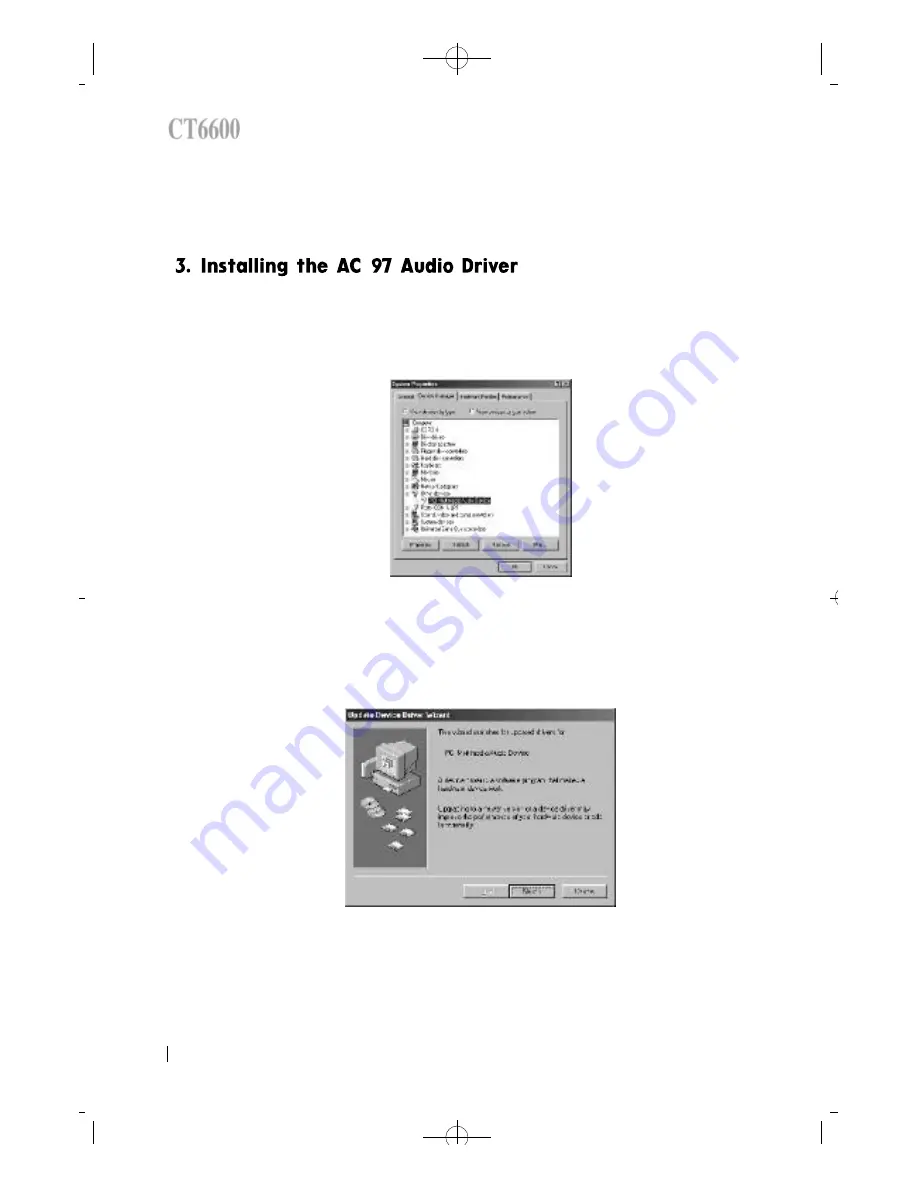
icon,  and  select  the  Driver  Manager  tab.  Then

you can see the following figure .

¡

á

Select the 

°

PCI Multimedia Audio Device

°

±

, and click 

°

Æ

R e m o v e

°

Ø

b u t t o n .

¡

á

Click 

°

Æ

R e f re s h

°

Ø

b u t t o n .

¡

á

Click 

°

Æ

n e x t

°

Ø

b u t t o n .

40

DAEWOO CT6600

CT6600 USER

°Ø

S GUIDE

CT6600øµ

π

Æmenual  89.6.16 11:14 AM  

‰¿Ã¡ˆ40

Summary of Contents for CT6600

Page 1: ...USER Ø S GUIDE CT6600øµπÆmenual 89 6 16 11 12 AM à ˆ1 ...

Page 2: ...CONTENTS CT6600 DAEWOO CT6600 USER S GUIDE CONTENTS CT6600øµπÆmenual 89 6 16 11 12 AM à ˆ2 ...

Page 3: ...line 2 Srart to Install 10 Disassembling Drawing Upgrading Memory and installing the PCI option card 3 System disassemble upgrading 15 Specification Layout Jumper Setting 4 Mother board 19 MAIN Setup Menu Advanded Serup Menu Security Setup Menu Power Setup Menu Boot Setup Menu Exit Setup Menu 5 BIOS Setup 35 Inf Update Installation the VGA Driver Insralling theAV 97 Audio Driver 6 Driver Insrallat...

Page 4: ...ead this guide carefully before you install the system Ü For your safety remember to turn off the system and to disconnect all the cords and cables before opening the system chassis Ü To avoid electric shock do not open the power supply 4 DAEWOO CT6600 CT6600 USER Ø S GUIDE Starting CT6600øµπÆmenual 89 6 16 11 12 AM à ˆ4 ...

Page 5: ...ng box includes CT6600 keyboard mouse and power cord Check all the items form your box Starting 5 DAEWOO CT6600 Starting Keyboard System Manual CD ROM Title Mouse Power Cord CT6600øµπÆmenual 89 6 16 11 12 AM à ˆ5 ...

Page 6: ...er socket Please do not place magnetic objects close to the system Keep distance between the system and the wall Keep the computer away from high temperature and direct sunlight Place the system away from radio or any electronic receivers Keep the computer away from excessive moisture and dust CT6600øµπÆmenual 89 6 16 11 12 AM à ˆ6 ...

Page 7: ...ect button CD Rom Drive CD Rom Drive LED CD Rom Drive eject button USB Port MIDI GAME port Headphone MIC in Keyboard Mouse Digital LCD Monitor out option Monitor out Parallel port Serial port Tel Line to the wall Phone Voltage selection switch AC Power Speakerout Line in Mic in CT6600øµπÆmenual 89 6 16 11 12 AM à ˆ7 ...

Page 8: ...o the keyboard connector colored blue Connect the mouse cable to the mouse connector colored green 8 DAEWOO CT6600 CT6600 USER Ø S GUIDE 2 Start to Install PS 2 Mouse PS 2 Keyboard Option Digital LCD Monitor option Analog CRT Monitor Option CT6600øµπÆmenual 89 6 16 11 12 AM à ˆ8 ...

Page 9: ...r System applies both 110 220Vpower range with voltage selecting switch Before plug the power cord to your PC and connect the cord into the grounded outlet you should select voltage 100 or 220 first Ü Do not connect power cable to the power outlet until you finish all the preceding steps Start to Install 9 DAEWOO CT6600 Tel line to the wall Phone Voltage Selection Switch Power Cord CT6600øµπÆmenua...

Page 10: ... your computer please check out you have proper lighting and a clean work space If you temporarily disconnect cables or remove expansion cards make sure you note the position of the connectors and slots so that you can reassemble the system correctly 1 Remove all the AC power source from your computer and all peripherals 2 Connection any telephone or telecommunication lines from the computer may c...

Page 11: ...ouch an unpainted metal surface on the computer chassis periodically Touching components or contacts on a card or pins on a chip might cause damage of components This section describes how to disassemble PC for adding RAMs installing MR card and installing PCI option card etc Opening the Computer System disassemble upgrading 11 DAEWOO CT6600 1 DISCONNECT POWER CONNECTOR LOOSE THESE SCREWS LOOSE TH...

Page 12: ...clip holds the right edge 2 Push both clips away from the socket 3 Position the DIMM over the socket so that the notch at the bottom of the module lines up over the divider in the socket As shown in the next picture match the wide part of the module to the wide part of the opening in the socket 4 Push the module straight into the socket 12 DAEWOO CT6600 CT6600 USER Ø S GUIDE notches To insert DIMM...

Page 13: ...h one hand push the other clip away from the module 3 Lift the module out of the socket 1 Unscrew and remove an empty slot guide 2 Put an Add On Card in the empty PCI slot carefully be careful to the direction of the card 3 If there are cables that should be connected to the Add On card please connect to it 4 Screw the guide of the Add On card DIMM Memory module DIMM Socket System disassemble upgr...

Page 14: ...perly inserted in the slot If the card is not properly inserted then it could cause the system failure 14 DAEWOO CT6600 CT6600 USER Ø S GUIDE PCI Slot Tel Line to the wall Phone Option PCI CARD CT6600øµπÆmenual 89 6 16 11 13 AM à ˆ14 ...

Page 15: ...DE 50 pin Boxed Header 2mm pitch for CDROM Secondary IDE I O Controller 1 Serial port 1 Parallel port with ECD and EPP support Interface for one 1 2MB 1 44MB and 2 88MB Diskette Drive PS 2 type mouse and keyboard interfaces Audio SigmaTel AC Ø 97 codec Support AC Ø 97 compliant 2 1 Line out Line in Mic in port Telephony Aux In Front Line Out MIC In Connector BIOS Phoenix PnP BIOS 4MB Firmware Hub ...

Page 16: ...USER Ø S GUIDE J34 J29 J12 J20 J4 J23 J27 J26 J8 J24 J22 J33 J35 J30 J25 J28 J31 J32 J14 J13 J9 JP3 JP6 JP4 J16 J5 J6 J7 JP8 JP1 JP11 JP5 J3 J10 JP9 J19 JP7 GMCH JP10 ICH J21 J17 DM1 DM2 CT6600øµπÆmenual 89 6 16 11 13 AM à ˆ16 ...

Page 17: ...pins 2 3 for 5 10 seconds and place jumper back to pins 1 2 position If not the system may malfunctions JP4 FWH Setting JP5 Keyboard Password Power On Setting Mother board 17 DAEWOO CT6600 JP5 KBD PWR ON DESCRIPTION 1 2 NORMAL Nomal Operation without keyboard power on Setting when use keyboard power on password hotkey power on etc 2 3 KBD Power On JP4 FWH Setting DESCRIPTION ON UNLOCK When upgradi...

Page 18: ...ble Disable on BIOS Setup 18 DAEWOO CT6600 CT6600 USER Ø S GUIDE JP10 AUDIO DESCRIPTION 1 2 ENABLE Setting when use AUDIO on motherboard 2 3 DISABLE Setting when AMR or PCI Audio JP7 JP8 REMARK STR All OPEN 1 2 3 4 5 6 7 8 Entering up to S3 Non STR 1 2 3 4 5 6 All OPEN Entering up to S1 CT6600øµπÆmenual 89 6 16 11 13 AM à ˆ18 ...

Page 19: ...p main screen 2 From the initial SETUP menu use arrow key Right or to display the next or previous menu There are six SETUP menus and they are Main Advanced Security Power Boot Exit 3 To select an option entry press arrow key UP or Down As the cursor moves through the menu the current option is hightlighted 4 and the space bar will scroll the current field s value 5 To change a value of configurai...

Page 20: ...oks like this Figure1 MainScreen 20 DAEWOO CT6600 CT6600 USER Ø S GUIDE Phoenix BIOS Setup Utility Main Advanced Security Power Boot Exit System Time a 12 50 13 b System Date a 01 01 1998 b Legacy Diskette A a 1 44 1 25MB 3 ˆ b Legacy Diskette B a Disabled b Primary Master a 1755MB b Primary Slave a None b Secondary Maste a CD ROM b Secondary Slave a None b Keyboard Features System Memory 640KB Ex...

Page 21: ...rives installed in your system Primary Master Slave Secondary Master Slave The Master and Slave settings on the Main Menu control the types of devices Hard disk drives Removable disk drives CD ROM drives The setting is defined to Auto to automatically select the hard disk parameters and the protocol at the time of boot up The user can define its own parameter by selecting the User value If you pre...

Page 22: ...s held down before it begins to repeat the keystroke Legacy USB Support Enable Disable for Legacy Universal Serial Bus á System Memory Displays the amount of conventional system memory detected during bootup á Extended Memory Display the amount of extended system memory detected during bootup 22 DAEWOO CT6600 CT6600 USER Ø S GUIDE CT6600øµπÆmenual 89 6 16 11 13 AM à ˆ22 ...

Page 23: ...in 98 Win 2000 b Primary Video Adapter a AGP b Reset Configuration Data a No b PS 2Mouse a Auto Detect b Secured Setup Configurations a No b Large Disk Acsess Mode a DOS b Local Bus IDE adapter a Both b Spread Spectrum a Enabled b I O Device Configuration Advanced Chipset Control F1 Help y z Select Item Change Values F9 Setup Defaults ESC Exit w x Select Menu Enter Select Sub Menu F10 Save and Exi...

Page 24: ...value to Yes Yes erase all configuration data in ESCD which stores the configuration settings for non PnP plug in devices Select Yes when requied to restore the manufacture s defaults á PS 2Mouse This is to Enabled or to Disable PS 2Mouse functions Æ Auto Detect will enable the PS 2mouse only if present á Secured Setup Configurations Yes prevents the Operaing System from overriding selections you ...

Page 25: ... Floppy disk controller MIDI Port Configure MIDI Port Game PortL Configure Gme Port á Advanced Chipset Control Video boot type Determines whether the onboard video controller will be used as aboot display device or not If you want to disable onboard video controller Swlsct Disable Onboard Video Then no system memory will be allocated for video Video BIOS Update With this option seletable between E...

Page 26: ...2 files that will make available in its web site or given in any other kind of media The files must be named WVBIOS VID and WVBIOS SIG The VID file is the actual video BIOS and Æ SIG file is a signature file used by the validation process to confirm the video BIOS authenticity b Preparing a floppy Specific actions are necessary on preparing a floppy for the update process once the file reading cap...

Page 27: ...t and load the defult video BIOS Keep in mind that in the next boot if you want to select permaneitly the default video BIOS you need to go to setup applicaton and select Default VB for Video BIOS option Enable memory Hole If enabled turn system RAM off to free address space for use with an option card Either a 16KB conventional CD hole starting at 880KB DC000h or a 1MBextended memory gap starting...

Page 28: ...Specfic Help Supervisor Password Controls access to the setup utility Phoenix BIOS Setup Utility Main Advanced Security Power Boot Exit Supervisor Password Is Clear User Password Is Clear Set Supervisor Password a Enter b Set User Password a Enter b Password on boot a Disabled b Diskette access a Disabled b Fixed disk boot sector a Disabled b Virus check reminder a Disabled b System backup reminde...

Page 29: ...ctor of the hard disk is write protected to against viruses Note This must be set to Normal to transmit system files of the hard disk or to format the hard disk á Virus check reminder If Daily Weekely or Monthly is selected the system prompts the user with remi nder for virus check at respective intervals á System backup reminder If Daily Weekely or Monthly is selected the system prompts the user ...

Page 30: ...nd Resume Button and 30 DAEWOO CT6600 CT6600 USER Ø S GUIDE Item Specific Help Enabled Use PowerButton as the Suspend Resume Button and support 4sec Power Override Disabled Use PowerButton as the SoftOff Button Phoenix BIOS Setup Utility Main Advanced Security Power Boot Exit PowerButton Override a Enabled b Power Savings a Disabled b Standby Timeout a Off b Auto Suspend Timeout a Off b Resume On ...

Page 31: ...agement Customized Can define the Stanby Timeout and Auto Suspend Timeout á Stanby Timeout Define the Stanby Timeout á Auto Suspend Timeout Define the Auto Suspend Timeout á Resume On Time According to the pre set the system recoves from the Suspend mode or wakes up from power off state at a specific time á Resume Time Define the Resume Time when Resume On Time is set to On á Resume On Modem Ring ...

Page 32: ...le devices use the HARD DRIVE item to specify which one to use on the boot order list as descibed in the following 32 DAEWOO CT6600 CT6600 USER Ø S GUIDE Item specific Help Use C or D to select a device then press to move it up the list or to move it down the list Press Esc to exit this menu Phoenix BIOS Setup Utility Main Advanced Security Power Boot Exit 1 a Removable Devices b 2 a Hard Drive b ...

Page 33: ...If you have more than one removable device select Removable Devices from the Boot Menu Select the removable device to use for booting by using the up and down arrows Then move it to the top of this list using the key á QuickBoot Mode By skipping a few tests for booting Quick Boot mode reduces system booting time á Summary screen Display system configuration on boot BIOS Setup 33 DAEWOO CT6600 CT66...

Page 34: ...ion fields á Discard Changes Ignore the changes á Save Changes Save current values to CMOS 34 DAEWOO CT6600 CT6600 USER Ø S GUIDE Item specific Help Exit System Setup and save your changes to CMOS Phoenix BIOS Setup Utility Main Advanced Security Power Boot Exit Exit Saving Changes Exit Discaeding Changes Load Setup Defaults Discard Changes Save Changes F1 Help y z Select Item Change Values F9 Set...

Page 35: ...rt Identification of Intel chipset components in device manager Files for Windows98 and files for Windows95 are included in this software package Windows98 SE support Intel 810 chipset devices so No Inf files needed in Windows98 SE 1 Installing the INF file Run Setup exe file in Inf directory That is d inf setup exe Click the next button then you will be prompted to agree to the license agreement ...

Page 36: ...he yes button Click the next button Click the next button then Inf files will be copied to c program files intel intelInf directory 36 DAEWOO CT6600 CT6600 USER Ø S GUIDE CT6600øµπÆmenual 89 6 16 11 14 AM à ˆ36 ...

Page 37: ...tility Run Setup exe file in Infinst directory That is d infinst setup exe Click next button then you will be prompted to agree to the license agreement Click yes button Click next button Driver Installation CT6600øµπÆmenual 89 6 16 11 14 AM à ˆ37 ...

Page 38: ... restart Run the Setup exe file in win9x directory d vga win9x Graphics setup exe Click next button then you will be prompted to agree to the license agreement 38 DAEWOO CT6600 CT6600 USER Ø S GUIDE CT6600øµπÆmenual 89 6 16 11 14 AM à ˆ38 ...

Page 39: ...ck yes button Click next butto then the vga drivers will copied will copied c program files intel GfxDrvEUD diretory Click finish button then system will restart Driver Installation CT6600øµπÆmenual 89 6 16 11 14 AM à ˆ39 ...

Page 40: ...click System icon and select the Driver Manager tab Then you can see the following figure Select the PCI Multimedia Audio Device and click Remove button Click Refresh button Click next button 40 DAEWOO CT6600 CT6600 USER Ø S GUIDE CT6600øµπÆmenual 89 6 16 11 14 AM à ˆ40 ...

Page 41: ...e Specify a location box and type the location If you use Win98SE or Win2000 type d audio win98se_2k If you use Win95 or Win98 Gold version type d audio win95_98 Then click next button Driver Installation CT6600øµπÆmenual 89 6 16 11 14 AM à ˆ41 ...

Page 42: ... next button Then System will copy driver files Click finish button Then the Device Manager tab will change like following figure 42 DAEWOO CT6600 CT6600 USER Ø S GUIDE CT6600øµπÆmenual 89 6 16 11 14 AM à ˆ42 ...

Reviews: