background image


18 


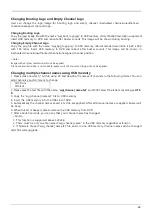
Changing Booting Logo and Empty Channel Logo 

User  can  change  the  logo  image  for  booting  logo  and  empty  channel  (inactivated  channel/unauthorized 
channel/unassigned channel) logo. 

 
Changing Booting Logo 

Copy the jpeg image file with the name “wgi_boot_logo.jpg” to USB memory. (Only 720x480 resolution supported) 
Insert USB memory to DVR and reboot after buzzer sounds. This image will be shown during booting. 

Changing Empty Channel Logo 

Copy the png file with the name “wgi_app_logo.png” to USB memory. (Recommended resolution is 640 x 360 
with  16:9  ratio)  Insert  USB  memory  to  DVR  and  reboot  after  buzzer  sounds.  This  image  will  be  shown  in 
inactivated channel/unauthorized channel/unassigned channel position.   
 

<Note>   
Image with very low resolution will not be applied. 
File name and resolution is not suitable, buzzer will not sound and logo will not be applied. 
 

Changing multiple channel names using USB memory 

1. Please make new text (*.txt) file using PC and describe the names of channels in the following format. You can 
skip channels you don’t want to change. 

CH1:Door 
CH3:Exit 

2. Please save the text file with the name “

wgi_channel_name.txt

” and MUST select the letters encoding as 

UTF-

8. 

3. Copy the “wgi_channel_name.txt” file to USB memory. 
4. Insert the USB memory into the USB slot of DVR. 
5. Automatically the channel names saved in txt file are applied. After all channel names are applied, buzzer will 
be beep. 
6. When buzzer is beeped, please remove the USB memory from DVR. 
7. After about 5 seconds, you can see that your channel name has changed. 

<Note> 
1. This function is supported above FW v8.4. 
2. There must be only one file named "wgi_channel_name" in the USB memory regardless extension. 
3. If firmware file and “wgi_channel_name.txt” file exists in one USB memory, channel names will be changed 

after firmware upgrade. 


Summary of Contents for HAC1630F

Page 1: ...0 Analog ALL IN ONE DVR Series Product Manual Digital Video Recorder Analog All in one 16 CHANNEL DVR Analog All in one 8 CHANNEL DVR Analog All in one 4 CHANNEL DVR Product Manual EN Rev 1 3...

Page 2: ...h the instruction manual may cause harmful interference to radio communications Operation of this equipment in a residential area is likely to cause Harmful interference in which case the user will be...

Page 3: ...3 Warning 3 Main Specification by Models 4 Key Features 5 Components 7 Product Description 8 Installation 11 Connecting other devices 14 Appendix 19 Problem solving FAQ 19 Compatible HDD 20 Factory d...

Page 4: ...o the product Be careful not to drop the product Physical shocks may harm the product including internal HDD In addition please do not throw or drop it Product is made of metal you can hurt another hu...

Page 5: ...TDM X X X O Supported X Not Supported Note 1 Max 4 IP camera can be connected 2 The name of mobile application is WEBEYE 3 To use Remote DVR please set the service streaming as Remote DVR Control Cen...

Page 6: ...FULL HD high quality video shows far superior resolution than SD video product Over 1200 TV lines at 1080p resolution can be visible SD Full HD D1 Resolution 1080P Resolution 720P Resolution HD A HAC...

Page 7: ...nd recording function Input 4ch RCA Output 1ch RCAI Rear 1ch HDMI Rear Audio recording and playback can be played Simultaneously Search and Playback Various useful functions for search playback Simult...

Page 8: ...Supports PTZ Control PRESET and PATROL function Easy control of up to 255 DVR with a single remote control Support Onvif Profile S Support Service Channel Booting logo and empty channel logo can be ch...

Page 9: ...connection terminal Audio Output Speaker output terminal 2 ALARM IN Sensor ALARM OUT RELAY ALARM IN External sensor input terminal ALARM OUT Relay connection port 3 Channel Input BNC input port for HD...

Page 10: ...ection port 3 Channel Input BNC input port for HD TVI 1080p 720p HD A SD 960H and NTSC PAL video 4 CVBS SPOT SPOT monitor output port SPOT video is output through CVBS port 5 VGA Output VGA monitor co...

Page 11: ...ut Speaker output terminal 2 ALARM IN Sensor ALARM OUT RELAY ALARM IN External sensor input terminal ALARM OUT Relay connection port 3 Channel Input BNC input port for HD TVI 1080p 720p HD A SD 960H a...

Page 12: ...not to damage HDD as it easily breaks 2 During installation make sure insulated coat doesn t come off or isn t placed in the wrong place 3 Don t lose screws and parts If screws a parts are not screwed...

Page 13: ...ace the HDD on the DVR body Connect power and data cable to HDD Fasten the HDD with screws Place the cover and lock the screws Note It is highly recommended to use an DC 12V 4A adapter option to use a...

Page 14: ...ody Fasten the HDD with screws Connect power and data cable to HDD Place the cover and lock the screws Note It is highly recommended to use an DC 12V 5A adapter option to use a high capacity HDD with...

Page 15: ...X 1 1920x1080 2M X 2 3840x2160 UHD 4K Preferred X 3 3840x2160 UHD 4K Fixed Changing the mode of VGA output Select the mode of VGA CVBS output at Menu Device Monitor VGA CVBS Output and reboot Changin...

Page 16: ...e controller can control several DVRs with only one remote control To be able to use the remote control please create a user ID on the remote control ID section of system settings See the right pictur...

Page 17: ...16 Remote controller Type B...

Page 18: ...O support Supported sensor Dry contact sensor Connection method Connect the trimmed wire to terminal block Connecting relay Specification Alarm output has operation conditions below Specifications Ou...

Page 19: ...buzzer will not sound and logo will not be applied Changing multiple channel names using USB memory 1 Please make new text txt file using PC and describe the names of channels in the following format...

Page 20: ...3 Insert that USB memory to DVR s front USB port 4 Turn OFF and ON the DVR s power 5 During booting progress bar will be displayed on monitor and DVR will be automatically rebooted If auto upgrade is...

Page 21: ...ode Please check HDD is ready for record Please check if current time is included in scheduled record time in case record mode is continuous or event Please press FUNC TOOL MANUAL RECORDING button to...

Page 22: ...L Previous setting Manually set when shipment Setup Wizard Previous setting initial setting on Network Network Type Ethernet Automatic Addressing DHCP Off IP Address 192 168 0 2 Net Mask 255 255 255 0...

Page 23: ...Fail E mail Setup Recipient Address 1 receiver gmail com Recipient Address 2 Recipient Address 3 Sender Address dvr1 dvr com Subject Event Notification Attach Picture Off SMTP Server Address SMTP_SER...

Page 24: ...ot be responsible for any data loss caused during repair service 2 Service request for product usage Service request on signal check according to usage environment power check network setting 3 Instal...

Page 25: ...lfunctions due to customer s misunderstanding on the product will be fixed by customer s side For requesting service Please inform details of malfunctions correctly Free or non free repair will be dec...

Page 26: ...Dcctv Alliance Premium to your HD CCTV WEBGATE WEBGATE Daemyung Corporation Co Ltd 6F Hanlim Venture Town B D 284 Gongdan ro Gunpo si Gyeonggi do Korea 15809 Tel 82 31 428 9383 Fax 82 31 455 3955 sale...

Reviews: