15
Various models illustrate these instructions, so the images
presented might not be an exact replication of the hood
being installed.
However, the best illustrations were chosen to help
communicate the intended information.
Instructions:
Disassembling Parts
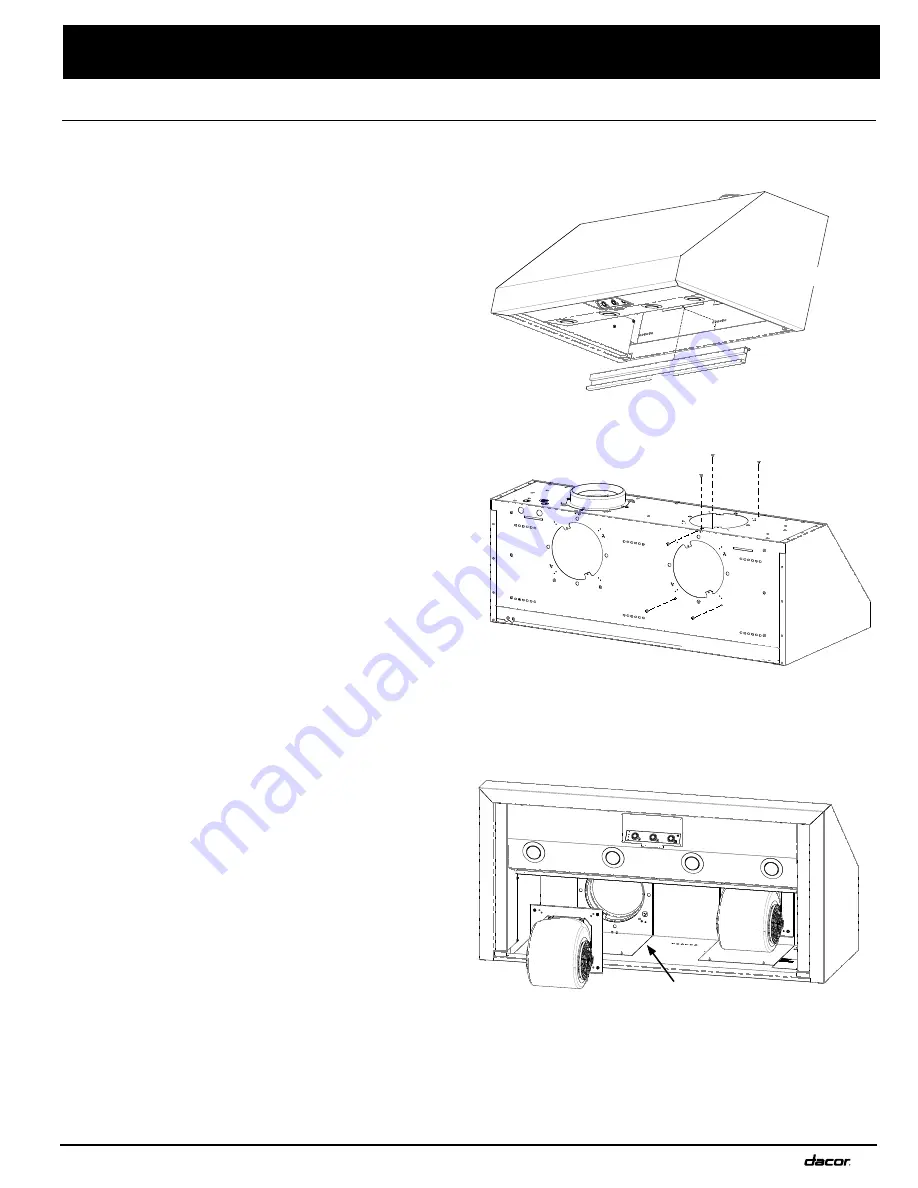
1. Unhook and remove the grease channel.
2. Place the hood assembly on a large, flat surface.
Take special care not to scratch the hood.
3. Remove the duct collar from the top of the unit.
Save the collar and screws.
Installation Instructions
Removing the Blower(s)
4. Tip the hood up, so that it lays on its
back
.
You are now facing inside the hood.
5. Find the end of the cable assembly plugged into the
bottom left of the blower.
6. Squeeze the connector, and unplug it.
Do not pull directly on the cable assembly.
Doing so will damage the contacts and wires; always
pull from the connectors.
7. Unscrew the cable clamp(s) and remove the
hardware that holds the blower and L-bracket.
8. Detach the blower and plate, and place them nearby.
continued...
Step 1
Steps 2-3
Rotating the Blower(s) for Rear Exhaust
Front of Hood
Back of Hood
Duct Collar
Back of Hood
Grease Channel
Steps 4-8
L-Bracket
plate
blower
Summary of Contents for RNHP36 Renaissance
Page 31: ...29 Notes...
Page 32: ......


