D2G DGKTCH43BK User Manual Download Page 18

1

8


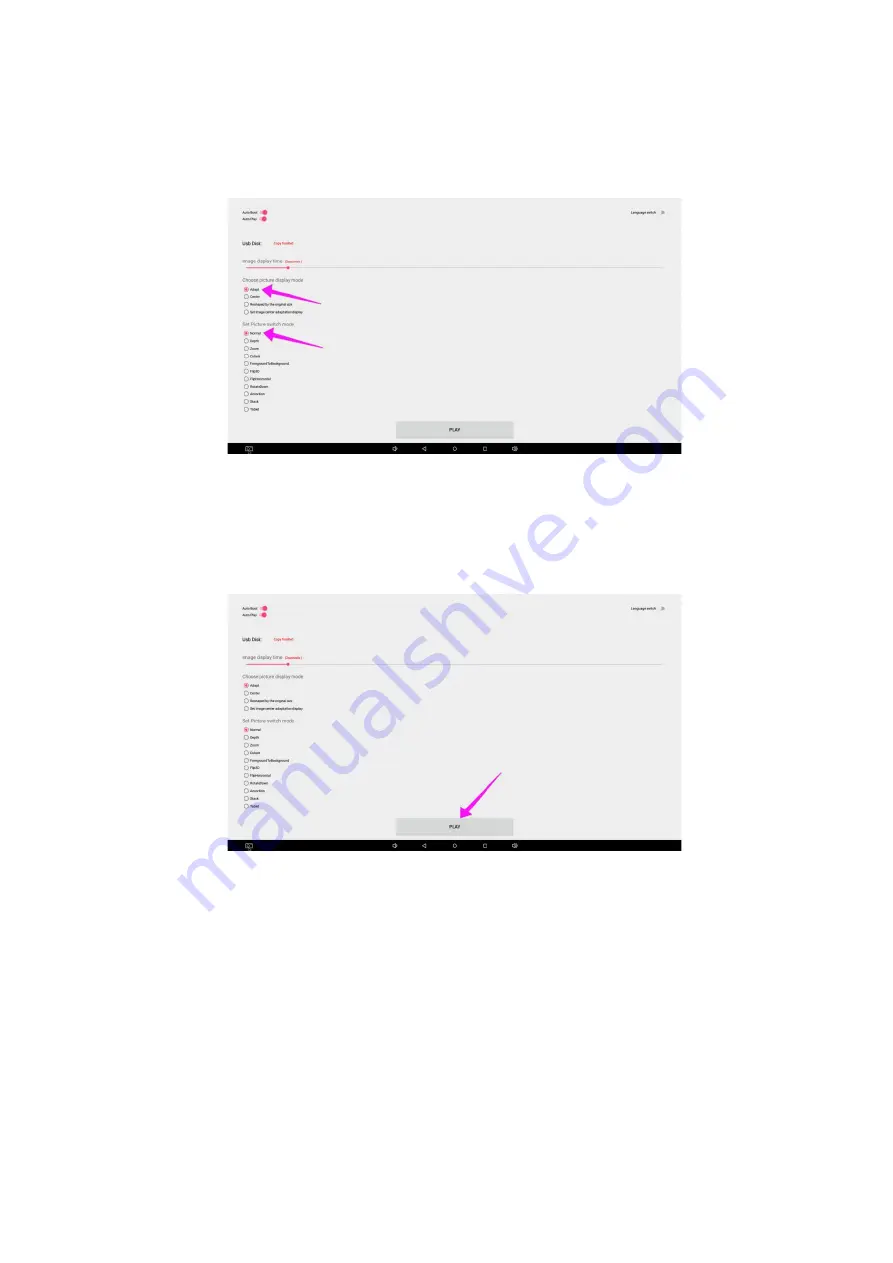
Step 7: Select the time you would like each picture to be on the screen for by dragging the bar to the 
desired time. Select how you would like the images to display. Select the desired transition effect between 
pictures.   

Step 8:Select Play and your slide show will begin playing 

Summary of Contents for DGKTCH43BK

Page 1: ...1 User Manual D2G Item No DGKTCH43BK Material Description Indoor Landscape IR Touch Digital Kiosk Scan QR code to visit the product page...

Page 2: ...Description of Basic Operation 10 Power on Standby 10 About Home Screen 10 Description of Wallpaper Switch 11 File Manager 11 Local Settings 12 Status of Menu bar 14 Slide Show APP Introduction 15 Tec...

Page 3: ...picture 7 Dynamic contrast technology can significantly improve the clarity and contrast of various screens 8 Multi channel USB interfaces supporting HD media streaming 9 Ultra thin narrow bezel desig...

Page 4: ...lammable gas leaks do not pull out the plug of the LCD Digital Signage or other electrical appliances instead turn off the gas valve immediately and open the doors and windows quickly Do not use power...

Page 5: ...due to water drops or splashing Do not put any sharp objects metal or liquid into the vents or let them touch the signal terminals to avoid short circuit product damage and electric shock The opening...

Page 6: ...n resulting in machine failure If the unit displays the same screen for a long time or the moving picture has fixed text or icon it will leave ghosting on the screen and won t disappear when the unit...

Page 7: ...immediately and consult the dealer The unit is class A product which may cause radio interference in living environment In this case please take feasible measures and use power plug as the disconnecti...

Page 8: ...8 Fig 1 Fig 2 Fig 3 Fig 4 1 Remove the wooden frame as shown in Fig 2 2 Lift out the unit then remove EPE as shown in Fig 3 Steps of Installation...

Page 9: ...corrosion due to battery leakage which will damage the remote control Do not use batteries of different types or mix new batteries with old ones Always replace the batteries in pairs Do not put the b...

Page 10: ...n it on if you press the switch button O the Digital Signage enters standby state In power on state enter System Assistant and press the button on the remote control and the Digital Signage enters sta...

Page 11: ...lorer icon in the APPS menu interface Fig 2 and enter Explorer menu Fig 3 3 Tap options in the Explorer menu to read the files from different devices Fig 1 Fig 2 Fig 3 11 Description of Wallpaper Swit...

Page 12: ...1 Fig 2 Fig 3 Local Settings 1 Tap the Main Apps button 2 Tap the Settings icon in the APPS menu interface Fig 2 and enter Wi Fi menu Fig 3 3 Tap options in the Wi Fi menu and set up different option...

Page 13: ...13 Description of Settings Interface shown on the right...

Page 14: ...Fig 3 Fig 1 1 Step1 Click the setting Fig 1 2 Step2 At the setting menu click the display menu Fig 2 3 Step3 At the display setting menu unselect the display navigation check box Fig 3 Status of Menu...

Page 15: ...15 Slide Show APP Introduction How to upload media files Step1 Open the Android launcher screen and click the explorer app Step2 Go to the USB storage menu click the USB storage button...

Page 16: ...elect the media files which you want to copy to the media folder click the edit button the pop menu will show then click the Copy button Step4 Click HOME button and go to the NAND FLASH menu you will...

Page 17: ...ton at the top of the screen the pop menu will show and click the Paste command button the files will start copy to the media folder Step6 Exit the Explorer app and go to the launcher screen run the S...

Page 18: ...e each picture to be on the screen for by dragging the bar to the desired time Select how you would like the images to display Select the desired transition effect between pictures Step 8 Select Play...

Page 19: ...19 How to Delete the media files Step1 Open the Android launcher screen and click the explorer app Step2 Click home button and go to the NAND FLASH menu you will see the media folder open it...

Page 20: ...At the media folder select the media files which you want to delete and click the edit button at the top of the screen the pop menu will show and click the Delete command button the files will be dele...

Page 21: ...ing temperature C 0 40 C Storage temperature C 10 60 C Storage humidity 10 60 RH Non condensing Operating humidity 20 85 RH Non condensing Maximum operating time hrs day 18 hours Functions Operating s...

Page 22: ...set N A USB2 0 2 SIM N A Structure Net weight 52kg Gross weight Unit dimensions W D H Package dimensions W D H Shell material Aluminum profile sheet metal Shell color Black Language OSD English 22 90k...

Page 23: ...seconds plug unit back into outlet and try again Try playing the content on a different device smart phone computer or tablet If all of the above have been checked and the issue is not resolved conta...

Page 24: ...he router and check If all of the above have been checked and the issue is not resolved contact a customer service representative Parts missing or Damaged Parts missed during manufacturing No charge f...

Page 25: ...hazardous substances or elements in the part is higher than the limit specified in GB T 26572 2011 standard The table shows that the machine contains harmful substances inside The data is provided by...

Reviews: