PC MODE.
The TV has a PC (VGA) input option with stereo sound input. See page 9 for a typical connection.
To select PC mode use the “SOURCE”
button and select VGA.
When connected to your PC for the first time the TV will “Auto Adjust”
to the PC. You should have the
display as you would with a normal CRT monitor.
If you see the “GEEN SIGNAAL”
message (Fig 1), your PC display settings may be not suitable for
your LCD TV. Re connect your PC to another monitor and enter the “Screen setting”
Mode and set
the screen resolution to 800 x 600. Reconnect the LCD TV and you should now see the PC display.
You may then change the screen resolution on your PC to a more suitable setting.
SETTINGS
The settings are different for PC Mode.
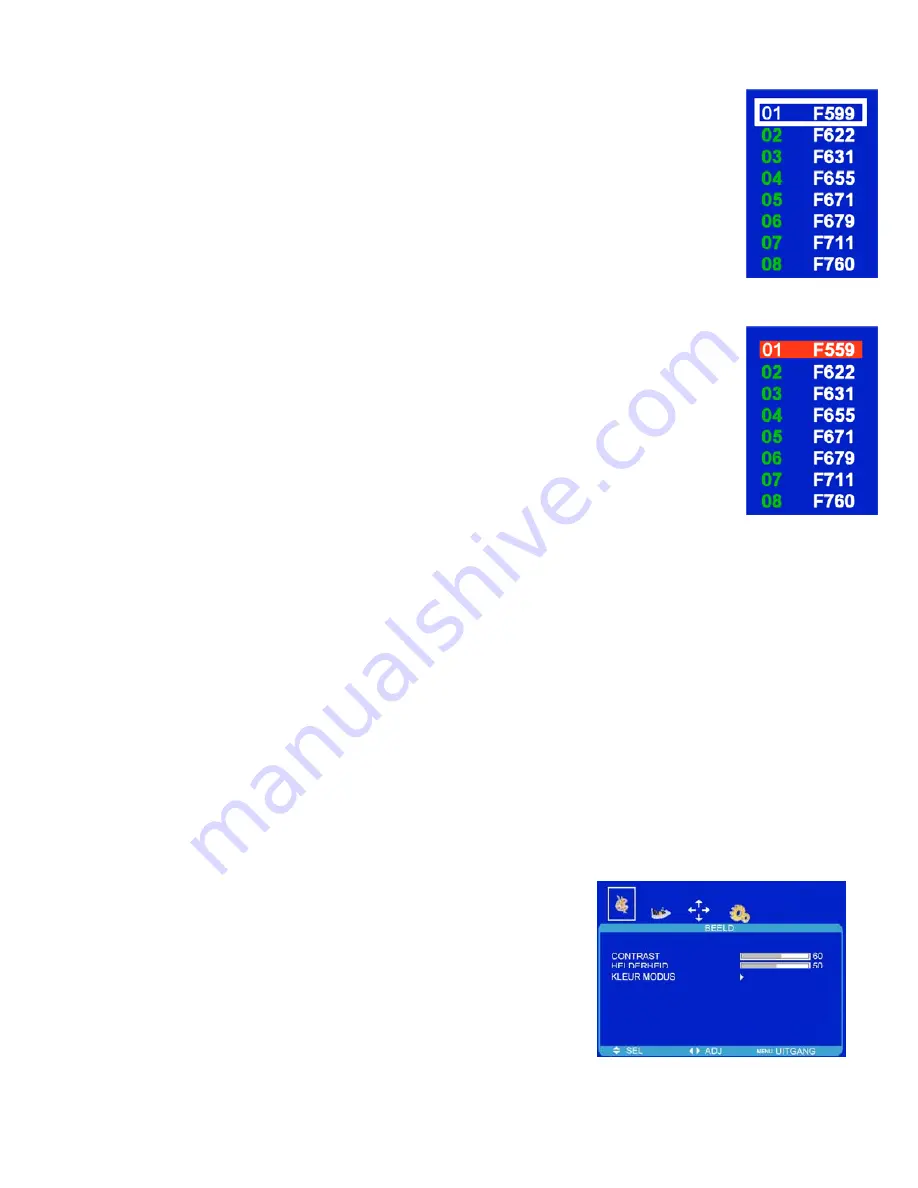
PICTURE ( BEELD). (Fig 13).
Contrast. (Contrast)
Adjusts the ratio of dark to light.
Brightness. (Helderheid)
Adjusts the overall picture brightness.
Colour Setting. (Kleur Modus).
There are 5 settings available,
NORMAAL, WARM, KOEL, S RGB and GEBRUIKER.
Personal (Gebruiker).
In this mode you may set the R G and G
settings individually to your choice.
7. Menu Operation cont...
Fig 13
13
Renaming Channels.
To rename any channel, select “CHANNEL LABEL ”
and press
►
button,
select the channel to be renamed using the
▲
/
▼
cursor buttons. Press the RED button. The
first letter changes colour to RED. Using the
►
/
◄
buttons, select the letter or digit to be
changed, using the
▲
/
▼
buttons change the letter or digit to the required one, press “RED”
to
end that “Naming”. When the renaming is complete, press LCD MENU to exit.
Moving Channel locations.
Select “CHANNEL LABEL”
and press
►
. A list of received channels will be displayed (see
Fig 10). It will be useful to have a current TV Programme Guide
to hand.
Use the
▲
/
▼
buttons to select the first station to be moved, this is noted by a White “Cursor”
box, the station selected will also be displayed on the TV screen. Fig 12a.
Press the “YELLOW”
button. The highlight box will now turn RED.”Fig
12b”. Use the
▲
/
▼
buttons
to move it to the correct position. Press the RED button again. The station will now be
in the new location and the cursor returns to White. The station
that was in the “New
Location”
will move to the “Old Location”. Continue with each station until they are in the
required locations. To exit press LCD MENU.
Skip .
You may wish to “Skip”
certain channels when using the CH+/CH-
buttons. Select “Channel”, Use the
cursor buttons
►
/
◄
to select the channel number you wish to Skip. Use the
▼
button to move down to “SKIP”,
use the
►
/
◄
buttons to select “On or Off”. To “Skip”
another channel use the
▲
button to reselect “Channel”
and
repeat the operation.
When a channel has been selected to Skip, you still may select that channel with the numeric buttons.
Fig 12a
Fig 12b
Delete.
After Naming and Moving stations you may wish to “Delete”
unwanted channels.
Select “CHANNEL LABEL”
and press
►
button. You will see the Channel list as in See Fig
10. Use the
▲
/
▼
buttons
to select the station that needs deleting. Press the “GREEN”
button. That station will now be deleted permanently, until you
perform a “Manual Tuning”
or
“Auto Search”.


