background image

48

D-Link DCS-7110 User Manual

Configuration

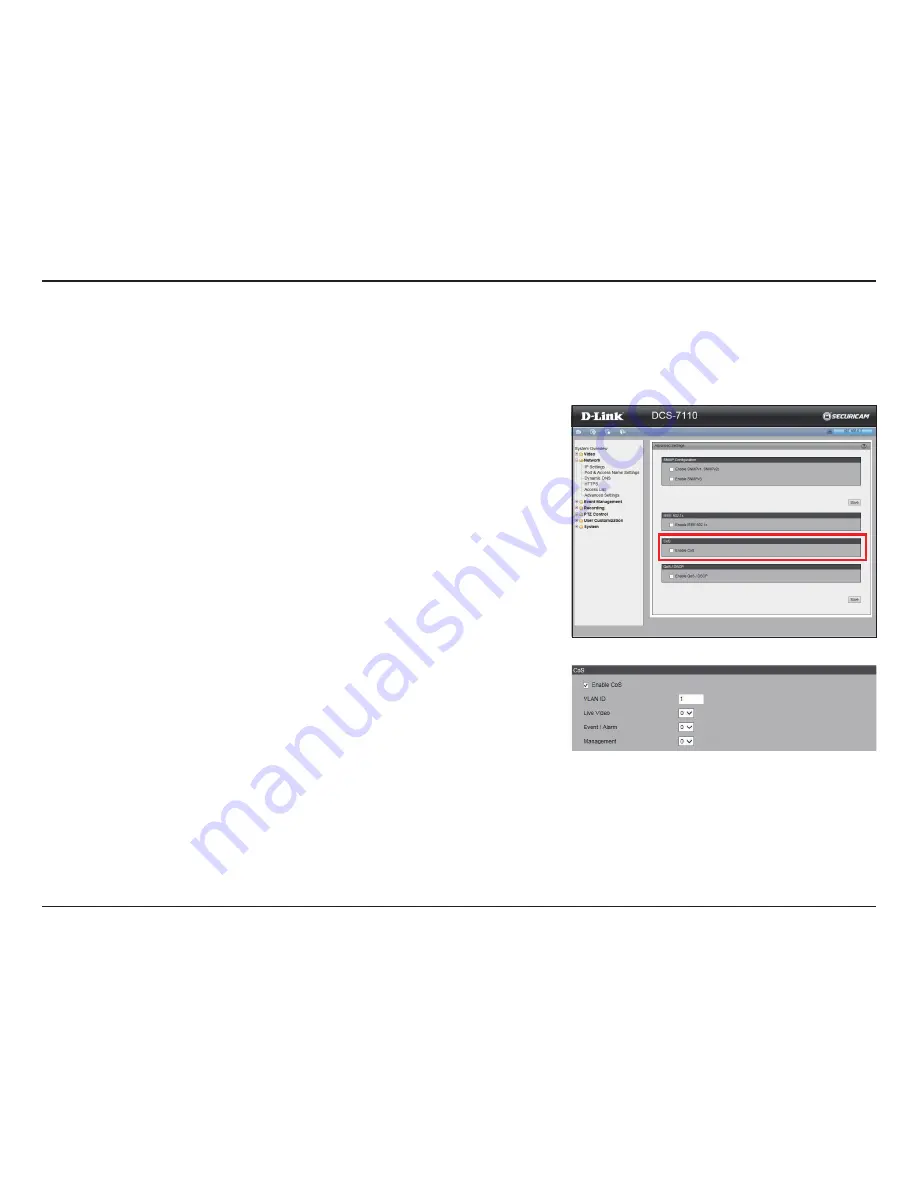
Cos

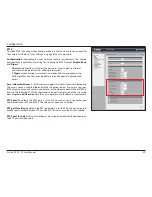
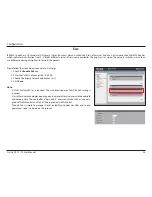
Please follow the steps below to enable CoS settings:

1. Check the 

Enable CoS

 box.

2. Enter the VLAN ID of your switch (0~4095)
3. Choose the priority for each application (0~7).
4. Click 

Save

.

Note:

•  A VLAN Switch (802.1p) is required.  The web browsing may fail if the CoS setting is 

incorrect.

•  Class of Service technologies do not guarantee a level of service in terms of bandwidth 

and delivery time. They only offer a "best-effort." Users can think of CoS as "coarsely-

grained" traffic control and QoS as "finely-grained" traffic control.

•  Though CoS is simple to manage, it lacks scalability and does not offer end-to-end 

guarantees since it is based on L2 protocol.

IEEE802.1p defines a QoS model at OSI Layer 2 (Data Link Layer), which is called CoS (Class of Service). It adds a 3-bit value to the VLAN MAC header, 

which indicates prioritization from 0~7 (Eight different classes of service are available). The priority is set up on the network switches, which then 

use different queuing disciplines to forward the packets.

Summary of Contents for SECURICAM DCS-7110

Page 1: ...User Manual Version 2 30 January 19 2016 DCS 7110 Full HD Day Night Network Camera ...

Page 2: ...or product names mentioned herein are trademarks or registered trademarks of their respective companies Copyright 2016 by D Link Systems Inc All rights reserved This publication may not be reproduced in whole or in part without prior expressed written permission from D Link Systems Inc Revision Date Description 1 0 March 7 2011 DCS 7110 Revision A1 with firmware version 1 00 1 1 January 5 2012 Upd...

Page 3: ... Configuration 20 Web based Configuration Utility 20 Web based Configuration Utility 22 Client Settings 26 Setup 27 Basic Setup 27 Advanced Setup 27 System Overview 28 Video 29 Video Settings 29 Image Settings 32 Day and Night Settings 34 Network 35 IP Settings 35 IPv4 35 IPv6 37 Port and Access Name Settings 38 Dynamic DNS 41 HTTPS 42 Access List 44 Advanced Settings 46 SNMP 46 IEEE 802 1x 47 Cos...

Page 4: ...er 61 Recording 62 Recording Settings 62 PTZ Control 64 Digital PTZ 64 User Customization 65 Live Video Page Configuration 65 HTML Code Examples 66 System 67 User Settings 67 Device Settings 68 Time and Date 69 Maintenance 70 Parameter List 72 Logs 73 Technical Specifications 74 Contacting Technical Support 76 Warranty 77 Registration 83 ...

Page 5: ...any of the above items are missing please contact your reseller System Requirements Operating System Microsoft Windows 8 7 Vista Memory At least 256MB of RAM 512MB recommended Web Browser Internet Explorer 8 or higher CPU 1 7GHz or above 2 8GHz plus processor with 512MB memory and a 32MB video card is required for multiple camera viewing and recording using IP surveillance software An available Et...

Page 6: ...y adjust based on lightning conditions This feature allows the camera to capture crisp color images during the daytime and detailed grayscale images at night or in or low light conditions Note Use of audio or video equipment for recording the image or voice of a person without their knowledge and consent is prohibited in certain states or jurisdictions Nothing herein represents a warranty or repre...

Page 7: ...against the elements Anti tamper features make this camera suitable for tamper prone locations such as transportation hubs schools or correctional facilities The electronic tamper detection system can sense whenever the camera has been redirected de focused blocked or spray painted and respond promptly with a visible or audible alarm AdvancedWeb User Interface The DCS 7110 features D Link s latest...

Page 8: ...nate the camera s field of view at night IR Cut Removable ICR Sensor IR Cut Removable sensor judges lighting conditions and switches from day mode to night mode accordingly Sunshield Adjustable sunshield protects the camera sensor from direct sunlight LED Power and network indicator Front Panel ...

Page 9: ...eive digital signals to and from a variety of external devices DC Power Connects to a 12 V DC power adapter to power the camera not included Ethernet PoE RJ 45 connector is for Ethernet and can also be used to power the camera using Power over Ethernet PoE AC Power 24 V AC power wiring can be connected to the AC connectors to power the camera ...

Page 10: ...uct Overview Rear panel Reset Button under weatherproof cover Remove the weatherproof cover and use a paperclip or similar tool to press and hold the recessed button for 10 seconds to reset the camera back to the factory default settings ...

Page 11: ...he Camera to the Mounting Bracket Step 2 Attach the camera shoe to the mounting bracket and adjust the vertical orientation of the camera Step 1 Using the provided screws attach the camera shoe to the underside of the camera Note It is strongly recommended to configure your camera before mounting ...

Page 12: ...and screws are included if needed for the material you are drilling into Step 3 The camera cables can be installed through a separate large hole drilled in the wall or using an external cable conduit Attach to Wall or Ceiling Step 3 Using the hex key provided loosen the bolts and adjust the vertical horizontal orientation of the camera to the desired field of view Firmly tighten the adjustment bol...

Page 13: ...ection Using a PoE Switch If you are using a PoE switch connect the network camera via Ethernet cable PoE will transmit both power and data over a single cable Basic Connection without PoE 1 Connect the camera to your switch or router via Ethernet cable 2 Connectthepowercablefromthecameratoacompatible12Vpoweradapter notincluded 3 Connect the power adapter to a power outlet Cable Connections ...

Page 14: ...g the camera the unsheathed part of the wire connectors must either be sealed or enclosed in a junction box 2 The unsheathed part of the wire connectors should be positioned at a downward facing angle when they extend out of the rear of the camera not upward The unsheathed part of the wire connectors must either be sealed or enclosed in a junction box ...

Page 15: ...ion on your computer is disabled or if the D Link Launcher fails to start automatically click Start and then type D autorun exe where D represents the drive letter of your CD ROM drive Click Setup Wizard to begin the installation After clicking Setup Wizard the window on the right will open Click Next to continue Software Installation Setup Wizard ...

Page 16: ...16 D Link DCS 7110 User Manual Installation Click Yes to accept the License Agreement Click Next to start the installation process Note The installation may take several minutes to finish ...

Page 17: ...inish to complete the installation Click on the D LinkSetupWizardSE icon that was created in yourWindows Start menu Click Start and then click All Programs Scroll down to the D Link folder open the Setup Wizard SE folder and click D Link Setup Wizard SE ...

Page 18: ...h the password left blank Click Next to continue The Setup Wizard will appear and display the MAC address and IP address of your camera s IfyouhaveaDHCPserveronyournetwork avalidIPAddresswillbedisplayed IfyournetworkdoesnotuseaDHCPserver thenetworkcamera sdefaultstaticIPaddress 192 168 0 20 will be displayed Click the Wizard button to continue ...

Page 19: ...moment to confirm your settings and click Restart Select DHCP if your camera obtains an IP address automatically from a DHCP server such as your router Select Static IP if you want to manually assign the IP settings to your camera Click Next to continue ...

Page 20: ...et Explorer is not your default browser note the IP address of the camera in the list and click Exit Open Internet Explorer and enter the IP address of the camera http 192 168 0 20 is the default IP address This section explains how to configure your new D Link Network Camera using the Web based Configuration Utility Click on the D Link SetupWizard SE icon that was created in your Windows Start me...

Page 21: ...CS 7110 User Manual Configuration The Live View screen will appear The next few pages will explain the page layout and features Enter admin as the default username and leave the password blank Click OK to continue ...

Page 22: ...ou will see the following page This is the Live Video page which will allow you to view the camera s video feed and control basic camera functions using the icons on this screen Refer to the tables on the following pages for detailed information about these icons Web based Configuration Utility ...

Page 23: ...ers Digital Output Click the x to turn the digital output off or click the o to turn it on Video Stream This camera supports multiple streams stream 1 4 simultaneously Click the number to view the stream You may hover the mouse cursor over the number to see the resolution and FPS Global View Click on this icon to display the Global View window The Global View window contains a full view image the ...

Page 24: ... Patrol Patrol executes a pre defined sequence of pan tilt zoom and focus features Note you must define at least two preset points Auto Pan Auto Pan automatically scans an area horizontally Stop Stop patrol and auto pan Go Preset Select from the preset drop down list to quickly move the camera to the desired preset position Speed Control Control Pan Tilt Zoom speed Pan Speed Control Tilt Speed Con...

Page 25: ...k Disable digital zoom to enable the zoom operation The navigation screen indicates the part of the image being magnified To control the zoom level drag the slider bar To move to a different area you want to magnify drag the navigation screen Full Screen Click this button to switch to full screen mode Press the Esc key to switch back to normal mode Zoom ratio Auto The video zoom ratio will be chan...

Page 26: ...TTP Hypertext Transfer Protocol which offers the highest image and video quality However packetlosswilldiminishimagequalitywhenbandwidthbecomes restricted MP4 Saving Options Folder Select the folder where you would like the MP4 file saved on your computer File name prefix Enter a file name prefix for the MP4 files Add date and time suffix to file name Select this checkbox if you would like the dat...

Page 27: ...p options Click the Settings button and then click either Basic Setup or Advanced Setup Basic Setup Advanced Setup Advanced setup includes the following options System Overview Video Video Settings Image Settings Day and Night Settings Network IP Settings Port Access Name Settings Dynamic DNS HTTPS Access List Advanced Settings Event Management Motion Detection Tamper Detection DI and DO Event Set...

Page 28: ...28 D Link DCS 7110 User Manual Configuration System Overview The system overview page contains a summary of the camera s current settings ...

Page 29: ...ing device Note AlltheitemsintheOutputFrameSizeshouldnotbegreaterthantheRegion of Interest current maximum resolution 4 ClickSavetoenablethesettingsandclickClosetoexitthewindow Theselected Output Frame Size will immediately be applied to the Frame size of the video stream You can then go back to the LiveVideo to test the new settings The definition of multiple streams Stream 1 3 Users can define t...

Page 30: ...the value the brighter the image will be Enable BLC Back Light Compensation Enable this option when the object is too dark or too brighttorecognize Itallowsthecameratoadjusttothebestlightconditionsinanyenvironment and automatically give the necessary light compensation Profile If you want to configure another sensor settings profile for day night schedule mode click Profile 2 and follow the steps ...

Page 31: ... are 10 options to select from 1 3 5 8 10 15 20 25 30 fps 30 fps is recommended for real time video on a computer monitor 5 fps is ideal for mobile viewers or select Customize to manually enter a value IntraFramePeriod Determines the frequency when an I frame is inserted The shorter the duration the better the video quality is but will require higher bandwidth and storage space Select from the fol...

Page 32: ... compensate for the ambient lighting conditions 1 Set theWhite balance to Auto and click Save 2 Placeasheetofwhitepaperinfrontofthelens thenallowthecameratoadjustthecolor temperature automatically 3 Select Fixed to confirm the setting while the white balance is being measured 4 Click Save to enable the new setting OverlayTitleandTimeStamponVideo Selectthisoptiontoplacethevideotitleandtimeon the vi...

Page 33: ...nges from 5 to 5 Contrast Adjust the image contrast level which ranges from 5 to 5 Sharpness Adjust the image sharpness level which ranges from 3 to 3 Status of Profiles Displays if the profile is enabled or disabled Profile 2 Click to create a second profile Restore Click to set the above settings to their default values Save Click to save and activate your settings ...

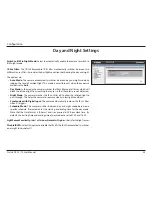
Page 34: ...from reaching the sensor so that the colors are not distorted Night Mode The camera switches the IR cut filter off to allow the infrared light to pass through This helps the camera to see more clearly in low light conditions Synchronize with Digital Input The camera automatically removes the IR cut filter when DI triggers Schedule Mode The camera switches between day and night mode based on a spec...

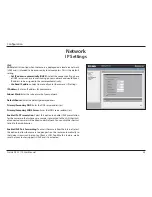
Page 35: ...k Enter the subnet mask of your network Default Router Enter the default gateway address Primary Secondary DNS Enter the DNS server address es Primary SecondaryWINS Server Enter the WINS server address es Enable UPnP Presentation Select this option to enable UPnP presentation for the camera so that whenever a camera is presented to the LAN shortcuts of connected cameras will be listed under Networ...

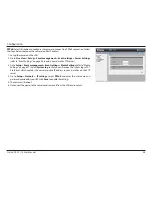
Page 36: ... add a new e mail or FTP server 3 Go to Setup Eventmanagement Eventsettings MediaSettings refer to Media Settings on page 57 Select System log so that you will receive the system log in TXT file format which contains the camera s public IP address in your e mail or on the FTP server 4 Go to Setup Network IP settings Select PPPoE and enter the user name and password provided by your ISP Click Save ...

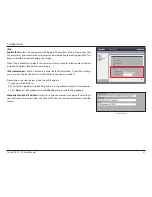
Page 37: ...y IPv6 Information Click this button to obtain the IPv6 information If your IPv6 settings are successful the IPv6 address list will be listed in the pop up window Please follow the steps below to link to an IPv6 address 1 Open your web browser 2 Enter the link global or link local IPv6 address in the address bar of your web browser 3 Press Enter on the keyboard or click Refresh button to refresh t...

Page 38: ... They can also be assigned to another port number between 1025 and 65535 Authentication Depending on your network security requirements the camera provides two types of security for an HTTP transaction Basic or Digest If Basic authentication is selected the password is sent in plain text format and there can be potential risks of being intercepted If Digest authentication is selected user credenti...

Page 39: ...nauthorized access AccessNameforStream1 5 Thiscamerasupportsmultiplestreamssimultaneously The access name is used to differentiate the streaming source If you want to use an RTSP player to access the camera you have to set the video mode to H 264 or MPEG 4 and use the following RTSP URL command to request transmission of the streaming data rtsp x x x x live sdpwherethex x x xrepresentstheIPaddress...

Page 40: ...roup address A Multicast group address is used to send and receive content Sources use this group address as the destination address while sending their data packets Receivers use this group address to inform the network that they are interested in receiving packets sent to that group Multicast video port By default the video port is set to 5556 You can assign it to another port number between 102...

Page 41: ...ur username or e mail used to connect to the DDNS Password Enter your password used to connect to the DDNS server Confirm Password Enter your password again for confirmation Status Indicates the connection status Save Click to save your settings This section explains how to configure the Dynamic Domain Name Service DDNS for the camera The service allows your camera especially when assigned with a ...

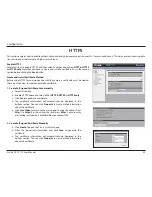
Page 42: ...tion will automatically be displayed in the buttom section You can click Property to view detailed information about the certificate e Click Live Video to return to the main page Change the address from http to https in the address bar and press Enter Some security alert dialogs will pop up Click OK or Yes to enable HTTPS 2 Create Self signed Certificate Manually a Click Create to open the Create ...

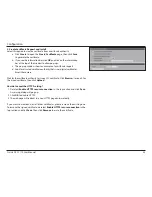
Page 43: ...ficate authority that issues digital certificates Enroll the camera Wait for the certificate authority to issue a SSL certificate Click Browse to search for the issued certificate then click Upload How do I cancel the HTTPS setting 1 Deselect Enable HTTPS secure connection in the top section and click Save A warning dialog will pop up 2 Click OK to disable HTTPS 3 The webpage will redirect to a no...

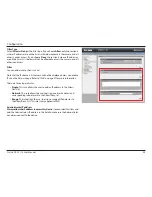
Page 44: ...rator allows client to link to the webpage without a user name and password the User ID column will be empty Refresh Click this button to refresh all current connections Addtodenylist YoucanselectentriesfromtheConnectionStatuslistand add them to the Deny List to deny access Please note that the selected connections will only be disconnected temporarily and will automatically try to re link again i...

Page 45: ...mn will not be displayed unless you enable IPv6 on the Network page Refer to IPv6 on page 37 for more information There are three types of rules Single This rule allows the user to add an IP address to the Allow Deny list Network This rule allows the user to assign a network address and corresponding subnet mask to the Allow Deny list Range This rule allows the user to assign a range of IP address...

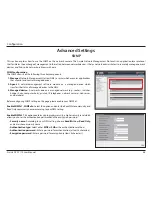
Page 46: ...naged devices to the NMS 3 Managed device A network node on a managed network e g routers switches bridges hubs computer hosts printers IP telephones network cameras web server and database Before configuring SNMP setting on this page please enable your NMS first Enable SNMPv1 SNMPv2c Select this option and enter the Read Write community and Read Only community names according to your NMS setting ...

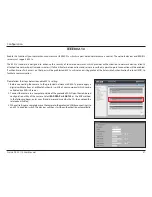
Page 47: ...Whenallsettingarecomplete movethecameratotheprotectedLANbyconnectingitto an 802 1x enabled switch The devices will then start the authentication automatically Enable this function if your network environment uses IEEE 802 1x which is a port based network access control The network devices and RADIUS server must support 802 1x The 802 1x standard is designed to enhance the security of local area ne...

Page 48: ...ery time They only offer a best effort Users can think of CoS as coarsely grained traffic control and QoS as finely grained traffic control Though CoS is simple to manage it lacks scalability and does not offer end to end guarantees since it is based on L2 protocol IEEE802 1p defines a QoS model at OSI Layer 2 Data Link Layer which is called CoS Class of Service It adds a 3 bit value to theVLAN MA...

Page 49: ... dropping discarding the packet decisions Routers at each network node classify packets according to their DSCP value and give them a particular forwarding treatment For example how much bandwidth should be reserved Quality of Service refers to a resource reservation control mechanism which guarantees a certain quality to different services on the network Quality of service guarantees are importan...

Page 50: ...indow to trigger a snapshot Note Setting a higher sensitivity and a lower percentage will make motion easier to be detected New Click to add a new window A maximum of three motion windows can be opened simultaneously Use your mouse to drag the window frame to resize or the title bar to move Clicking on the x at the upper right corner of the window will close the window Save Click to save the confi...

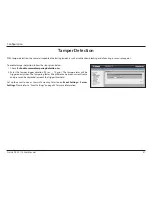
Page 51: ... alarm will be triggered only when the tampering factor the difference between current frame and pre saved background exceeds the trigger threshold Set up the event source as Camera Tampering Detection on Event Settings Server Settings Please refer to Event Settings on page 53 for more information With tamper detection the camera is capable of detecting incidents such as redirection blocking or de...

Page 52: ...rminal block with one digital input and digital output for device control The I O connector provides the physical interface for digital input DI GND and digital output DO 12V that is used for connecting external alarm devices to the camera such as IR Sensors and alarm relays DI DO Schematics ...

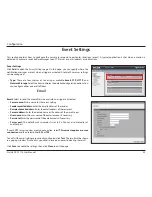
Page 53: ...o send the media files via e mail when a trigger is activated Server name Enter a name for the server setting Sender email address Enter the email address of the sender Recipient email address Enter the email address of the recipient Server address Enter the domain name or IP address of the e mail server User name Enter the user name of the email account if necessary Password Enter the password of...

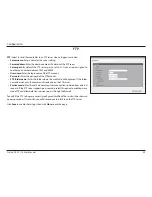
Page 54: ...ssword of the FTP account FTP folder name Enter the folder where the media file will be placed If the folder name does not exist the camera will create one on the FTP server Passive mode Most firewalls do not accept new connections initiated from external requests IftheFTPserversupportspassivemode selectthisoptiontoenablepassive mode FTP and allow data transmission to pass through the firewall To ...

Page 55: ... URL Enter the URL of the HTTP server User name Enter the user name if necessary Password Enter the password if necessary To verify if the HTTP settings are correctly configured click Test The result will be shown in a pop up window If successful you will receive a test txt file on the HTTP server Click Save to enable the settings then click Close to exit the page ...

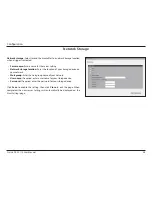
Page 56: ...rk storage location Enter the location of your storage device on your network Workgroup Enter the workgroup name of your network User name If required enter a user name for your storage device Password If required enter the password for your storage device Click Save to enable the setting then click Close to exit the page When completed the new server settings will automatically be displayed on th...

Page 57: ...ed Name Enter a name for the server setting Source Select which stream to take snapshots from Send pre event images The camera has a buffer area that temporarily holds data up to a certain limit Enter a number to decide how many images to capture before a trigger is activated Up to seven images can be generated Send post event images Enter a number to decide how many images to capture after a trig...

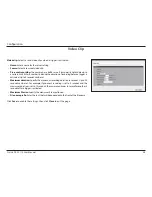
Page 58: ...ecording before a trigger is activated Up to 9 seconds can be set Maximum duration Specify the maximum recording duration in seconds Up to 20 seconds can be set For example if pre event recording is set to 5 seconds and the maximum durationissetto10seconds thecameracontinuesto record foranother4 seconds after a trigger is activated Maximum file size Specify the maximum file size allowed File name ...

Page 59: ...ystem Log System log Select to send a system log when a trigger is activated Name Enter a name for the server setting Click Save to enable the settings then click Close to exit the page The new media settings will appear on the Event Settings page ...

Page 60: ... an event A total of three event settings can be configured Event name Enter a name for the event Enable this event Select to activate this event Priority Set the priority for this event High Normal or Low The event with higher priority will be executed first Detect next event after seconds Select the delay time before selecting the next event It is being used for both events of motion detection a...

Page 61: ... other defined minute Up to 999 minutes are allowed Digital input This option allows the camera to use an external digital input device or sensor as a trigger source Depending on your application there are many choices of digital input devices on the market which will detect changes in temperature vibration sound and light etc System boot This option triggers the camera when the power to the camer...

Page 62: ...n Select where you want to save the recorded video files Capacity Youcanchooseeithertheentirefreespaceavailableorlimitthereservedspace The recording size limit must be larger than the reserved amount for cyclic recording File name prefix Enter the text that will be appended to the front of the file name Enable cyclic recording If you select this item when the maximum capacity is reached the oldest...

Page 63: ...formation Whencompleted selectEnablethisrecording ClickSavetoenablethesettingandclickClosetoexitthispage Whenthesystembeginsrecording it will send the recorded files to the Network Storage The new recording name will appear in the drop down list on the recording page To remove a recording setting from the list select a recording name from the drop down list and click Delete ...

Page 64: ...Save to enable the setting The Preset Positions will also be displayed on the Live Video page Select one from the drop down list and the camera will move to the selected preset position Patrol Setting You can select some preset positions for the camera to patrol Please follow the steps below to set up a patrol schedule 1 Click a preset location on the list and click Select 2 The selected preset lo...

Page 65: ...ve Video page Follow the steps below to upload a new logo 1 Click Custom and the Browse field will appear 2 Select a logo from your files 3 Click Upload to replace the existing logo with a new one 4 Enter a website link if necessary 5 Click Save to enable the setting Repeat the steps 1 3 and 5 for the center and right side Title You can also change the title at the top of your Live Video page User...

Page 66: ... uses QuickTime plug in for Firefox then the example code can only support H 264 and MPEG4 streaming MJPEG using Server Push for other browser If the target remote user client uses another browser then the example code can only support MJPEG streaming Still Image Format Refresh interval If a user only needs to embed a still image in a browser use this option and set up the refresh interval of the ...

Page 67: ... User Account User name Enter a user name for the new account Password Enter a password for the new account Privilege Select the access rights for the new user Add Click to save your new user Manage User User name Select an existing user from the drop down menu to edit User Password Enter a new password Authentication Selecttheaccessrightsfortheuser Administrator Normal orGuest Modify Click to sav...

Page 68: ...Configuration Device Settings Turn off the LED indicator Check the box to turn off the LED next to the lens This will prevent anyone from observing the operation of the network camera Camera Name Create a unique name for your camera ...

Page 69: ...ver NTP Server Network Time Protocol NTP synchronizes the network camera with an Internet time server Choose the one that is closest to your location Update Interval Select the time interval for updating the time information from the NTP server Set the date and time manually Set the time and date manually Enter theYear Month Day Hour Minute and Second Copy Your Computer s Time Setting Click to syn...

Page 70: ...below Click Open to review the XML file or click Save to store the file for editing 3 Open the file with Microsoft Notepad and locate your time zone Set the start and end time of DST 4 When completed save the file Export setting backup file Click to export all parameters for the device and user defined scripts to a file Upload Files There are two options available for importing upload files as det...

Page 71: ... the upgrade Follow the steps below to upgrade the firmware 1 Download the latest firmware file from the D Link website The file is in pkg file format 2 Click Browse and select a firmware file 3 Click Upgrade The camera starts to upgrade and will reboot automatically when the upgrade completes If the upgrade is successful you will see Reboot system now This connection will close After that re acce...

Page 72: ...72 D Link DCS 7110 User Manual Configuration Parameter List The Parameters List page lists the entire system s parameters in alphabetical order ...

Page 73: ...he remote server Follow the steps below to set up the remote log 1 Check the Enable remote log box 2 In the IP Address box enter the IP address of the remote server 3 In the Port box enter the port number of the remote server 514 is default 4 Click Save to enable the setting Current Log This will display the system log in chronological order The system log is stored in the camera s buffer area and...

Page 74: ...v6 TCP IP UDP ICMP DHCP Client NTP Client D Link DNS Client DDNS Client D Link SMTP Client FTP Client HTTP HTTPS Samba Client PPPoE UPnP Port Forwarding RTP RTSP RTCP IP filtering 3GPP LLTD CoS QoS SNMP IGMP 802 1x ONVIF Compliant Security Administrator and user group protection Password authentication HTTP and RTSP digest encryption HTTPS streaming Remote client access control System Integration ...

Page 75: ...wer Input 12 V DC 1 25 A 24 V AC 50 60 Hz 802 3af PoE Max Power Consumption 6 3 W Operating Temperature 20 to 50 C 4 to 122 F Storage Temperature 20 to 70 C 4 to 158 F Humidity 90 non condensing Weight 808 g Certifications CE Class A LVD FCC Class A C Tick Dimensions ...

Page 76: ... the label on the bottom of the Camera e g rev B2 Serial Number s n number located on the label on the bottom of the Camera You can find software updates and user documentation on the D Link website as well as frequently asked questions and answers to technical issues For customers within the United States Phone Support 877 354 6555 Internet Support http support dlink com For customers within Cana...

Page 77: ...under this Limited Warranty will be at D Link s option to repair or replace the defective Hardware during the Warranty Period at no charge to the original owner or to refund the actual purchase price paid Any repair or replacement will be rendered by D Link at an Authorized D Link Service Office The replacement hardware need not be new or have an identical make model or part D Link may at its opti...

Page 78: ...nsee for the non conforming Software will be refunded by D Link provided that the non conforming Software and all copies thereof is first returned to D Link The license granted respecting any Software for which a refund is given automatically terminates Non Applicability of Warranty The Limited Warranty provided hereunder for Hardware and Software portions of D Link s products will not be applied ...

Page 79: ...d return shipping charges for any product that is not packaged and shipped in accordance with the foregoing requirements or that is determined by D Link not to be defective or non conforming What Is Not Covered The Limited Warranty provided herein by D Link does not cover Productsthat inD Link sjudgment havebeensubjectedtoabuse accident alteration modification tampering negligence misuse faultyins...

Page 80: ...EDY FOR A BREACH OF THE FOREGOING LIMITED WARRANTY IS REPAIR REPLACEMENT OR REFUND OF THE DEFECTIVE OR NONCONFORMING PRODUCT THE MAXIMUM LIABILITY OF D LINK UNDERTHISWARRANTY IS LIMITEDTOTHE PURCHASE PRICE OFTHE PRODUCT COVERED BYTHEWARRANTY THE FOREGOING EXPRESS WRITTEN WARRANTIES AND REMEDIES ARE EXCLUSIVE AND ARE IN LIEU OF ANY OTHER WARRANTIES OR REMEDIES EXPRESS IMPLIED OR STATUTORY Governing...

Page 81: ...ect the equipment into an outlet on a circuit different from that to which the receiver is connected Consult the dealer or an experienced radio TV technician for help FCC Caution Any changes or modifications not expressly approved by the party responsible for compliance could void the user s authority to operate this equipment This device complies with Part 15 of the FCC Rules Operation is subject...

Page 82: ...2 this device must accept any interference received including interference that may cause undesired operation IMPORTANT NOTE Radiation Exposure Statement This equipment complies with IC radiation exposure limits set forth for an uncontrolled environment This equipment should be installed and operated with minimum distance 20cm between the radiator and your body This device has been designed to ope...

Page 83: ...7110 User Manual Registration Product registration is entirely voluntary and failure to complete or return this form will not diminish your warranty rights Registration Register your product at registration dlink com ...

Reviews: