


DSL-564T ADSL Router User
’
s Guide
30
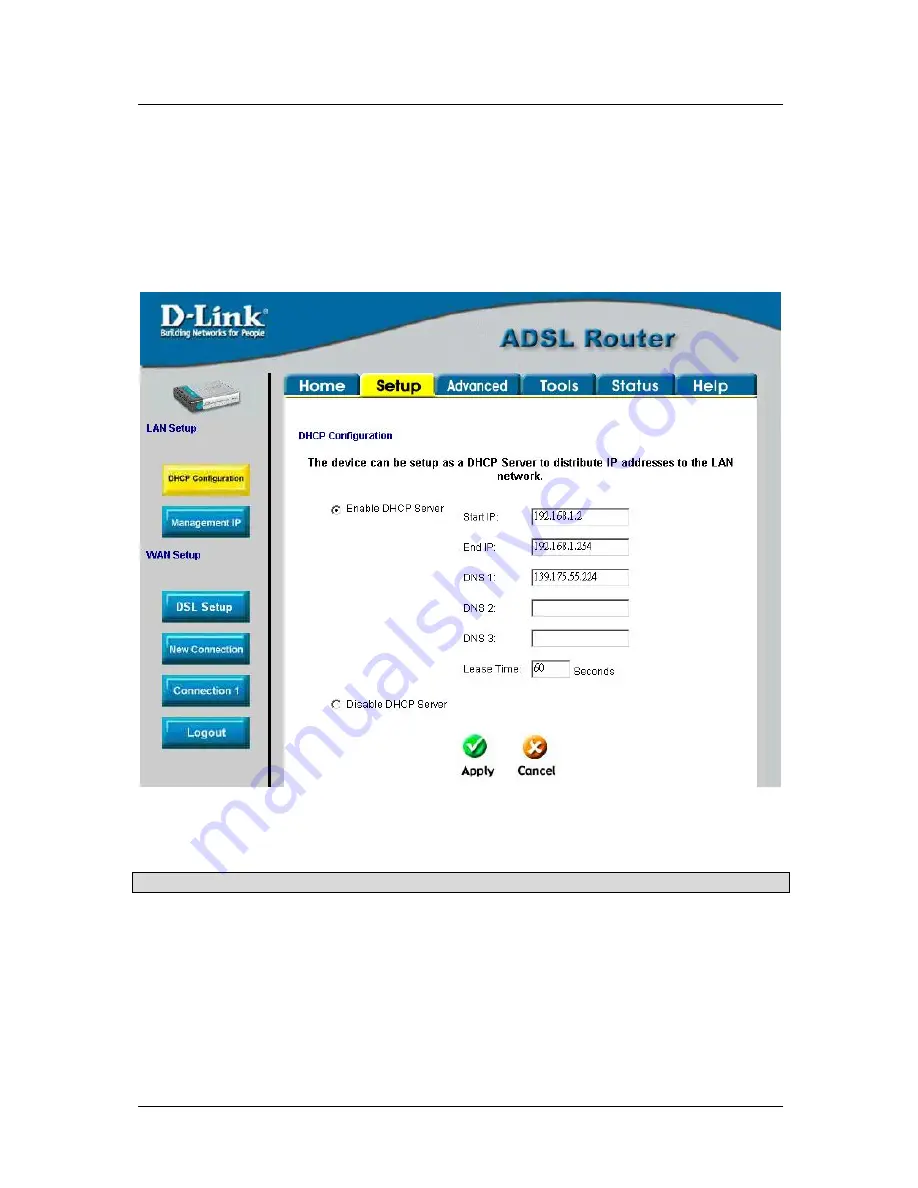
DHCP Configuration for LAN
The Router supports three DHCP modes for the LAN. By default, DHCP service is provided using an IP pool of
192.168.1.2
–
192.168.1.254 for a total of 253 IP addresses available. The Router can also relay DHCP service
from another server through the WAN port. You may prefer to disable DHCP service and DHCP relay and use a
different preferred method for IP addressing on your LAN.
To disable the embedded DHCP server, select the
Server and Relay Off
option and click the
Apply
button.
Figure 3- 13. Configure DHCP service for the LAN
For DHCP service on the LAN, select the
Server On
option to enable DHCP service from the Router (enabled
by default) and configure DHCP server parameters as follows:
DHCP Parameter
Description
Start IP
Type in the base address for the IP pool of unassigned IP addresses. This IP
address must be consistent with the Management IP address of the Router.
Normally the Start IP address is one greater than the Management IP address.
End IP
Type in the last address of the contiguous IP address range to be used by the
Router for DHCP function. Up to 253 consecutive IP addresses may be used
for the pool.
Lease Time
This specifies the amount of time (in seconds) a client can lease an IP
address, from the dynamically allocated IP pool.
Click the
Apply
button to make the changes to the DHCP settings. Remember to
Save All
in the
Tools/System
Commands
menu.
Summary of Contents for DSL-564T
Page 1: ...DSL 564T ADSLRouter User sGuide April 2004 ...
Page 87: ......


