background image

Section 3 – Configuration 


D-Link 

DSL-526B 

User 

Manual 


  60

Quality of Service


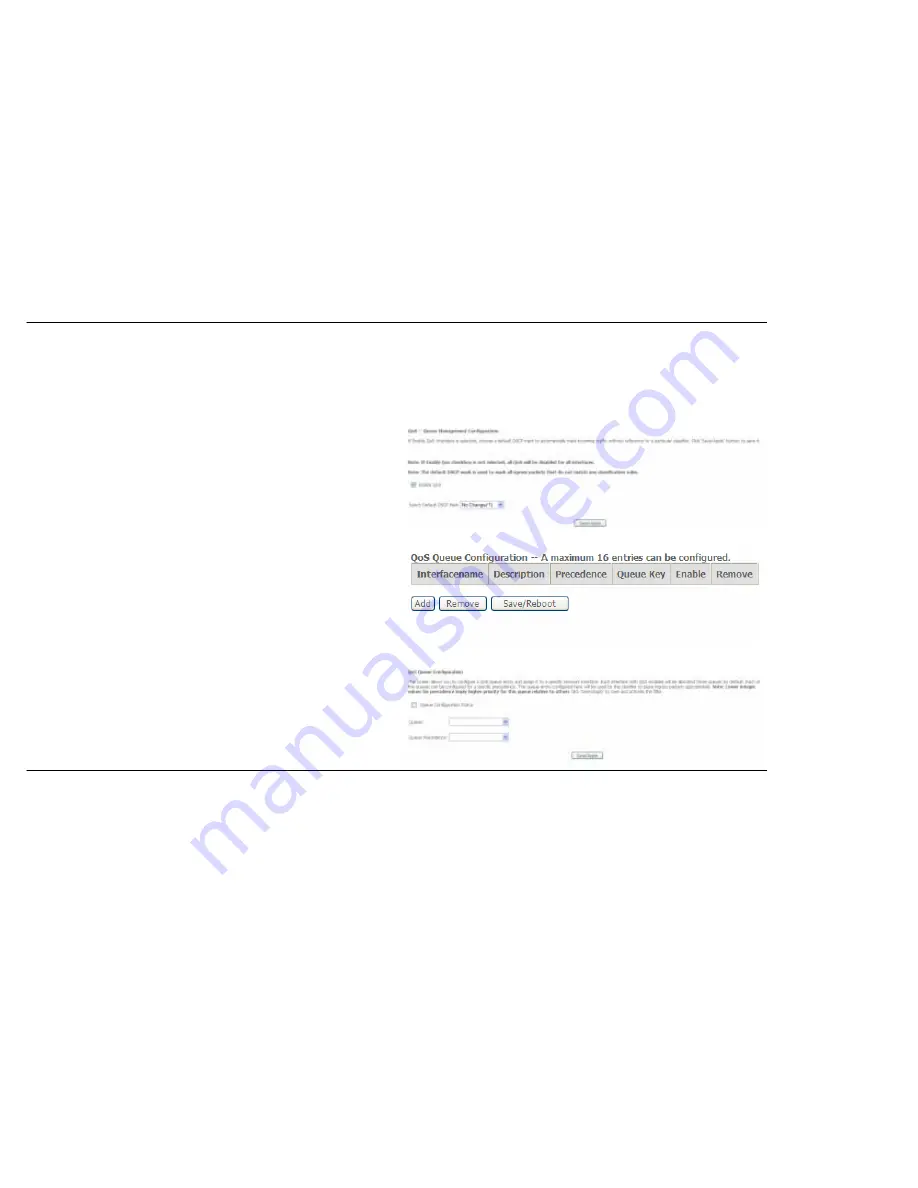
QoS or Quality of Service allows your Router to help prioritize the data packet flow in your Router and network. This is very important for time 
sensitive applications such as VoIP where it may help prevent dropped calls. Large amounts of non-critical data can be scaled so as not to affect 
these prioritized sensitive real-time programs.   
 
To access the 

QoS – Queue Management Configuration

 window, click the 

Quality of Service 

link in the 

Advanced Setup

 directory. 

This window allows you to set up QoS on the Router. When you are 
finished, click on the 

Save/Apply

 button. 


Queue Config 

To add a new QoS Queue configuration, click the 

Queue Config

 link. 

 
Click the 

Add

 button to add a new QoS Queue Configuration table entry. 


This window allows you to configure a QoS queue entry and assign it a 
specific network interface.   
   
Click the 

Save/Apply

 button to save and activate the filter. 


Summary of Contents for DSL-526B

Page 1: ...1 刪除 sp ...

Page 2: ...Factory Reset Button 16 Network Connections 17 CONFIGURATION 18 WEB BASED CONFIGURATION UTILITY 18 QUICK SETUP 19 WIZARD 20 ADVANCED SETUP 36 DEVICE INFO 49 SUMMARY 50 WAN 50 STATISTICS 51 ROUTE 53 ARP 53 DHCP 54 ADVANCED SETUP 55 WAN 55 LAN 57 NAT 58 QUALITY OF SERVICE 60 Queue Config 60 QoS Classification 61 ROUTING 62 DNS 64 DSL 67 DIAGNOSTICS 69 MANAGEMENT 70 SETTINGS 70 SYSTEM LOG 72 TR 069 C...

Page 3: ...Installation Guide Note Using a power supply with a different voltage rating other than the one included with the DSL 526B may cause damage and void the warranty for this product System Requirements ADSL Internet service Computer with 200MHz Processor 64MB Memory CD ROM Drive Ethernet Adapter with TCP IP Protocol Installed Internet Explorer v6 or later FireFox v1 5 Computer with Windows 2000 Windo...

Page 4: ...vices Static Routing This allows you to select a data path to a particular network destination that will remain in the routing table and never age out Create a static route if you wish to define a specific route that will always be used for data traffic from your LAN to a specific destination within your LAN for example to another router or a server or to a specific destination outside your networ...

Page 5: ...ower Button Push in to power on the Router Push again to power off the Router Power Insert Use the adapter shipped with the Router to connect to power source ADSL Port Use the ADSL cable to connect to your telephone line RJ 11 port Reset Button To manually reset depress button with the power on for at least seven seconds USB Port Use the USB port to connect to a single computer ...

Page 6: ...light indicates activity on the WAN ADSL interface Status A blinking green light indicates the system is operating normally System failure is indicated by either a steady green or dark light LAN A solid green light indicates a valid link on startup This light will blink when there is activity currently passing through the Ethernet port USB A solid green light indicates a valid link on startup This...

Page 7: ...f the Router is very important Do not place the Router in an enclosed area such as a closet cabinet or in the attic or garage Before You Begin Please read and make sure you understand all the prerequisites for proper installation of your new Router Have all the necessary information and equipment on hand before beginning the installation ...

Page 8: ...etup and management The web configuration manager may be accessed using any operating system capable of running web browser software including Windows 98 SE Windows ME Windows 2000 Windows XP and Windows Vista Web Browser Any common web browser can be used to configure the Router using the web configuration management software The program is designed to work best with more recently released browse...

Page 9: ...ll software on your computer It may however be necessary to change some settings in the device including account information used to identify and verify the connection All connections to the Internet require a unique global IP address For bridged connections the global IP settings must reside in a TCP IP enabled device on the LAN side of the bridge such as a PC a server a gateway device such as a ...

Page 10: ...uted IP LLC 1483 Routed IP VC Mux or IPoA MER Dynamic IP Address 1483 Bridged IP LLC or 1483 Bridged IP VC Mux Modulation Type ADSL uses various standardized modulation techniques to transmit data over the allotted signal frequencies Some users may need to change the type of modulation used for their service The default DSL modulation ADSL2 Multi Mode used for the Router automatically detects all ...

Page 11: ...n with the VPI to identify the data path between your ADSL service provider s network and your computer If you are setting up the Router for multiple virtual connections you will need to configure the VPI and VCI as instructed by your ADSL service provider for the additional connections This setting can be changed in the WAN Setup window of the web management interface ...

Page 12: ... s management interface The default Password is admin The user may change this LAN IP addresses for the DSL 526B This is the IP address you will enter into the Address field of your web browser to access the Router s configuration graphical user interface GUI using a web browser The default IP address is 192 168 1 1 This may be changed to suit any IP address scheme the user desires This address wi...

Page 13: ...server This means that it can assign an IP address subnet mask and a default gateway address to computers on your LAN The default range of IP addresses the DSL 526B will assign are from 192 168 1 2 to 192 168 1 254 Your computer or computers needs to be configured to obtain an IP address automatically that is they need to be configured as DHCP clients It is recommended that you collect and record ...

Page 14: ...e View Manual Install Acrobat Reader and Exit If you do not see this auto run pop up window explore the CD ROM and double click the setup application file autorun exe or find the file Setup exe in the folder labeled Setup and double click it to launch the installation software The auto run USB driver setup must be completed before connecting the router to your PC with the USB cable To install the ...

Page 15: ... port on your PC 3 Connect the power adapter to the power input in the back panel of the DSL 526B and then plug the other end of the power adapter to a wall outlet or power strip 4 Press the power button to switch on the Router On the front of the device the Power LED will turn ON to indicate proper operation 5 Insert the telephone cable included with the Router into the ADSL port and then connect...

Page 16: ...ators on the front if you need to view them for troubleshooting Power on Router The Router must be used with the power adapter included with the device 1 Insert the AC Power Adapter cord into the power receptacle located on the rear panel of the Router and plug the adapter into a suitable nearby power source 2 Depress the Power button into the on position You should see the Power LED indicator lig...

Page 17: ...nd hold the reset button while the device is powered off 2 Turn on the power 3 Wait for 5 8 seconds and then release the reset button Remember that this will wipe out any settings stored in flash memory including user account information and LAN IP settings The device settings will be restored to the factory default IP address 192 168 1 1 and the subnet mask 255 255 255 0 the default management Us...

Page 18: ...as auto negotiation NWay enabled for the connecting port Use standard twisted pair cabling with RJ 45 connectors The RJ 45 port on the Router is a crossed port MDI X Follow standard Ethernet guidelines when deciding what type of cable to use to make this connection When connecting the Router directly to a PC or server use a normal straight through cable You should use a crossed cable when connecti...

Page 19: ...nd can be accessed using a web browser The easiest way to make sure your computer has the correct IP settings is to configure it to use the DHCP server in the Router The next section describes how to change the IP configuration for a computer running a Windows operating system to be a DHCP client To access the configuration utility open a web browser such as Internet Explorer and enter the IP addr...

Page 20: ...e any additional settings click the Advance Setup button This will take you to the Advanced Setup windows Please refer to the Advanced Setup section in this manual for more information When you have finished click the Save Reboot button QUICK SETUP The following window appears to indicate that the router is restarting QUICK SETUP Once the router has restarted you will be presented with the Quick S...

Page 21: ...ld The VPI and VCI values should be provided by your ISP This window also allows you to enable QoS by ticking the Enable Quality of Service check box Click the Next button to continue WIZARD CONNECTION TYPE This window allows you to select the appropriate connection type The choices include PPP over ATM PPPoA PPP over Ethernet PPPoE MAC Encapsulation Routing MER IP over ATM IPoA and Bridging defau...

Page 22: ...e Service check box and enter a Service Name To disable WAN service unselect the check box Click the Next button to continue WIZARD BRIDGING This window allows you to configure the Router IP address and subnet mask for your LAN Once you have entered an IP address and subnet mask click the Next button to continue ...

Page 23: ...tion D Link DSL 526B User Manual 22 WIZARD BRIDGING This summary window allows you to confirm the bridging settings you have just made Click the Save Reboot button to save your new bridging settings and restart the Router ...

Page 24: ...ows you to use the drop down menu to select the desired Encapsulation Mode Click the Next button to continue WIZARD PPPoA This window allows you to set the username and the password for your PPP connection This information is obtained from your ISP Additional settings on this window will also depend on your ISP Click the Next button to continue ...

Page 25: ... ISP advises you to change it Click the Next button to continue WIZARD PPPoA This window allows you to enter an IP address and subnet mask for the LAN interface In addition you can either enable or disable the DHCP server To enable the DHCP server enter a starting IP address an ending IP address and a subnet mask You may also choose to change the default value of the leased time Click the Next but...

Page 26: ...guration D Link DSL 526B User Manual 25 WIZARD PPPoA This summary window allows you to confirm the settings you have just made Click the Save Reboot button to save your new PPP over ATM settings and restart the Router ...

Page 27: ...allows you to use the drop down menu to select the desired Encapsulation Mode Click the Next button to continue WIZARD PPPoE This window allows you to set the username and the password for your PPP connection This information is obtained from your ISP Additional settings on this window will also depend on your ISP Click the Next button to continue ...

Page 28: ... ISP advises you to change it Click the Next button to continue WIZARD PPPoE This window allows you to enter an IP address and subnet mask for the LAN interface In addition you can either enable or disable the DHCP server To enable the DHCP server enter a starting IP address an ending IP address and a subnet mask You may also choose to change the default value of the leased time Click the Next but...

Page 29: ...ation D Link DSL 526B User Manual 28 WIZARD PPPoE This summary window allows you to confirm the settings you have just made Click the Save Reboot button to save your new PPP over Ethernet settings and restart the Router ...

Page 30: ...MER radio button on this window This window also allows you to use the drop down menu to select the desired Encapsulation Mode Click the Next button to continue WIZARD MER This window allows you to configure the WAN IP settings This information is obtained from your ISP Click the Next button to continue ...

Page 31: ... multicasting and WAN service Click the Next button to continue WIZARD MER This window allows you to enter an IP address and subnet mask for the LAN interface In addition you can either enable or disable the DHCP server To enable the DHCP server enter a starting IP address an ending IP address and a subnet mask You may also choose to change the default value of the leased time Click the Next butto...

Page 32: ...on D Link DSL 526B User Manual 31 WIZARD MER This summary window allows you to confirm the settings you have just made Click the Save Reboot button to save your new MAC Encapsulation Routing settings and restart the Router ...

Page 33: ...io button on this window This window also allows you to use the drop down menu to select the desired Encapsulation Mode Click the Next button to continue WIZARD IPoA This window allows you to configure the WAN IP settings This information is obtained from your ISP Click the Next button to continue ...

Page 34: ...6B User Manual 33 WIZARD IPoA This window allows you to enable or disable Network Address Translation and a firewall for your Router In addition you can enable or disable IGMP multicasting and WAN service Click the Next button to continue ...

Page 35: ...IP address and subnet mask for the LAN interface In addition you can either enable or disable the DHCP server To enable the DHCP server enter a starting IP address an ending IP address and a subnet mask You may also choose to change the default value of the leased time Click the Next button to continue ...

Page 36: ...iguration D Link DSL 526B User Manual 35 WIZARD IPoA This summary window allows you to confirm the settings you have just made Click the Save Reboot button to save your new IP over ATM settings and restart the Router ...

Page 37: ...r computer to configure the WAN connection The following chapter describes the various windows used to configure and monitor the Router including how to change IP settings and DHCP server setup ADVANCED SETUP Click the Advanced Setup link on the left panel of the opening page to launch a series of setup windows ...

Page 38: ...ew PVC connection ADVANCED SETUP ATM PVC Configuration This window allows you to set up ATM PVC configurations for the Router Enter a Port Identifier Virtual Path Identifier and Virtual Channel Identifier The VPI and VCI values should be provided by your ISP Select the Service Category that your ISP uses from the Service Category drop down menu This window also allows you to enable QoS by ticking ...

Page 39: ... over ATM PPPoA PPP over Ethernet PPPoE MAC Encapsulation Routing IP over ATM IPoA and Bridging default This window also allows you to use the drop down menu to select the desired Encapsulation Mode Click the Next button to continue ADVANCED SETUP BRIDGING To enable bridging tick the Enable Bridge Service check box and enter a Service Name Click the Next button to continue ...

Page 40: ...ion D Link DSL 526B User Manual 39 ADVANCED SETUP BRIDGING This summary window allows you to confirm the bridging settings you have just made Click the Save button to save your new bridging settings and restart the Router ...

Page 41: ... DSL 526B User Manual 40 ADVANCED SETUP PPPoA Click the PPP over ATM PPPoA radio button on this window This window also allows you to use the drop down menu to select the desired Encapsulation Mode Click the Next button to continue ...

Page 42: ...nformation is obtained from your ISP Additional settings on this window will also depend on your ISP Most users will want to leave the MTU value at the default setting unless your ISP advises you to change it Click the Next button to continue ADVANCED SETUP PPPoA This window allows you to enable IGMP multicasting and the WAN service Click the Next button to continue ...

Page 43: ...settings you have just made Click the Save button to save your new PPP over ATM settings and restart the Router ADVANCED SETUP PPPoE Click the PPP over Ethernet PPPoE radio button on this window This window also allows you to use the drop down menu to select the desired Encapsulation Mode Click the Next button to continue ...

Page 44: ...nformation is obtained from your ISP Additional settings on this window will also depend on your ISP Most users will want to leave the MTU value at the default setting unless your ISP advises you to change it Click the Next button to continue ADVANCED SETUP PPPoE This window allows you to enable IGMP multicasting and the WAN service Click the Next button to continue ...

Page 45: ...ation D Link DSL 526B User Manual 44 ADVANCED SETUP PPPoE This summary window allows you to confirm the settings you have just made Click the Save button to save your new PPP over Ethernet settings and restart the Router ...

Page 46: ...dio button on this window This window also allows you to use the drop down menu to select the desired Encapsulation Mode Click the Next button to continue ADVANCED SETUP MER This window allows you to configure the WAN IP settings This information is obtained from your ISP When you have finished configuring the IP settings click the Next button to continue ...

Page 47: ...l for your Router In addition you can enable or disable IGMP multicasting and the WAN service Type a Service Name in the Service Name field Click the Next button to continue ADVANCED SETUP MER This summary window allows you to confirm the settings you have just made Click the Save button to save your new MAC Encapsulation Routing settings and restart the Router ...

Page 48: ...on this window This window also allows you to use the drop down menu to select the desired Encapsulation Mode Click the Next button to continue ADVANCED SETUP IPOA This window allows you to configure the WAN IP settings This information is obtained from your ISP When you have finished configuring the IP settings click the Next button to continue ...

Page 49: ...ewall for your Router In addition you can enable or disable IGMP multicasting and the WAN service Type a Service Name in the Service Name field Click the Next button to continue ADVANCED SETUP IPOA This summary window allows you to confirm the settings you have just made Click the Save button to save your new IP over ATM IPoA settings and restart the Router ...

Page 50: ...User Manual 49 Device Info To access the Device Info window click either the Device Info link The following page opens This window displays different information about the Router including Summary WAN Statistics Route ARP and DHCP information ...

Page 51: ... link in the Device Info directory This window displays the current status of your DSL connection including the software version LAN IP address and DNS server address WAN To access the WAN Info window click the WAN link in the Device Info directory This window displays the current status of your WAN connection ...

Page 52: ...plays the Router s LAN statistics Click the Reset Statistics button to refresh these statistics To access WAN Statistics click the WAN link in the Statistics directory This window displays the Router s WAN statistics Click the Reset Statistics button to refresh these statistics To access ATM Statistics click the ATM link in the Statistics directory This window displays the Router s ATM statistics ...

Page 53: ...DSL Statistics click the ADSL link in the Statistics directory This window displays the Router s ADSL statistics Click the Reset Statistics button to refresh these statistics Click the ADSL BER Test button to access the ADSL Bit Error Rate Test window displayed below ...

Page 54: ...he Device Info Route window click the Route link in the Device Info directory This read only window displays routing info ARP To access the Device Info ARP window click the ARP link in the Device Info directory This read only window displays Address Resolution Protocol info ...

Page 55: ... 3 Configuration D Link DSL 526B User Manual 54 DHCP To access the Device Info DHCP window click the DHCP link in the Device Info directory This read only window displays the current DHCP leases on the Router ...

Page 56: ... the WAN interface You can add delete and modify WAN interfaces on this window Once the desired changes to the WAN interface are complete click the Save Reboot button If you are setting up the WAN interface for the first time click the Add button The ATM PVC Configuration window allows you to set up an ATM PVC configuration Enter a Port Identifier in the PORT field Virtual Path Identifier in the V...

Page 57: ...E MAC Encapsulation Routing MER IP over ATM IPoA and Bridging default This window also allows you to use the drop down menu to select the desired Encapsulation Mode Click the Next button to continue For further information about each of the five connection types available on the Router please go to the Quick Setup section earlier in this manual as all of the windows are identical ...

Page 58: ...g and Configure DHCP Server settings To enable IGMP tick the Enable IGMP check box Choose from Standard Mode or Blocking Mode by clicking the appropriate radio button To enable the DHCP server frunction tick the Enable DHCP Server radio button and type in the first IP address you want to use in your DHCP range in the DHCP Start IP Address textbox and the type in the last IP address you want to use...

Page 59: ... button to add a new a new virtual server service Select a Service from the drop down menu or click the Custom Server radio button to create a custom service You can also configure the External Port Start External Port End Protocol Internal Port Start Internal Port End and Remote IP settings for the service you want to setup on your Router When you have finished configuring the virtual server clic...

Page 60: ...you want to setup isn t listed click the Custom application radio button and type in a name for the trigger in the Custom application field Configure the Trigger Port Start Trigger Port End Trigger Protocol Open Port Start Open Port End and Open Protocol settings for the port trigger you want to configure When you have finished click the Save Apply button Click the DMZ Host link in the NAT directo...

Page 61: ...prioritized sensitive real time programs To access the QoS Queue Management Configuration window click the Quality of Service link in the Advanced Setup directory This window allows you to set up QoS on the Router When you are finished click on the Save Apply button Queue Config To add a new QoS Queue configuration click the Queue Config link Click the Add button to add a new QoS Queue Configurati...

Page 62: ...to create a traffic class rule to classify the upstream traffic assign a queue that defines the precedence and the interface and optionally overwrite the IP header DSCP byte A rule consists of a class name and at least one condition Please remember that all of the specified conditions on this window must be met for the rule to take effect Click the Save Apply button to save and activate this rule ...

Page 63: ...A PPPoE or MER DHCP enabled PVC s If this checkbox is not ticked enter the static default gateway and or a WAN interface Click the Save Apply button when you are finished To add a new static route click on the Static Route link in the Routing directory Click the Add button to access the following window Enter the static routing information for an entry to the routing table Click the Save Apply but...

Page 64: ...adio button to enable RIP on the Router Configure the interfaces you want to enable RIP on and choose the Version and Operation modes from the appropriate drop down menus Tick the Enabled checkbox to enable RIP on the interface Click the Save Apply button when you are finished ...

Page 65: ...n DNS server IP addresses deselect the Enable Automatic Assigned DNS checkbox and type in a Primary DNS server IP address and Secondary DNS server IP address in the appropriate boxes The DSL 526B router supports Dynamic DNS from two providers DynDNS org and TZO This feature allows you to alias a dynamic IP address to a static hostname allowing your DSL router to be more easily accessed from variou...

Page 66: ...ostname that you have registered with your D DNS provider in the Hostname textbox Select the Interface you want to enable DDNS from the Interface drop down menu If your Dynamic DNS service provider is DynDNS org type in your DynDNS org Username and Password in the appropriate boxes Press the Save Apply button when you have finished ...

Page 67: ... Manual 66 If your Dynamic DNS service provider is TZO type in the e mail address you have registered with TZO in the Email textbox Type in the Key you have registered with TZO in the Key textbox Press the Save Apply button when you have finished ...

Page 68: ...one line pair and capability Carry out the following to configure the DSL Settings Tick the text boxes of the modulation types you want to enable Choose the Inner pair or Outer pair option by clicking the appropriate radio button Tick the text boxes of the capability options you want to enable Click the Save Apply button when you are finished Click the Advanced Settings button to select a DSL test...

Page 69: ...e desired DSL test mode and then click the Apply button Click the Tone Selection button to modify the upstream and downstream tones Select the appropriate upstream and downstream tones for your ADSL connection Click the Apply button to let your settings take effect ...

Page 70: ...s the Diagnostics window click the Diagnostics link This window is used to test connectivity of the Router The results of the test display immediately Click the Rerun Diagnostic Tests button to rerun the tests to both your local network connection and your DSL service provider ...

Page 71: ...ws you to backup the Router configuration update the router configuration and restore the router to default settings To access the Settings windows click the Settings link in the Management directory To backup the router settings click the Backup link This window allows you to backup your DSL Router configuration Click the Backup Settings button to save your Router configuration to a file on your ...

Page 72: ...owse to the location where the settings file is saved on your PC Click the Update Settings button to update your Router configuration To restore the router configuration to default settings click the Restore Default link This window allows you to restore your DSL Router configuration to factory default settings Click the Restore Default Settings button to restore your Router to factory default set...

Page 73: ...o configure the System Log options In the System Log window click on the Refresh button to refresh the system log settings System Log Configuration Click the Configure System Log button to configure the system log The system log displays chronological event log data The event log can be read from the local host or sent to a System Log server Click the Enable radio button Select the Log Level Displ...

Page 74: ...o carry out the auto configuration provision collection and diagnostics to the device in the ACS URL field Type in the User Name you will use to log onto the ACS server into the ACS User Name field Type in the Password you will use to log onto the ACS server into the ACS Password field If you require the ACS server to authenticate to your Router tick the Connection Request Authentication checkbox ...

Page 75: ...h Internet time servers checkbox to setup automatic synchronization with Internet time servers Select a primary time server from the First NTP time server drop down menu Select a secondary time server from the Second NTP time server drop down menu Select the time zone you are in from the Time Zone offset drop down menu When you have finished configuring the Time Settings click the Save Apply butto...

Page 76: ...ng the appropriate checkboxes When you are finished click the Save Apply button Access Control IP Addresses To configure IP address access control click the IP Addresses link Click the Enable or Disable radio button to enable or disable Access Control Mode To add an IP address management station click the Add button Enter the IP address of the management station permitted to access the local manag...

Page 77: ...e new password in the New Password field and confirm the new password in the Confirm Password field When you are finished click the Save Apply button Update Software To access the Update Software window click the Update Software link in the Management directory This window allows you to update the Router s software Click the Browse button to navigate to the location where the updated software file...

Page 78: ... 3 Configuration D Link DSL 526B User Manual 77 Save Reboot To access this window click the Save Reboot link in the Management directory To save your settings and reboot the system click the Save Reboot button ...

Page 79: ... is admin and the default password is tot If you have changed the password and cannot remember it you will need to reset the Router to the factory default setting see question 2 which will set the password back to tot Note Please refer to the next section Networking Basics to check your PC s IP configuration if you can t see the login windows 2 How do I reset my Router to the factory default setti...

Page 80: ...ve been provided by your ISP 4 Why can t I get an Internet connection For ADSL ISP users please contact your ISP to make sure the service has been enabled connected by your ISP and that your ISP username and password are correct 5 What can I do if my Router can t be detected by running the installation CD Ensure the Router is powered on Check that all the cables are firmly connected at both ends a...

Page 81: ...n the run box type cmd and click on the OK button At the prompt type ipconfig and press Enter This will display the IP address subnet mask and the default gateway of your adapter If the address is 0 0 0 0 check your adapter installation security settings and the settings on your router Some firewall software programs may block a DHCP request on newly installed adapters If you are connecting to a w...

Page 82: ...ernet Protocol TCP IP and click on the Properties button Step 4 Click on the Use the following IP address and enter an IP address that is on the same subnet as your network or the LAN IP address on your router Example If the router s LAN IP address is 192 168 1 1 make your IP address 192 168 1 X where X is a number between 2 and 254 Make sure that the number you choose is not in use on the network...

Page 83: ...tiprotocol Encapsulation over ATM Adaptation Layer 5 AAL5 RFC1661 Point to Point Protocol RFC1994 CHAP RFC2131 DHCP Client DHCP Server RFC2364 PPP over ATM RFC2516 PPP over Ethernet Data Transfer Rate G dmt full rate downstream up to 8 Mbps upstream up to 1 Mbps G lite ADSL downstream up to 1 5 Mbps upstream up to 512 Kbps G dmt bis full rate downstream up to 12 Mbps upstream up to 12 Mbps ADSL fu...

Reviews: