User Manual
Version 1.00 | 08/16/2016
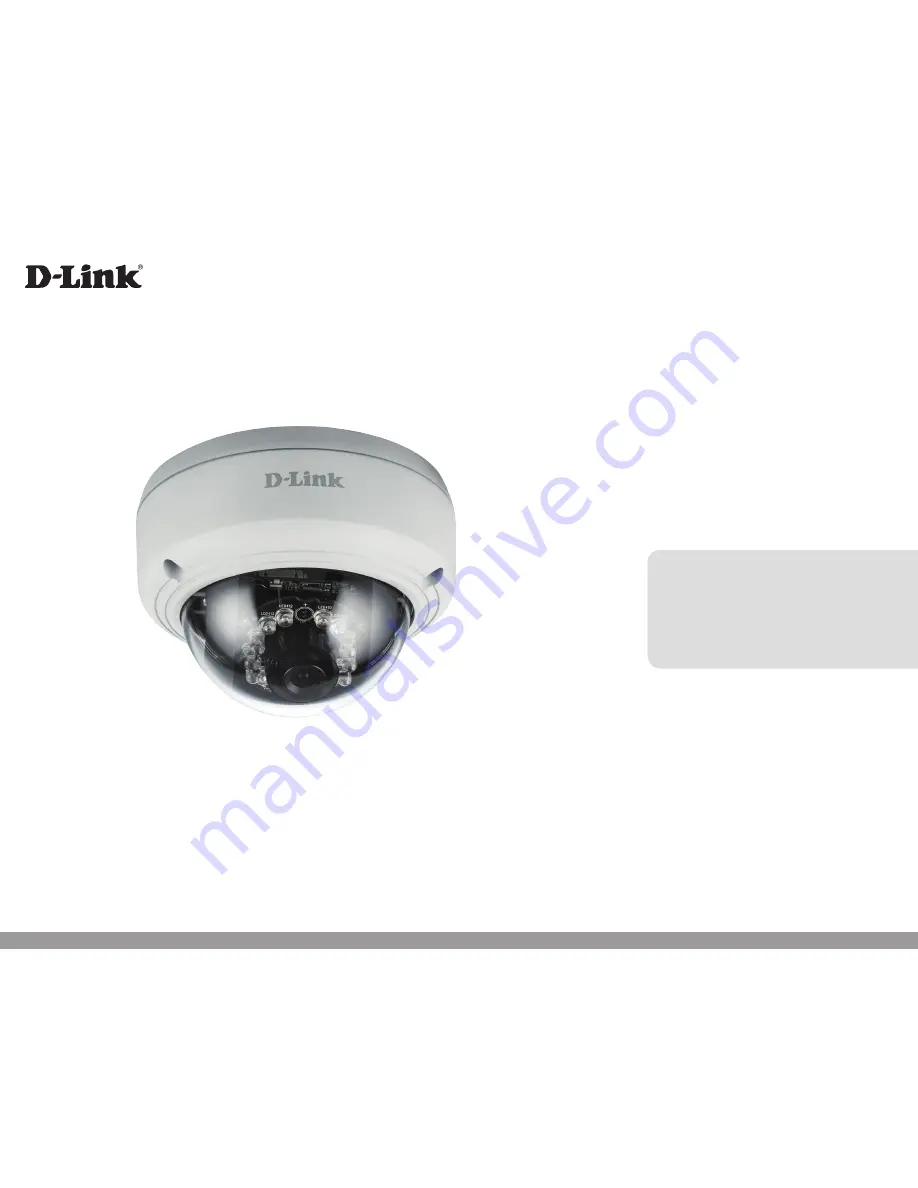
DCS-4603
Vigilance Full HD PoE Dome Camera
Page 1: ...User Manual Version 1 00 08 16 2016 DCS 4603 Vigilance Full HD PoE Dome Camera ...
Page 2: ...cription 1 00 07 13 2016 DCS 4603 Revision A1 with firmware version 1 00 Trademarks D Link and the D Link logo are trademarks or registered trademarks of D Link Corporation or its subsidiaries in the United States or other countries All other company or product names mentioned herein are trademarks or registered trademarks of their respective companies Copyright 2016 D Link Corporation All rights ...
Page 3: ...nt optional 14 Software Installation 16 Configuration 19 Using the Configuration Interface 19 Live Video 21 Setup 22 Setup Wizard 22 Network Setup 27 Dynamic DNS 30 Image Setup 31 Video 33 Motion Detection 34 Time and Date 35 Event Setup 36 Advanced 43 ICR and IR 43 HTTPS 44 Access List 45 Maintenance 46 Device Management 46 System 47 Firmware Upgrade 48 Status 49 Device Info 49 Logs 50 Help 51 Te...
Page 4: ...tems are missing please contact your reseller Safety Notice Installation and servicing should be done by certified technicians so as to conform to all local codes and prevent voiding your warranty DCS 4603 Vigilance Full HD PoE Dome Camera Mounting Kit CD ROM with User Manual and software Quick Installation Guide ...
Page 5: ...The simple installation and intuitive web based interface offer easy configuration across the full range of its advanced feature set including granular control over multiple video streams with different configurations and multicast video streams which helps you manage your network load The built in removable IR cut filter and IR LEDs give the DCS 4603 the capability to view up to 20M at night The ...
Page 6: ... is detected Events can be triggered from several sources such as motion detection and time based events IR LEDs for Day and Night Functionality The built in infrared LEDs enable night time viewing of up to 20 meters PoE Power over Ethernet for Flexible Installation The DCS 4603 can draw all the power it needs from a PoE switch or PoE injector for a simple and clutter free installation Remote Moni...
Page 7: ...ith the included wrench 3 Camera Lens Fixed lens to record video of the surrounding area 4 Inner Cover Covers the camera components 5 Reset Button Press and hold for 10 seconds to reset camera back to the factory default settings 6 IR LEDs Provide illumination for low light environments 7 Tilt Adjustment Screw Can be loosened to adjust camera angle 1 2 3 4 5 6 7 ...
Page 8: ...l Section 1 Product Overview 1 Power Connector Connects to an optional 12 V 1 5 A power adapter not included 2 Ethernet Jack RJ 45 connector for Ethernet which can also be used to power the camera using Power over Ethernet PoE 1 2 ...
Page 9: ...icker where you want to position the camera Use a 6 mm drill bit to make the required holes approximately 25 mm deep then insert the wall anchors into the holes If you are running the camera cables through the wall or ceiling drill a hole in the center and pull the cables through the hole Step 2 Use the included wrench to loosen the 3 screws on the top of the camera then lift the camera cover off ...
Page 10: ...ews provided to mount the camera to the wall or ceiling If you are running the camera cables out the side of the camera guide the camera cables through the cable channel on the base Step 4 ConnectthepowerandEthernetcables orjusttheEthernetcableifyouareusing a PoE connection ...
Page 11: ...en retighten it after moving the camera to the desired angle You can also rotate the camera by grasping the camera and turning it left or right When you are done adjusting the camera s angle put the inner cover back into place Note Thecamerahasalimitedrangeofmotion Ifitstopswhenyouareadjusting it do not attempt to rotate or tilt the camera any further in that direction Step 6 Reattach the camera c...
Page 12: ...ticker in the desired location then use a 6 mm drill bit to drill the required holes 25 mm deep and insert the wall anchors into the holes If you plan to pass cables through the wall you will also need to drill a hole for the cable channel Step 3 Remove the cover from the camera Pass the camera connectors through the back or bottom cable channel on the DCS 37 1 Use the provided screws to mount the...
Page 13: ...ve the inner cover and adjust the angle and rotation of the camera as desired then put the inner cover back in place Step 5 Attach the camera cover If you are passing the camera cables through the wall place the rubber stopper into the bottom cable channel to seal it ...
Page 14: ...S 37 2 mounting sticker in the desired location then use a 6 mm drill bit to drill the required holes 25 mm deep and insert the wall anchors into the holes If you plan to pass cables through the wall you will also need to drill a hole for the cable channel Step 3 Remove the cover from the camera Pass the camera connectors through the back or side cable channel on the DCS 37 2 Use the provided scre...
Page 15: ...ve the inner cover and adjust the angle and rotation of the camera as desired then put the inner cover back in place Step 5 Attach the camera cover If you are passing the camera cables through the wall place the rubber stopper into the bottom cable channel to seal it ...
Page 16: ...Autorun function on your computer is disabled or if the D Link Launcher failstostartautomatically clicktheStartbuttonandtypeD autorun exe where D represents the drive letter of your CD ROM drive and press Enter Step 2 Click on the D Link Setup Wizard SE icon that was created in your Windows Start menu Start D Link Setup Wizard SE Software Installation ...
Page 17: ...nd password for the camera and enter the new ID and password you wish to use Click Next to continue Step 3 The SetupWizard will appear and display the MAC address and IP address of your camera s If you have a DHCP server on your network a valid IP Address will be displayed If your network does not use a DHCP server the network camera s default static IP 192 168 0 20 will be displayed Select your c...
Page 18: ...Take a moment to confirm your settings and click Restart Step 5 Select DHCP if your camera obtains an IP address automatically from a DHCP server such as a router Select Static IP if you want to manually enter the IP settings for the camera Click Next to continue ...
Page 19: ...r enter the IP address of your camera into a web browser such as Firefox To log in use the User name admin and the password you created in the InstallationWizard If you did not create a password the default password is blank After entering your password click OK Step 1 Click on the D LinkSetupWizardSE icon that was created in yourWindows Start menu Start D Link Setup Wizard SE Step 2 Select the ca...
Page 20: ...ection 3 Configuration Step 3 Enter admin as the default username and leave the password blank Click OK to continue Step 4 This section displays your camera s live video You can select your video profile and view or operate the camera ...
Page 21: ...using this menu Language Video Profile 1 2 3 Select a video profile to use For more on setting up your video profiles refer to Video on page 33 Full Screen Mode This will switch to a full screen view of your camera s video Double click or press the Esc key to exit full screen mode Take a Snapshot This will save a snapshot to your PC using the storage folder you have selected Record a Video Clip Th...
Page 22: ... may click Manual Internet Connection Setup to manually configure your Network Camera and skip to Network Setup on page 27 To quickly configure your Network Camera s motion detection settings click Motion Detection Setup Wizard If you want to enter your settings without running the wizard click Manual Motion Detection Setup and skip to Motion Detection on page 34 ...
Page 23: ...ect to the Internet If your camera is connected to a router or you are unsure how your camera will connect to the Internet select DHCP Connection Select Static IP if your Internet Service Provider has provided you with connection settings or if you wish to set a static address within your home network Enter the correct configuration information and click Next to continue If you are using PPPoE sel...
Page 24: ...ick Next to continue Enter a name for your camera and click Next to continue Configure the correct time to ensure that all events will be triggered as scheduled Click Next to continue If you have selected DHCP you will see a summary of your settings including the camera s IP address Please write down all of this information as you will need it in order to access your camera Click Apply to save you...
Page 25: ...otiondetection specifythedetectionsensitivity and adjust the camera s ability to detect movement You may specify whether the camera should capture a snapshot or a video clip when motion is detected Refer to Motion Detection on page 34 for information about how to configure motion detection Step 2 This step allows you to enable motion detection based on a customized schedule Specify the day and hou...
Page 26: ... choose not to receive notifications or to receive notifications via e mail or FTP Please enter the relevant information for your e mail or FTP account Click Next to continue Step 4 You have completed the Motion Detection Wizard Please verify your settings and click Apply to save them Please wait a few moments while the camera saves your settings and restarts ...
Page 27: ...ou may obtain a static or fixed IP address and other network information from your network administrator for your camera IPv4 Address Enter the IP address that the camera will use on your network You may need to get this information from your ISP or network administrator Subnet Mask The default value is 255 255 255 0 Used to determine if the destination is part of the same subnet Default Router Th...
Page 28: ... a secure browser to connect to the HTTPS port of the camera The default port number is 443 Choose to enable or disable RTSP digest encryption Digest encryption uses MD5 hashes The port number that you use for RTSP streaming to mobile devices such as mobile phones or PDAs The default port number is 554 You may specify the address of a particular stream For instance live1 sdp can be accessed at rts...
Page 29: ...icast each of the available streams via a group address and specify the TTL value for each stream Enter the port and TTL settings you wish to use if you do not want to use the defaults Checking the Bonjour box will allow the camera to be discoverable on the network and visible to Apple devices Enter the name to identify this camera on Bonjour ...
Page 30: ...e your changes Enable DDNS Server Address Host Name User Name Password Timeout Status Check this box to enable the DDNS function Select your Dynamic DNS Server from the drop down menu Enter the host name of the DDNS server Enter the username or e mail address used to connect to the DDNS server Enter the password used to connect to the DDNS server You can set up how often the camera notifies the DD...
Page 31: ...izontally This will flip the image vertically When turning Flip on you may want to consider turning Mirror on as well Select the frequency used by your power lines to avoid camera flicker or moving bars in your video Generally if your power outlets are 220 to 240 V you should select 50 Hz If your power outlets are 100 to 120 V you should select 60 Hz Use the drop down box to change white balance s...
Page 32: ... but may blur objects that are in motion This setting controls the amount of noise reduction that will be applied to the picture Adjust this setting to compensate for backlit subjects Adjust this setting to alter the color intensity strength Thissettingcontrolstheamountofcoloration fromgrayscaletofullysaturated Specify a value from 0 to 8 to specify how much sharpening to apply to the image WDR ma...
Page 33: ...ing used 16 9 1920 x 1080 1280 x 720 800 x 448 640 x 360 4 3 2048 x 1536 1440 x 1080 1280 x 960 900 x 720 800 x 592 640 x 480 A higher frame rate provides smoother motion for videos and requires more bandwidth Lower frame rates will result in stuttering motion and requires less bandwidth This limits the maximum frame rate which can be combined with the Fixed quality option to optimize the bandwidt...
Page 34: ...itive motion detection will be from 0 to 100 A low sensitivity setting means that there must be large changes between two images in order to detect motion and a high sensitivity setting means that even small changes will cause motion to be detected Use your mouse to click and drag on the areas that you would like to monitor for motion To erase a motion detection area simply click on the red square...
Page 35: ...s Daylight Saving time you can enable it here Select Set date and time manually if you want to manually set the offset and the period of time that the Daylight Saving correction should be used NetworkTime Protocol NTP will synchronize your camera with an Internet timeserver Choosetheonethatisclosesttoyourcamera orselectGetNTP Server from DHCP to try and get the NTP server information automatically...
Page 36: ...ollowing Server This is a destination for media to be sent to such as an e mail address or FTP server Media This is the media that will be sent such as snapshots video clips or a system log You can then set up Events and Recordings Event This is the actual trigger event that the camera is monitoring for and the action that it will take Event triggers include motion detection loss of network connec...
Page 37: ...ver Name E mail FTP Network Storage Enter the name for the server If you want to use an e mail address for your server select this and enter the settings for your target e mail account If you want to use an FTP server for your server select this and enter the settings for your target FTP server If you want to use a network storage device for your server select this and enter its settings here You ...
Page 38: ...ent images are images taken before the main event snapshot is taken Set the number of post event images to take Post event images are images taken after the main event snapshot is taken You can set up to 7 post event images to be taken For example If both the Send pre event images and Send post event images are set to four a total of 9 images are generated after a trigger is activated There are th...
Page 39: ...ect this option to set the media type to video clips Set the video profile to use as the media source Refer to Video on page 33 for more information on video profiles This sets how many seconds to record before the main event video clip starts You can record up to 4 seconds of pre event video Set the maximum length of video to record for your video clips Set the maximum file size to record for you...
Page 40: ...detection events and digital input triggers Specify the input type that triggers the event Selecting this will trigger the event when motion is detected during live video monitoring Make sure you have enabled motion detection and specified what part of the image to monitor for motion For more details refer to Motion Detection on page 34 Selecting this will trigger the event in specified intervals ...
Page 41: ...t up a Server entry for a network storage drive first Please input a HDD volume between 1MB and 2TB for recording space The recording data will replace the oldest record when the total recording size exceeds this value For example if each recording file is 6MB and the total cyclical recording size is 600MB then the camera will record 100 files in the specified location folder and then will delete ...
Page 42: ...al Section 3 Configuration Time of each file for recording File Name Prefix If this is selected files will be separated based on the maximum length you specify The prefix name will be added to the file name of the recording file s ...
Page 43: ...ns are currently being detected by the camera for reference You can refresh this status by clicking the Refresh button Day mode enables the IR Cut Filter Night mode disables the IR Cut Filter Set up the Day Night mode using a schedule The camera will enter Day mode at the starting time and return to Night mode at the ending time The camera can enable or disable the IR infrared light according to y...
Page 44: ...nnection Create Certificate Method Status Note Enable the HTTPS service Choose the way the certificate should be created Three options are available Create a self signed certificate automatically Create a self signed certificate manually Create a certificate request and install Displays the status of the certificate The certificate cannot be removed while HTTPS is still enabled To remove the certi...
Page 45: ...fter adding the entry to the Allow list The starting IP address of the IP address range for the devices such as a computer that have permission to access the video of the camera The ending IP address of the IP address range for the devices such as a computer that have permission to access the video of the camera Click Add to save your changes Note A total of seven lists can be configured for both ...
Page 46: ... new user account fill out the User Name and Password for the new account then click Add Enter the user name for the new account Enter the password for the new account All the existing user accounts will be displayed here You select an account and click the Delete button to remove it You may want to reserve at least one as a guest account Create a unique name for your camera that will be added to ...
Page 47: ... your current camera configuration as a file on your computer Locate a pre saved configuration by clicking Browse and then restore the pre defined settings to your camera by clicking Load Configuration You may reset your camera and restore the factory settings by clicking Restore Factory Defaults This will restart your camera If you want your camera to reboot on a regular schedule check the Enable...
Page 48: ...load and save the latest firmware version from the D Link Support Page to your local hard drive Locate the file on your local hard drive by clicking the Browse button Select the file and click the Upload button to start upgrading the firmware Current Firmware Version Current Product Name File Path Upload Displays the detected firmware version Displays the camera model name Select a firmware file t...
Page 49: ...49 D Link DCS 4603 User Manual Section 3 Configuration Status Device Info This page displays detailed information about your device and network connection ...
Page 50: ... 4603 User Manual Section 3 Configuration This page displays the log information of your camera You may download the information by clicking Download You may also click Clear to delete the saved log information Logs ...
Page 51: ...51 D Link DCS 4603 User Manual Section 3 Configuration This page provides helpful information regarding camera operation Help ...
Page 52: ...n windows Configurable privacy mask zones Configurable shutter speed brightness saturation contrast sharpness WDR and 3D filter Video Compression Simultaneous H 264 MJPEG format compression H 264 MJPEG multicast streaming JPEG for still images Video Resolution 16 9 1920 x 1080 1280 x 720 800 x 448 640 x 360 up to 30 fps 4 3 2048 x 1536 up to 15 fps 1440 x 1080 1280 x 960 900 x 720 800 x 592 640 x ...
Page 53: ...browser D ViewCam System Requirements Operating System MicrosoftWindows 8 7 Vista Web Browser Internet Explorer 7 or higher Protocol StandardTCP IP D ViewCam Software Functions Remote management control of up to 32 cameras Viewing of up to 32 cameras on one screen Supports all management functions provided in web interface Scheduled motion triggered or manual recording options General Weight 385 g...
Page 54: ...54 D Link DCS 4603 User Manual Appendix A Technical Specifications Dimensions Diagram Optional Products Mounts DCS 37 1Wall type mount bracket DCS 37 2 Ceiling type mount bracket ...
Page 55: ...o radio communications Operation of this equipment in a residential area is likely to cause harmful interference in which case the user will be required to correct the interference at his own expense Non modification Statement Any changes or modifications not expressly approved by the party responsible for compliance could void the user s authority to operate the equipment Caution This device comp...
Page 56: ... Sicherheitsvorschriften dienen als Hilfe zur Gewährleistung Ihrer eigenen Sicherheit und zum Schutz Ihres Produkts Weitere Details finden Sie in den Benutzeranleitungen zum Produkt Statische Elektrizität kann elektronischen Komponenten schaden Um Schäden durch statische Aufladung zu vermeiden leiten Sie elektrostatische Ladungen von Ihrem Körper ab z B durch Berühren eines geerdeten blanken Metal...
Page 57: ...Débranchez toujours le produit de l alimentation avant de le nettoyer et utilisez uniquement un chiffon sec non pelucheux INSTRUCCIONES DE SEGURIDAD Las siguientes directrices de seguridad general se facilitan para ayudarle a garantizar su propia seguridad personal y para proteger el producto frente a posibles daños No olvide consultar las instrucciones del usuario del producto para obtener más in...
Page 58: ...gare sempre il prodotto dalla presa elettrica prima di pulirlo e usare solo un panno asciutto che non lasci filacce VEILIGHEIDSINFORMATIE De volgende algemene veiligheidsinformatie werd verstrekt om uw eigen persoonlijke veiligheid te waarborgen en uw product te beschermen tegen mogelijke schade Denk eraan om de gebruikersinstructies van het product te raadplegen voor meer informatie Statische ele...
Page 59: ...s Symbol auf dem Produkt oder der Verpackung weist darauf hin dass dieses Produkt gemäß bestehender örtlicher Gesetze undVorschriftennichtüberdennormalenHausmüllentsorgtwerdensollte sonderneinerWiederverwertungzuzuführenist Bringen Sie es bitte zu einer von Ihrer Kommunalbehörde entsprechend amtlich ausgewiesenen Sammelstelle sobald das Produkt das Ende seiner Nutzungsdauer erreicht hat Für die An...
Page 60: ... en savoir plus sur les produits et emballages respectueux de l environnement veuillez consulter le www dlinkgreen com ESPAÑOL ES Este símbolo en el producto o el embalaje significa que de acuerdo con la legislación y la normativa local este producto no se debe desechar en la basura doméstica sino que se debe reciclar Llévelo a un punto de recogida designado por las autoridades locales una vez que...
Page 61: ... energia e a ridurre le emissioni di anidride carbonica Per ulteriori informazioni sui prodotti e sugli imballaggi D Link a ridotto impatto ambientale visitate il sito all indirizzo www dlinkgreen com NEDERLANDS NL Ditsymboolophetproductofdeverpakkingbetekentdatditproductvolgensdeplaatselijkewetgevingnietmagwordenweggegooid met het huishoudelijk afval maar voor recyclage moeten worden ingeleverd Z...
Page 62: ...adku samych produktów jak i opakowań Firma D Link zaleca aby Państwo zawsze prawidłowo wyłączali z użytku swoje produkty D Link gdy nie są one wykorzystywane Postępując w ten sposób pozwalają Państwo oszczędzać energię i zmniejszać emisje CO2 Aby dowiedzieć się więcej na temat produktów i opakowań mających wpływ na środowisko prosimy zapoznać się ze stroną Internetową www dlinkgreen com ČESKY CZ T...
Page 63: ...arításában és a széndioxid kibocsátásának csökkentésében Környezetbarát termékeinkről és csomagolásainkról további információkat a www dlinkgreen com weboldalon tudhat meg NORSK NO Dette symbolet på produktet eller forpakningen betyr at dette produktet ifølge lokale lover og forskrifter ikke skal kastes sammen med husholdningsavfall men leveres inn til gjenvinning Vennligst ta det til et innsamlin...
Page 64: ...dledningerne Du kan finde flere oplysninger om vores miljømæssigt ansvarlige produkter og emballage på www dlinkgreen com SUOMI FI Tämä symboli tuotteen pakkauksessa tarkoittaa että paikallisten lakien ja säännösten mukaisesti tätä tuotetta ei pidä hävittää yleisen kotitalousjätteen seassa vaan se tulee toimittaa kierrätettäväksi Kun tuote on elinkaarensa päässä toimita se lähimpään viranomaistenh...
Page 65: ...d För mer information om våra miljöansvariga produkter och förpackningar www dlinkgreen com PORTUGUÊS PT Este símbolo no produto ou embalagem significa que de acordo com as leis e regulamentações locais este produto não deverá ser eliminado juntamente com o lixo doméstico mas enviado para a reciclagem Transporte o para um ponto de recolha designado pelas suas autoridades locais quando este tiver a...